API
Basic Usage of the API
Authentication
We recommend the usage of API Keys as authentication method against the API
API Keys
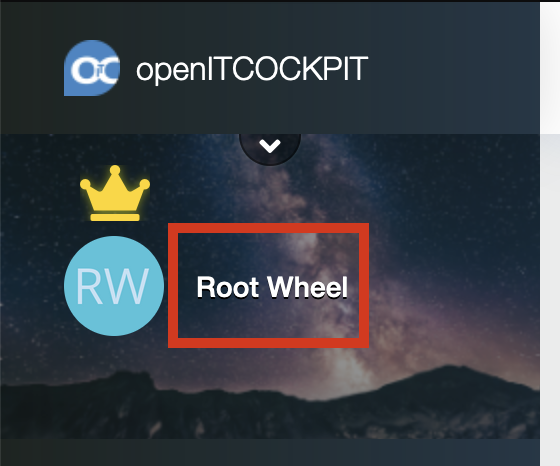
To create an API-Key you need to open the settings of your profile. In order to do so click on your name within openITCOCKPIT.
In the profile settings scroll down until you find the "API-Key" Section and click on "Create new API-Key"

You need to specify a description for the key. In the "API-Key (read only)" field you can see the generated key.
In order to facilitate authentication (e.g. with the mobile website) a QR code, containing the current API key is also generated. This can be scanned with a smartphone
If you need to regenerate or rotate the key you can use the button "Generate new key"
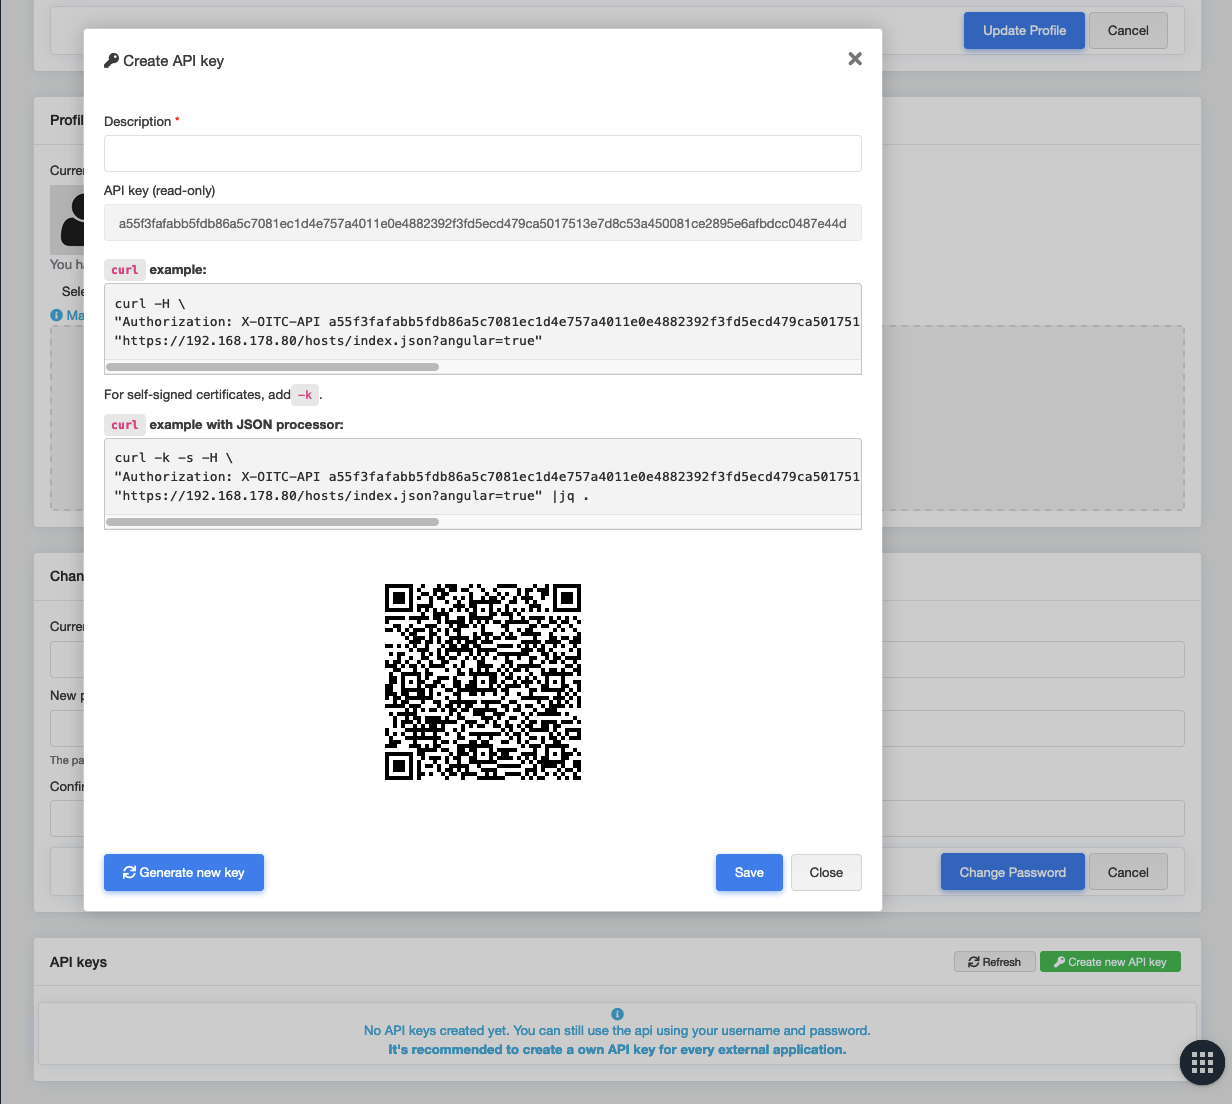
To finalize the creation click on "Save". Afterward, the API-Key is created.
The generated API-Keys can be viewed over the list "API Keys"
Examples
The following examples show how to send a HTTP POST request to the openITCOCKPIT API with different programming languages.
PHP
# Install Composer

curl -sS https://getcomposer.org/installer | php

# Install Guzzle
php composer.phar require guzzlehttp/guzzle:~6.0
<?php
require_once 'vendor/autoload.php';

$client = new GuzzleHttp\Client([
    'base_uri'        => 'https://demo.openitcockpit.io',
    'headers'         => [
        'Content-Type' => 'application/json',
        'Authorization' => 'X-OITC-API d2083e61fee067077ac239b7d89084f31c16a66f5e2908f6f74009492b600d3d90db2c5f6175ff199c31e1adbdcf6cf089ecadaf1c93c776bc19c7f41feb42b58f2637883b1a1273035f0ade592415f5'
    ],
    'verify'          => false,
    'cookies'         => true,
    'connect_timeout' => 5,
    'timeout'         => 10
]);
try {
    $response = $client->post("/hosts/add.json",
        [
            'body' => json_encode(
                [
                    'Host' =>
                    [
                        'name' => 'api host',
                        'address' => '127.0.0.1',
                        'container_id' => 1,
                        'hosttemplate_id' => 1,
                        'notification_interval' => NULL,
                        'check_interval' => NULL,
                        'Hostgroup' => [],
                        'retry_interval' => NULL,
                    ],
                ]
            )
        ]
    );
    $response_content = json_decode($response->getBody()->getContents(), true);
    if(isset($response_content['id'])){
        printf('Host was created successfully. Host ID is: %s%s', $response_content['id'], PHP_EOL);
    }
} catch (Exception $e) {
    echo 'Exception catched: ' . $e->getMessage() . PHP_EOL;
}
Python
#!/usr/bin/python3

import json
import traceback
import requests
import urllib3
import re
import sys
import time

oitc_url="https://demo.openitcockpit.io"
oitc_apikey="d2083e61fee067077ac239b7d89084f31c16a66f5e2908f6f74009492b600d3d90db2c5f6175ff199c31e1adbdcf6cf089ecadaf1c93c776bc19c7f41feb42b58f2637883b1a1273035f0ade592415f5"

class ApiExample():

    def run(self):
        self.oitc_url = oitc_url
        self.apikey = oitc_apikey

        result = self.send_post_request(
            url="/hosts/add.json",
            data={
                "Host": {
                    "name": 'api host',
                    "address": '127.0.0.1',
                    "container_id": 1,
                    "hosttemplate_id": 1,
                    "notification_interval": None,
                    "check_interval": None,
                    "Hostgroup": [],
                    "retry_interval": None,
                }
            }
        )

        if "id" in result:
            print("Host was created successfully. Host ID is: %s\n" % result['id'])
        else:
            print(result)


    def send_post_request(self, url, data, cookies=None):
            try:
                urllib3.disable_warnings()
            except:
                print(traceback.format_exc())

            url = self.oitc_url + url

            headers = {
                'Content-Type': 'application/json',
                'Authorization': 'X-OITC-API ' + self.apikey
            }

            try:
                response = requests.post(
                    url,
                    json=data,
                    headers=headers,
                    verify=False,
                    cookies=cookies
                )

                # response_body = response.content.decode('utf-8')
                # print(response_body)

                if response.status_code != 200:
                    print("Error while saving data :(")
                    print(response.content.decode('utf-8'))

                if response.content.decode('utf-8').strip() != '':
                    if cookies is None:
                        # Save the PHP Session cookie - (only important für Checkmk Module)
                        # Only store the cookies if we do not already have one stored (only store on the first request)
                        self.cookies = response.cookies
                    return json.loads(response.content.decode('utf-8'))

            except Exception as e:
                print(str(e))
                print(traceback.format_exc())


if __name__ == '__main__':
    ApiExample().run()
Scroll or Paginator mode
openITCOCKPIT offers two different methods of querying data as ordered lists.
Scroll mode (recommended)
We recommend scroll mode for all API requests on /index endpoints and for search queries.
In scroll mode, the response does not include an accurate count of how many objects were found in the database for the specified filters. This significantly reduces the response time of the API.
To determine if more records might be available, the API returns the hasNextPage field.
To enable scroll mode, append scroll=true to the URL.
{
  "scroll": {
    "page": 1,
    "limit": 50,
    "offset": 0,
    "hasPrevPage": false,
    "prevPage": 1,
    "nextPage": 2,
    "current": 1,
    "hasNextPage": false
  }
}
Paginator-Modus
By default, API requests are executed in pagination mode. The API response contains an exact count of how many objects were found in the database.
This request is slower to execute.
{
  "paging": {
    "page": 1,
    "current": 11,
    "count": 11,
    "prevPage": false,
    "nextPage": false,
    "pageCount": 1,
    "limit": 50,
    "options": [],
    "paramType": "named",
    "queryScope": null
  }
}
Generate API requests with the web browser
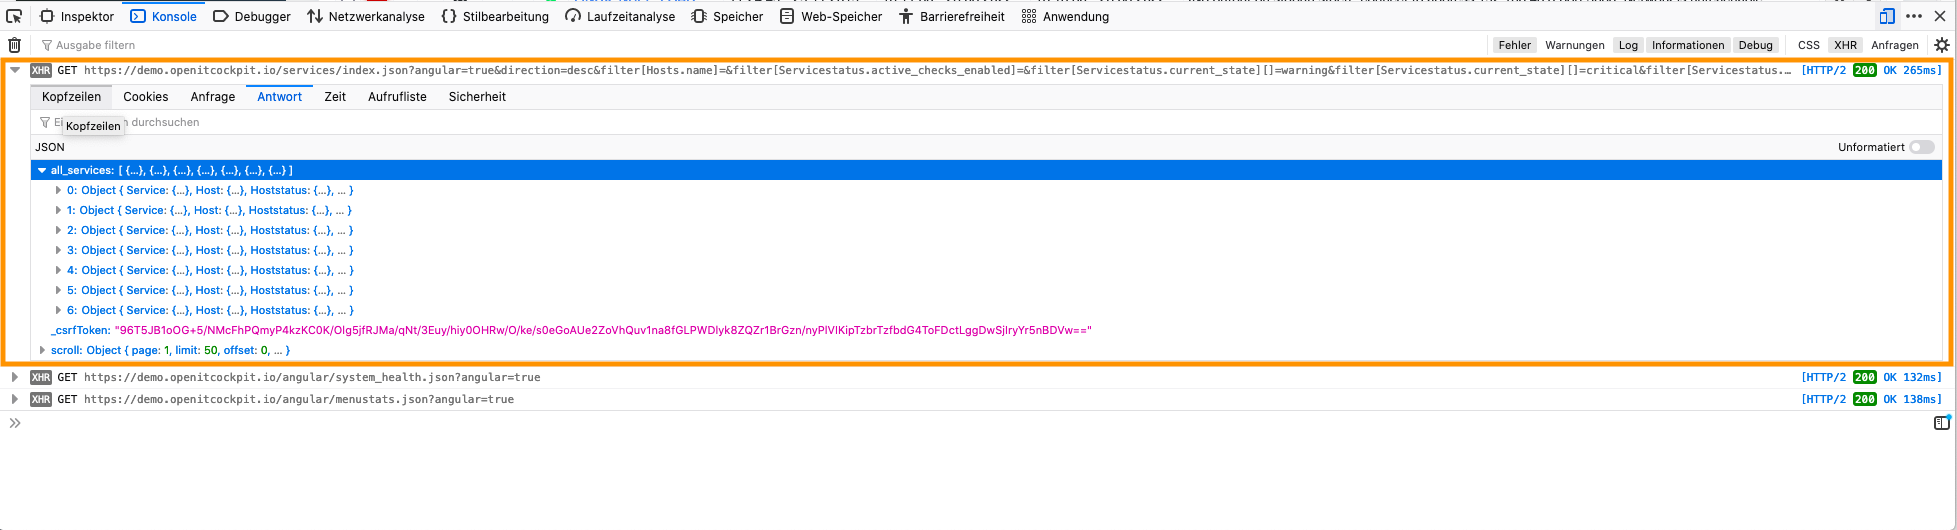
Due to the fact that the openITCOCKPIT interface communicates with the backend exclusively via the HTTP API, the browser can be used as a generator for API requests.
Mozilla Firefox
1. Open Browser Console
Press F12 (Windows/Linux) or Alt + Cmd + i (macOS) and select the tab Console.
Please make sure that XHR is enabled.

2. Apply filter
Open any subpage of openITCOCKPIT and create the desired filter. This method works with any subpage and every action that can be done via the web frontend.
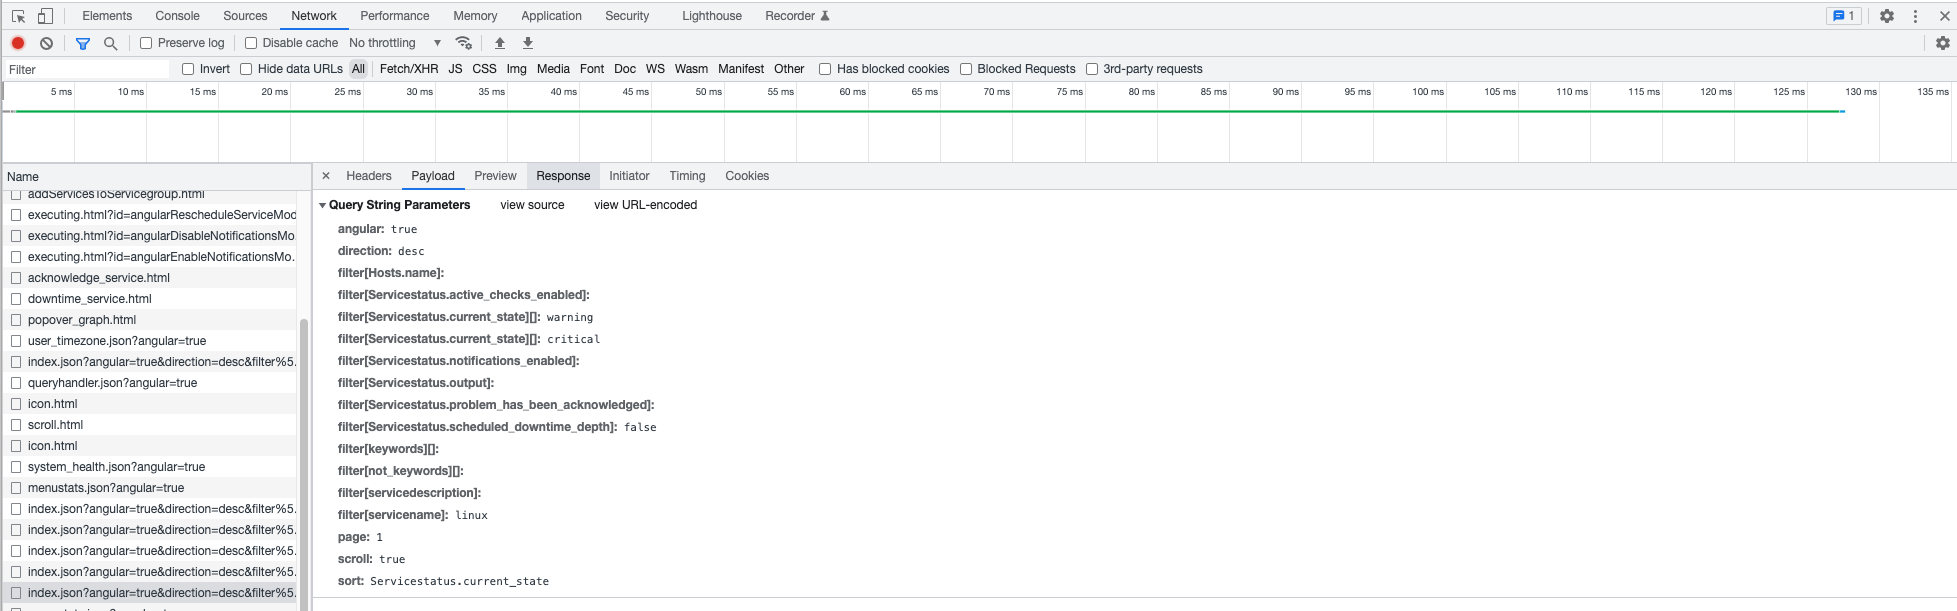
3. Inspect request
The request sent by the web frontend and the response sent by the openITCOCKPIT server can now be viewed in the browser. This makes it possible to use the frontend as a generator for API requests.
Google Chrome
1. Open Browser Console
Press F12 (Windows/Linux) or Alt + Cmd + i (macOS) and select the tab Console.
Please make sure that Log XMLHttpRequests is enabled.
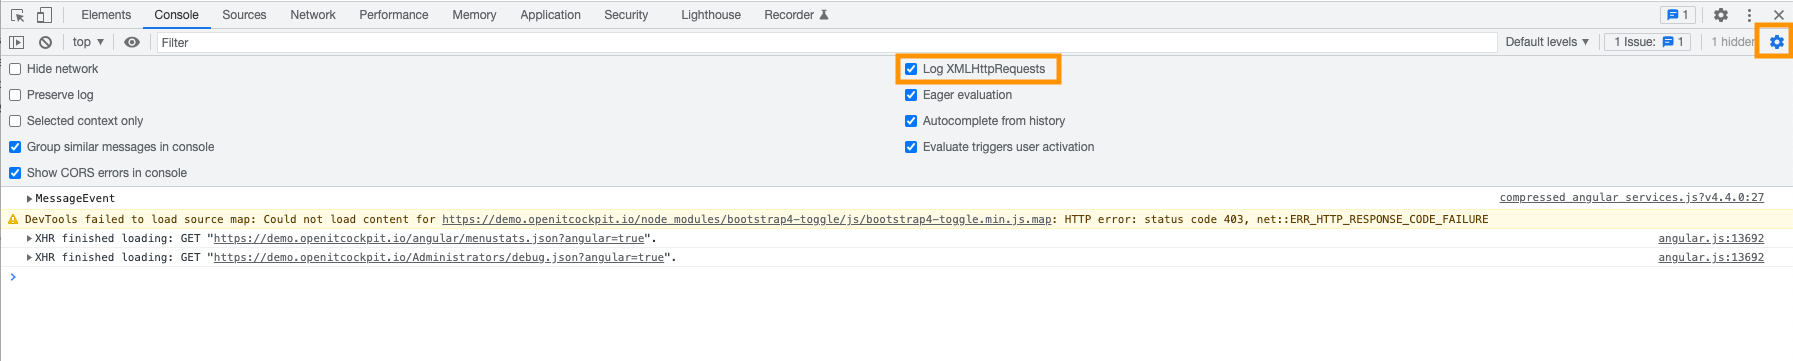
2. Apply filter
Open any subpage of openITCOCKPIT and create the desired filter. This method works with any subpage and every action that can be done via the web frontend.
3. Inspect request
The request sent by the web frontend and the response sent by the openITCOCKPIT server can now be viewed in the browser. This makes it possible to use the frontend as a generator for API requests.
API Documentation
You can find the API documentation here openITCOCKPIT API Documentation