Creating an openITCOCKPIT development environment
Creating a virtual machine
It is recommended you create a new virtual machine (e.g. with VirtualBox) that meets the following minimum requirements:
| OS | Hard disk | RAM | CPU cores |
|---|---|---|---|
| Ubuntu Noble 24.04 (64 Bit) | 20 GB | 8192 MB | 4 |
To be able to reach the machine via the network, select the Bridged Network option under the network settings for the virtual machine.
If you do not want to use a bridged network, we recommend setting up two network cards for the virtual machine. One network card should be in NAT mode to ensure access to the internet and the other in a host-only network to allow the VM to be accessed by your local computer.
For more information on networking with VirtualBox, click on the following link https://www.virtualbox.org/manual/ch06.html
If desired, you can also use "Ubuntu Desktop" to access a graphical user interface.
Preparing the operating system
First make sure that the latest updates are installed on your system.
sudo add-apt-repository universe
sudo apt-get update
sudo apt-get dist-upgrade
Installing the required packages for the development environment
sudo apt-get dist-upgrade vim git tmux screen mc htop curl wget ca-certificates sysstat nfs-kernel-server samba-common samba gnupg2 apt-transport-https npm
Enable "root" user
By default, the root user is disabled under Ubuntu.
Use sudo to change to the root user.
sudo su
Set a new password for the root user using the command passwd
passwd
Enable the root user to log in via SSH (optional)
Open the file /etc/ssh/sshd_config and change the following line:
PermitRootLogin yes
Enable the change:
systemctl restart ssh
You can now log onto the system as root via SSH.
Installing openITCOCKPIT
Since you are wanting to install an openITCOCKPIT development environment, we assume that you are familiar with the openITCOCKPIT setup process. For more information on the setup process, please click on the following link: https://openitcockpit.io/download_server/
curl https://packages5.openitcockpit.io/repokey.txt | sudo apt-key add -

echo "deb https://packages5.openitcockpit.io/openitcockpit/$(lsb_release -sc)/stable $(lsb_release -sc) main" | sudo tee /etc/apt/sources.list.d/openitcockpit.list
sudo apt-get update

sudo apt-get install openitcockpit
Set up openITCOCKPIT
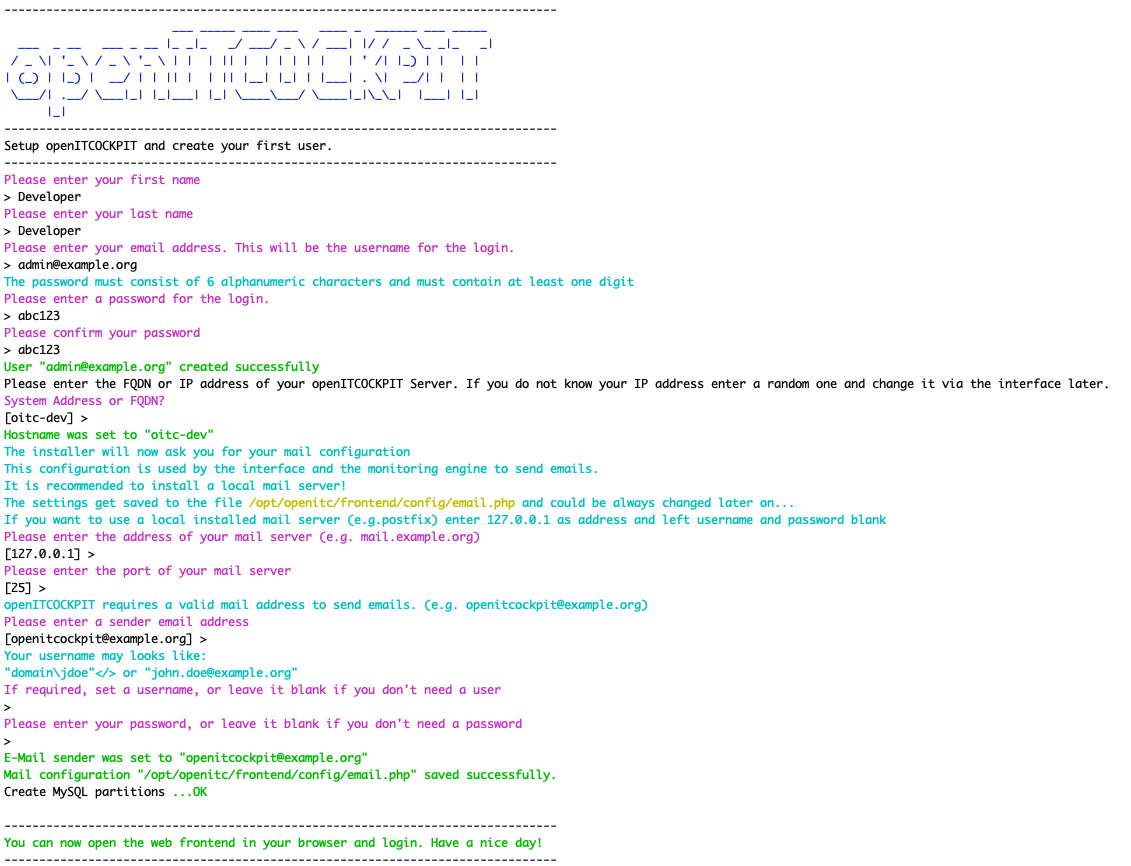
Run the openITCOCKPIT Setup Wizard to create a user for the web interface. An actual email address is not required.
sudo /opt/openitc/frontend/SETUP.sh
Setup phpMyAdmin (optional)
phpMyAdmin is a web-based MySQL database management tool. After installation, it can be accessed via https://xxx.xxx.xxx.xxx/phpmyadmin erreichbar. The MySQL access data can be found in the file /opt/openitc/etc/mysql/mysql.cnf.
Skip phpMyAdmin Webserver setup
During installation, select neither of the two options for the web server. The installation will then be completed without any further configuration. Otherwise the setup adds configuration to present webservers, which may interfere with our own configuration.
sudo apt-get install phpmyadmin
mysql.cnf Example:
dziegler@oitc-dev:~$ sudo cat /opt/openitc/etc/mysql/mysql.cnf
; Automatically generated for openITCOCKPIT scripts. DO NOT TOUCH!
[client]
database = openitcockpit
host = localhost
user = openitcockpit
password = zw8upknsKte2pGvn
port = 3306
dziegler@oitc-dev:~$
Installing PHP Composer
Composer is a package manager for PHP libraries and a prerequisite for an openITCOCKPIT development environment.
curl -o composer-setup.php https://getcomposer.org/installer
php composer-setup.php
sudo cp composer.phar /usr/local/bin/composer
Cloning the GitHub source code
openITCOCKPIT uses git as a version control system. The repositories are publicly hosted on GitHub:
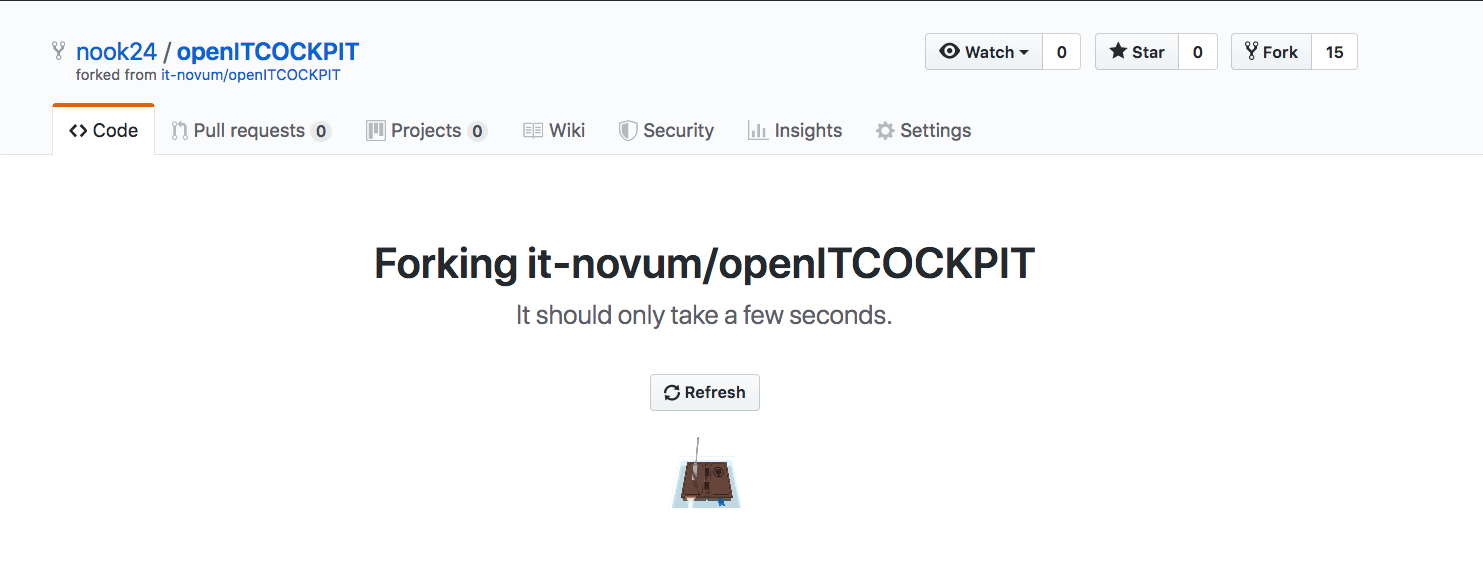
Forking the openITCOCKPIT repositories
Although not strictly necessary, it is strongly recommended that you create personal forks of both the front-end and back-end repositories. This will allow you to create pull requests and submit your changes to the openITCOCKPIT project.
However, if you want to contribute to the openITCOCKPIT project, this is a prerequisite. If you only intend to look at the source code or you don't have a GitHub account, you can simply clone the official openITCOCKPIT repository.
Delete files delivered by apt
Delete the files that were installed by apt by removing both folders.
sudo su
rm -rf /opt/openitc/frontend
rm -rf /opt/openitc/frontend-angular
Cloning your forked repositories (recommended)
Clone the repositories into the same directories, you've just deleted. Replace %YOUR_ACCOUNT_NAME% with your GitHub username.
cd /opt/openitc/
git clone -b development https://github.com/%YOUR_ACCOUNT_NAME%/openITCOCKPIT frontend
git clone -b development https://github.com/%YOUR_ACCOUNT_NAME%/openITCOCKPIT-frontend-angular frontend-angular
Cloning the official openITCOCKPIT Back-End repository
(only recommended if you do NOT have a GitHub account)
cd /opt/openitc/
git clone -b development https://github.com/openITCOCKPIT/openITCOCKPIT frontend
git clone -b development https://github.com/openITCOCKPIT/openITCOCKPIT-frontend-angular frontend-angular
Installing dependencies
Make sure that you execute all commands as the root user (sudo su).
Installing the PHP dependencies
cd /opt/openitc/frontend

composer install

rm -f /opt/openitc/frontend/config/app_local.php
Installing the JavaScript and TypeScript dependencies
cd /opt/openitc/frontend-angular

npm install

npm install -g @angular/cli
Updating the database and repairing the file permissions
openitcockpit-update --cc --rights
Installing Node.js
apt-get install -y ca-certificates curl gnupg
mkdir -p /etc/apt/keyrings
curl -fsSL https://deb.nodesource.com/gpgkey/nodesource-repo.gpg.key | gpg --dearmor -o /etc/apt/keyrings/nodesource.gpg
echo "deb [signed-by=/etc/apt/keyrings/nodesource.gpg] https://deb.nodesource.com/node_22.x nodistro main" | tee /etc/apt/sources.list.d/nodesource.list

apt-get update
apt-get install nodejs -y
Activating openITCOCKPIT development mode (permanent)
As a developer, you will want to enable the development features of openITCOCKPIT. This will enable, for example, the output of error messages in the browser, the activation of global PHP methods such as dd($var) and debug($var) as well as the loading of uncompressed CSS and JavaScript.
Make sure that you execute all commands as the root user (sudo su).
Danger
Be aware that activating the debug mode can lead to data leaks and the loss of sensitive information.
echo "OITC_DEBUG=1" >> /etc/environment
export OITC_DEBUG=1

sed -i 's/OITC_DEBUG 0/OITC_DEBUG 1/g' /etc/nginx/openitc/master.conf
Also, in /etc/nginx/openitc/master.conf comment out the entire block for the angular front-end reverse proxy, and un-comment the development block:
# Proxy for the Angular Frontend (production)
#location ^~ /a/ {
#    alias /opt/openitc/frontend-angular/browser/;
#    index index.html;
#    try_files $uri $uri/ /a/index.html;
#}

# Proxy for the Angular Frontend (development)
location ^~ /a/ {
    proxy_pass http://localhost:4200/a/;
    # Try to replace localhost with 127.0.0.1 if you have any issues

    proxy_http_version 1.1;
    proxy_set_header Upgrade $http_upgrade;
    proxy_set_header Connection "Upgrade";

    proxy_set_header    Host                $host;
    proxy_set_header    X-Real-IP           $remote_addr;
    proxy_set_header    X-Forwarded-Host    $host;
    proxy_set_header    X-Forwarded-Server  $host;
    proxy_set_header    X-Forwarded-Proto   $scheme;
    proxy_set_header    X-Forwarded-For     $remote_addr;
    proxy_redirect off;
    proxy_connect_timeout 90s;
    proxy_read_timeout 90s;
    proxy_send_timeout 90s;
}
Restart nginx web server
systemctl restart nginx
Start hacking
Serving your very own angular front-end
To serve the angular application correctly, you'll need to "serve" the application. Do this by running the following command in /opt/openitc/frontend-angular/
cd /opt/openitc/frontend-angular/
npm start
Accessing files via a remote system (IDE) (optional)
Your development environment (e.g. PHPStorm, Visual Studio Code, etc.) will usually not run on the same system as openITCOCKPIT.
There are three common ways to gain access to the source code via your IDE: NFS, SMB and SSH
NFS (Linux and macOS clients)
Open the file /etc/exports on your openITCOCKPIT server and create a new entry as follows: (You can enable access for a single IP address or for an entire subnet. Make sure you set the correct IP address for your network).
/opt/openitc/frontend/ 192.168.56.0/24(rw,async,no_subtree_check,insecure,all_squash,anonuid=33,anongid=33)
sudo exportfs -a
Mounting an NFS share on a Linux client
sudo apt-get install nfs-common

mkdir ~/openitcockpit-frontend
mount -t nfs -o rw,soft,intr,tcp,rsize=262144,wsize=262144,noatime,actimeo=3 xxx.xxx.xxx.xxx:/opt/openitc/frontend ~/openitcockpit-frontend
Make sure you replace xxx.xxx.xxx.xxx with the IP address of your openITCOCKPIT server.
You can now open the folder ~/openitcockpit-frontend with your IDE.
Unmounting an NFS share (Linux client)
If you no longer need the share on your system, you can remove it with the following command:
umount ~/openitcockpit-frontend
Mounting an NFS share on a macOS client
mkdir ~/openitcockpit-frontend
sudo mount -t nfs -o rw,resvport,nolocks,locallocks,intr,soft,nfc,tcp,rsize=65536,wsize=65536 xxx.xxx.xxx.xxx:/opt/openitc/frontend ~/openitcockpit-frontend
xxx.xxx.xxx.xxx with the IP address of your openITCOCKPIT server.
You can now open the folder ~/openitcockpit-frontend with your IDE.
Unmounting an NFS share (macOS client)
If you no longer need the share on your system, you can remove it with the following command:
sudo umount ~/openitcockpit-frontend
SMB (Windows, Linux und macOS clients)
You will first need to set up the SMB daemon on your openITCOCKPIT server.
sudo cp /etc/samba/smb.conf /etc/samba/smb.conf.backup
Replace your current smb configuration, which can be found under /etc/samba/smb.conf, with the following:
[global]
    # Identity & Logging
    workgroup = WORKGROUP
    server string = %h server (Samba, Ubuntu)
    log file = /var/log/samba/log.%m
    max log size = 1000
    logging = file
    panic action = /usr/share/samba/panic-action %d

    # Protocol Standards (Security & Speed)
    server role = standalone server
    server min protocol = SMB2_10
    server max protocol = SMB3
    security = user
    guest only = yes
    map to guest = bad user
    guest account = nobody
    usershare allow guests = yes

    # PERFORMANCE-TWEAKS (Windows & Linux-Clients)
    socket options = TCP_NODELAY IPTOS_LOWDELAY
    aio read size = 16384
    aio write size = 16384
    read raw = yes
    write raw = yes
    max xmit = 65535
    getwd cache = yes
    nt acl support = no

    # MACOS-OPTIMIZATION
    # fruit:metadata = stream stores metadata in .DS_Store-like streams instead of separate files
    vfs objects = fruit streams_xattr
    fruit:metadata = stream
    fruit:model = MacSamba
    fruit:posix_rename = yes
    fruit:veto_appledouble = no
    fruit:wipe_intentionally_left_blank_rfork = yes
    fruit:delete_empty_adfiles = yes

    # FILE HYGIENE
    # Prevents macOS & Windows temp files from cluttering the Linux system
    veto files = /._*/.DS_Store/Thumbs.db/desktop.ini/
    delete veto files = yes

    # PASSWORD SYNCHRONIZATION
    obey pam restrictions = yes
    unix password sync = yes
    passwd program = /usr/bin/passwd %u
    passwd chat = *Enter\snew\s*\spassword:* %n\n *Retype\snew\s*\spassword:* %n\n *password\supdated\ssuccessfully* .
    pam password change = yes

#======================= Share Definitions =======================
[frontend]
    comment = openITCOCKPIT Share for IDEs like PhpStorm
    path = /opt/openitc/frontend
    available = yes
    browseable = yes
    guest ok = no
    writeable = yes
    create mask = 0664
    force create mode = 0664
    directory mask = 0775
    force directory mode = 0775
    force user = www-data
    valid users = www-data
Set a password for the user www-data to gain access to the files via samba.
smbpasswd -a www-data
Enable the changes:
sudo systemctl restart smbd
Mounting an SMB share on a Windows client
- Open Windows Explorer and click on "Connect network drive".
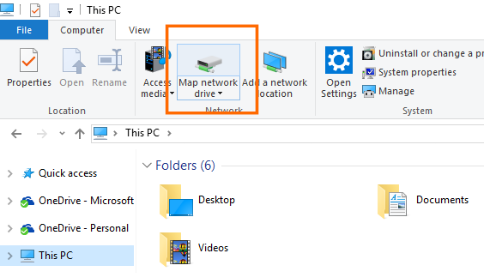
- Add your SMB share as a network drive. Make sure you have selected the option "Establish login using other credentials".
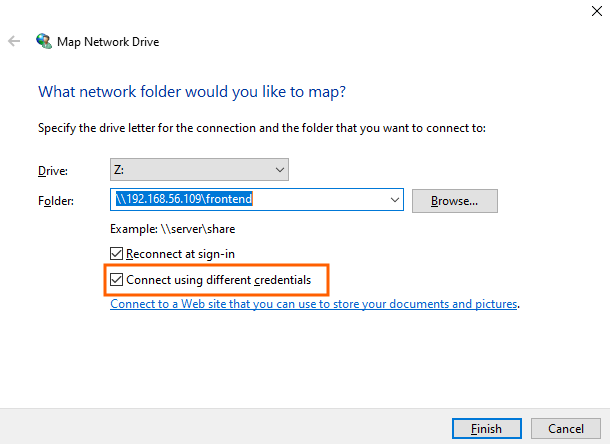
- Use the
www-datauser and password you just set.
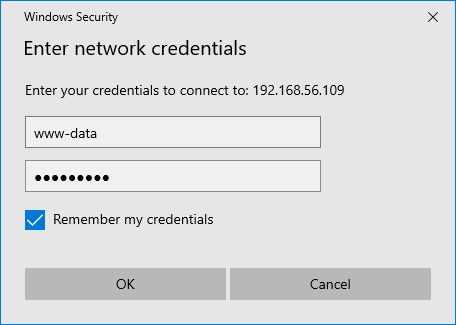
- You can now browse the files.
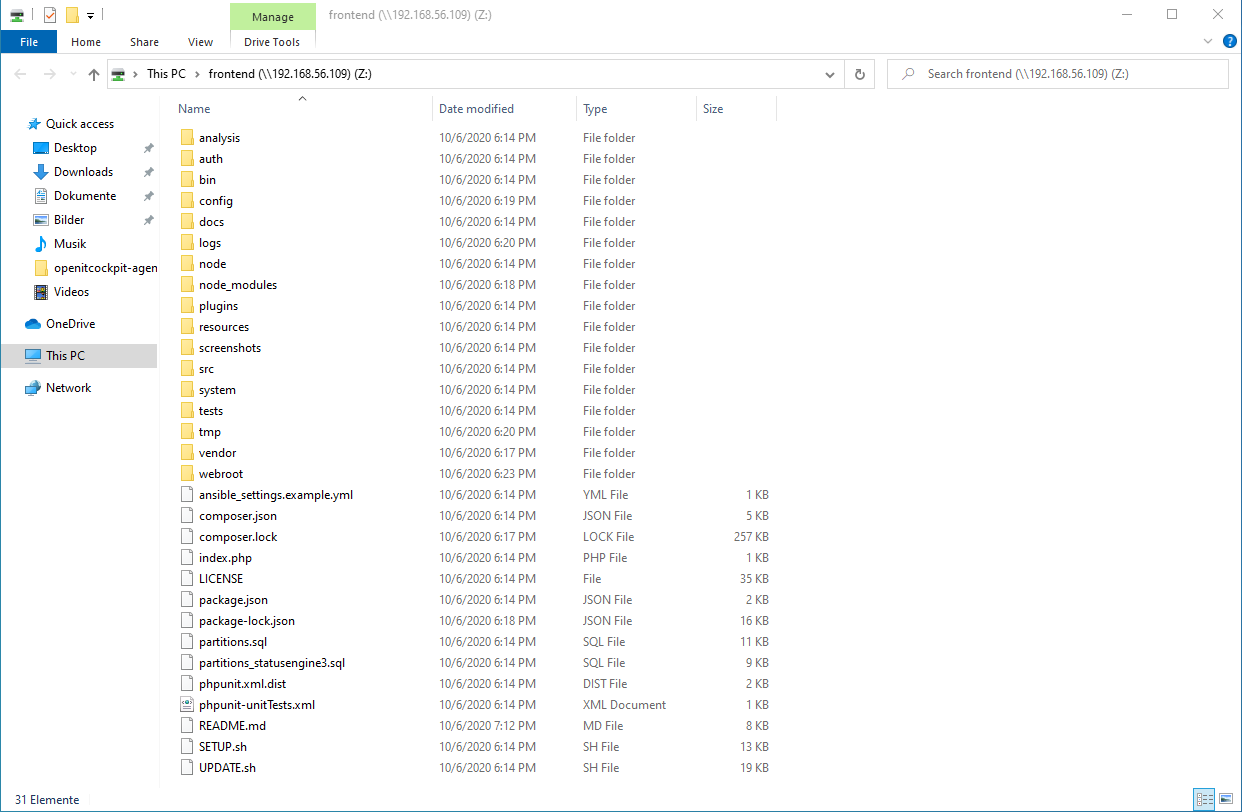
Open Z:\ with your IDE.
Help: https://support.microsoft.com/en-us/help/4026635/windows-10-map-a-network-drive
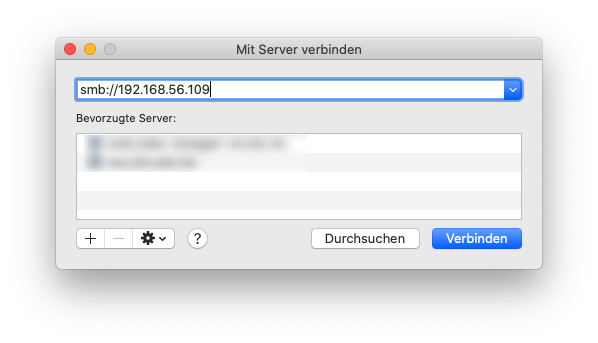
Mounting an SMB share on a macOS client
- Open "Finder" and press
CMD+k.
- Use the
www-datauser and password you just set.
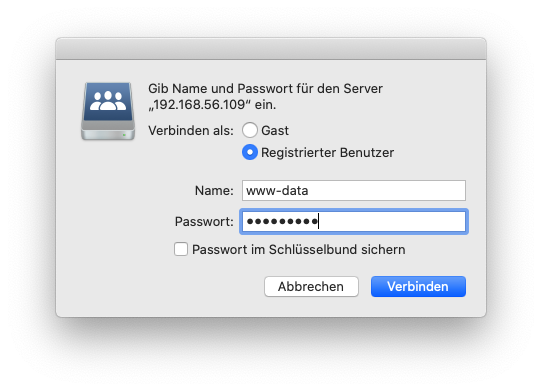
-
- You can now browse the files.
Open /Volumes/frontend with your IDE.
SSH (platform-independent - depends on the IDE)
Many IDEs support access to remote files via FTP, SFTP or SSH. The setup process will depend on your IDE. Please search the web for the appropriate SSH setup for your IDE.
Setup for PHPStorm: https://www.jetbrains.com/help/phpstorm/create-new-project-add-remote-server.html
Setup for Visual Studio Code: https://code.visualstudio.com/docs/remote/ssh