Hello World
Hello World - Backend
The structure of your new module should look like the following example:
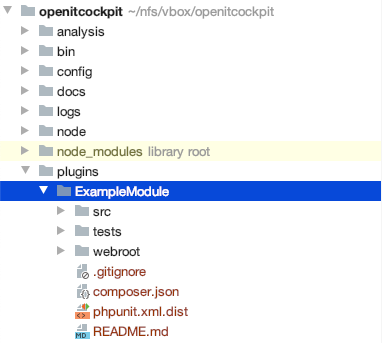
A good starting point would be to create your first page with the traditional output "Hello, World".
Creating a new controller
CakePHP controllers contain all the business logic and provide the API endpoints for the frontend.
In this example we will create the "TestController".
Create the file /opt/openitc/frontend/plugins/ExampleModule/src/Controller/TestController.php mit folgendem Inhalt:
<?php
declare(strict_types=1);

namespace ExampleModule\Controller;


class TestController extends AppController {
}
Creating a new action
Actions contain the logic for your API endpoint.
We will now create an action with the name index to output the message Hello World.
<?php
declare(strict_types=1);

namespace ExampleModule\Controller;


class TestController extends AppController {

    public function index() {

        // This get executed for API requests
        //  The requested URL was: /example_module/test/index.json

        // Pass the variable "message" with the content "Hello World" to the view
        $this->set('message', 'Hello World');

        // Add the variable "message" to .json output
        $this->viewBuilder()->setOption('serialize', ['message']);
    }

}
Creating the JSON view
The JSON view is automatically generated by the CakePHP framework.
You can read more about this topic in the CakePHP documentation.
Assigning permissions for the "Administrator" user role
By default, all access to the API actions is denied. You can have openITCOCKPIT assign all permissions to the " Administrator" user by executing the following command:
openitcockpit-update --no-system-files
If your current user is not part of the "Administrator" group, you must navigate
to Verwaltung -> Benutzerverwaltung -> Verwalte Benutzerrollen and assign the permissions manually.
Querying actions
You should now be able to request the .html and .json actions.
Navigate in your web browser to /example_module/test/index.html to get the HTML action.
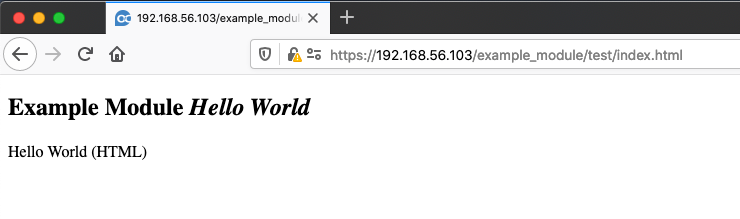
It is normal that no CSS or Javascript is loaded at this point.
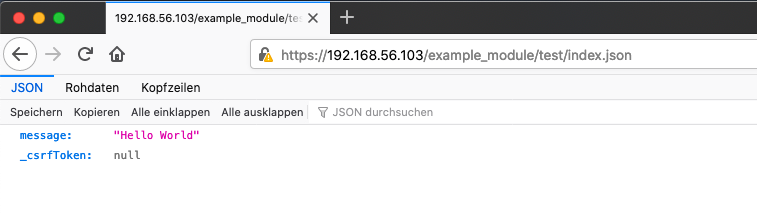
By going to /example_module/test/index.json you will get the JSON representation of the action.
Hello World - Frontend
New menu item
By default, the openITCOCKPIT menu is divided into four categories (MenuHeadline): Overview, Monitoring, Administration and System Configuration.
You can either create links in these categories or create your own categories.
All menu entries for your module are defined in the file /opt/openitc/frontend/plugins/ExampleModule/src/Lib/Menu.php
definiert.
Menu entry for the existing heading
PHP Code
<?php

namespace ExampleModule\Lib;


use itnovum\openITCOCKPIT\Core\Menu\MenuCategory;
use itnovum\openITCOCKPIT\Core\Menu\MenuHeadline;
use itnovum\openITCOCKPIT\Core\Menu\MenuInterface;
use itnovum\openITCOCKPIT\Core\Menu\MenuLink;

class Menu implements MenuInterface {

    /**
     * @return array
     */
    public function getHeadlines() {
        $Overview = new MenuHeadline(\itnovum\openITCOCKPIT\Core\Menu\Menu::MENU_OVERVIEW);
        $Overview
            //Create a new Sub-Category of the Overview Headline
            ->addCategory((new MenuCategory(
                'ExampleModule',
                __('Example Module'),
                1000,
                ['fas', 'burn']
            ))
                //Add new Link to Sub-Category
                ->addLink(new MenuLink(
                    __('Hello world'),
                    'TestIndex', // Name of the NG-State, historically needed but may be deprecated in the future
                    'Test', // Name of the PHP Controller
                    'index', // Name of the PHP action
                    'ExampleModule', //Name of the Module
                    ['fas', 'code'], //Menu Icon
                    [],
                    1,
                    true,
                    'example_module/index' //URL to the action
                ))
            );

        return [$Overview];
    }

}
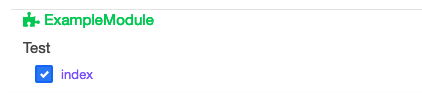
Result
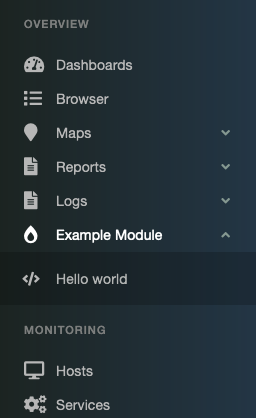
Now execute the following command to update the display for the views that have been edited.
openitcockpit-update --no-system-files
Menu items under a new heading
If needed, you can also create your own headings.
PHP Code
<?php

namespace ExampleModule\Lib;


use itnovum\openITCOCKPIT\Core\Menu\MenuCategory;
use itnovum\openITCOCKPIT\Core\Menu\MenuHeadline;
use itnovum\openITCOCKPIT\Core\Menu\MenuInterface;
use itnovum\openITCOCKPIT\Core\Menu\MenuLink;

class Menu implements MenuInterface {

    /**
     * @return array
     */
    public function getHeadlines() {
        $ExampleModuleHeadline = new MenuHeadline(
            'ExampleModuleHeadline',
            __('Example Module')
        );
        $ExampleModuleHeadline
            //Create a new Sub-Category of the Overview Headline
            ->addCategory((new MenuCategory(
                'ExampleModule',
                __('Example Module'),
                1000,
                'fas burn'
            ))
                //Add new Link to Sub-Category
                ->addLink(new MenuLink(
                    __('Hello world'),
                    'TestIndex', // Name of the NG-State, historically needed but may be deprecated in the future
                    'Test', //Name of the PHP Controller
                    'index', //Name of the PHP action
                    'ExampleModule', //Name of the Module
                    ['fas', 'code'], //Menu Icon
                    [],
                    1,
                    true,
                    'example_module/index' //URL to the action
                ))
            );

        return [$ExampleModuleHeadline];
    }

}
Result
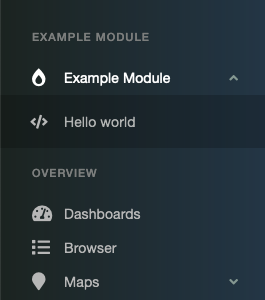
Now execute the following command to update the display for the views that have been edited.
openitcockpit-update --no-system-files
Creating Front-End
First, you will want to browse to the front-end repository of openITCOCKPIT.
cd /opt/openitc/frontend-angular/
Before beginning, also create your own branch here, since your are now in a different GIT repository.
git checkout -b example_module
Also, you will create your module's main directory tree there:
mkdir src/app/modules/example_module
mkdir src/app/modules/example_module/pages      # A place for pages (views)
mkdir src/app/modules/example_module/components # A place for your custom components
In pages, we use the same folder structure like in the URI, so four our example_module/test/index page, we need at least the controller's level of the directory:
mkdir src/app/modules/example_module/pages/test
Creating the Page
In the "controller level" directory of your module, execute the following command to generate a new page:
cd src/app/modules/example_module/pages/test
ng generate component TestIndex
Result:
CREATE src/app/modules/example_module/pages/test/test-index/test-index.component.css (0 bytes)
CREATE src/app/modules/example_module/pages/test/test-index/test-index.component.html (25 bytes)
CREATE src/app/modules/example_module/pages/test/test-index/test-index.component.spec.ts (614 bytes)
CREATE src/app/modules/example_module/pages/test/test-index/test-index.component.ts (306 bytes)
Before changing your page, reset the file permissions here again:
oitc rights
Creating the Routes
In your module's main directory, create a new file called example_module.route[AppController.php](../../../../../openITCOCKPIT-ExampleModule-Frontend-Angular/frontend/plugins/ExampleModule/src/Controller/AppController.php)s.ts with the following content:
import { Routes } from '@angular/router';

export const exampleModuleRoutes: Routes = [
    {
        path: 'example_module/test/index',
        loadComponent: () => import('./pages/test/test-index/test-index.component').then(m => m.TestIndexComponent)
    }
];
Registering the Routes
In the file src/app/app.routes.ts, add the following line to the import section:
import { exampleModuleRoutes } from './modules/example_module/example_module.routes';
Then, add the following line to the routes array:
/***    Routes for modules   ***/
const moduleRoutes: Routes = [
    ...snmpTrapModuleRoutes,
    // ...
    ...servicenowModuleRoutes,
    ...exampleModuleRoutes // Add this line
];
Serve the angular application
If not already done, run the ng serve... command to serve the angular application
cd /opt/openitc/frontend-angular/
npm start
If already running, the angular server will automatically detect your changes and rebuild the page.
Don't panic if this takes a while, at least if you had added the first change during the ng servers runtime. The next ones will be faster.
NOTE: Raw file sizes do not reflect development server per-request transformations.
  ➜  Local:   http://localhost:4200/a
  ➜  Network: http://192.168.93.131:4200/a
  ➜  Network: http://172.17.0.1:4200/a
  ➜  Network: http://172.18.0.1:4200/a
  ➜  press h + enter to show help
⠸ Changes detected. Rebuilding...
After the rebuild has finished, you can open your browser and navigate to the following URL: https://master-release/a/example_module/test/index