Distributed Monitoring and Satellite EE
The Distribute module makes it possible to use distributed monitoring with satellite systems. These can then monitor remote locations as a self-sufficient unit. This makes it easier to maintain firewall rules, because only one connection between the openITCOCKPIT Monitoring Server and the satellites is required and not to the systems to be monitored. Distributed monitoring can also be used for load balancing if required.
The satellite systems and the hosts designated for monitoring are centrally managed by the openITCOCKPIT server.
If the connection between the satellites and the openITCOCKPIT server is interrupted, the satellites save the check results. As soon as the connection is restored, the openITCOCKPIT server processes the data that has been saved to ensure a consistent history is preserved.
openITCOCKPIT offers a special and optional web interface for satellite systems. Using this interface administrators and users at remote locations always have the ability to view there local IT systems even if the connection to the central openITCOCKPIT server has been interrupted.
The satellite systems are installed using special packages and monitor their individual systems independently. Depending on the synchronisation settings, the results are then sent to or fetched from the master system (openITCOCKPIT).
Prerequisites
An Enterprise licence is required to use the Distribute module.
Creating satellites in openITCOCKPIT
To create a satellite in openITCOCKPIT, go to the main menu, satellite overview, System Satellites and then click on the "New" button.
You must then select a container, give the satellite a name and enter the IP address or host name in the "IP address" field.
Satellites can be operated using three different synchronisation methods.
NSTA
The nsta service is responsible for communications between the master and satellite systems. The connection status can be viewed under System Satellite Status.

The NSTA log file can be viewed using the journalctl --follow -u nsta command.
Synchronisation methods
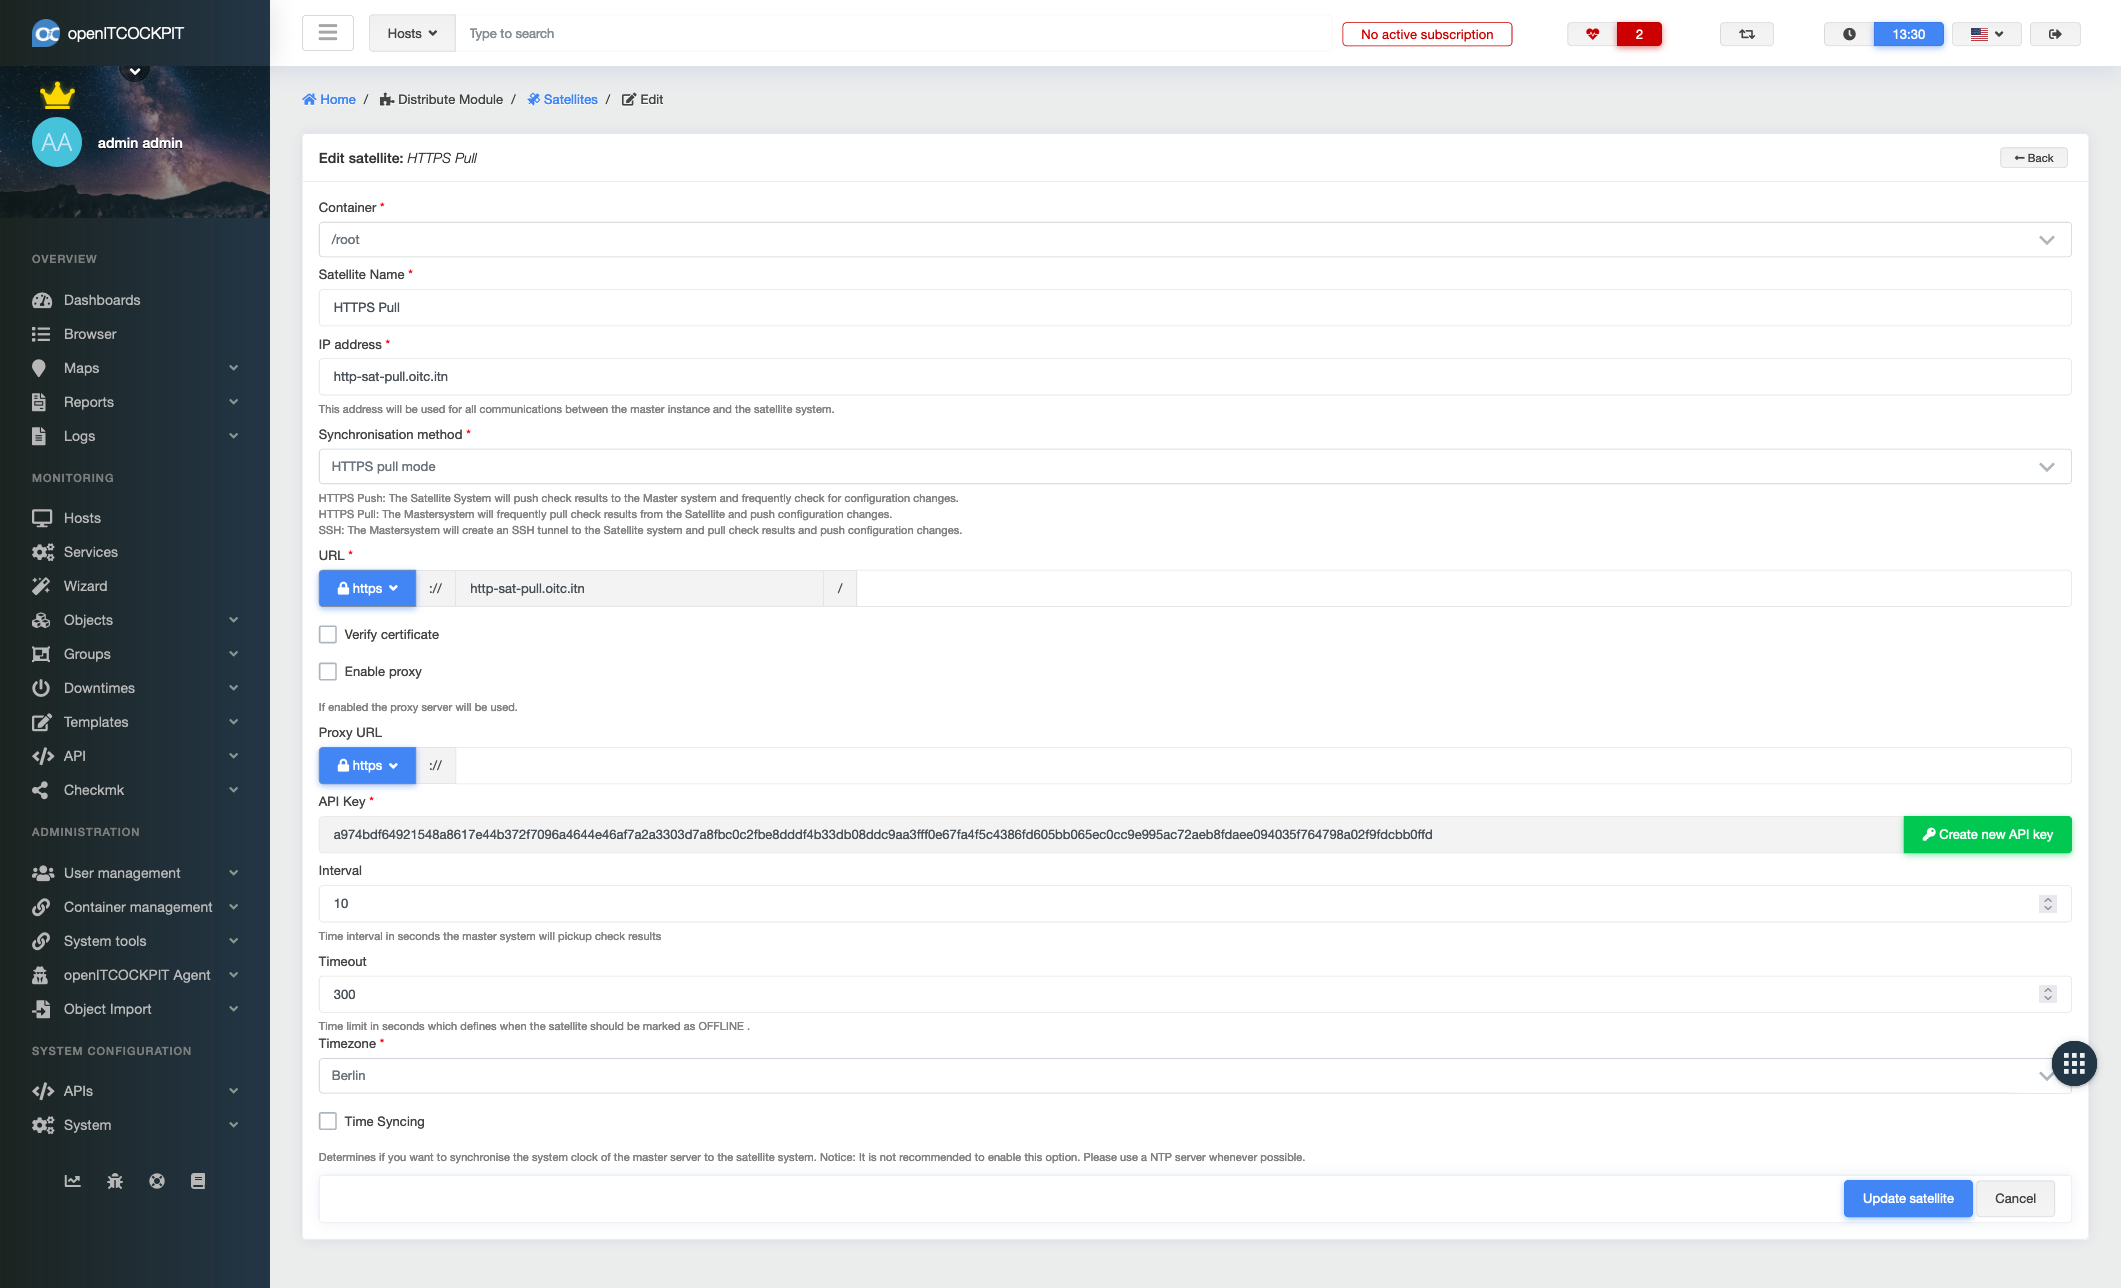
HTTPS-Pull
The master system periodically retrieves test results from the satellite and pushes changes in the configuration.
The openITCOCKPIT server establishes a connection to the satellite for the outgoing communication path.
The IP address of the satellite and the other parameters of the HTTPS call must be specified here. You can also select whether the SSL certificate is checked and whether an HTTP proxy should be used. The displayed API key is used by the master system to authenticate itself on the satellite system.
On the satellite system, communication is managed by the NSTA service. This requires that the configuration of /opt/openitc/etc/nsta/nsta.ini must be edited as follows:
[nsta]
satellite-id=ADD_YOUR_SATELLITE_ID_HERE
api-key=ADD_YOUR_API_KEY_HERE
mode=https_pull
You will need to restart the NSTA service for the changes to take effect.
systemctl restart nsta
Communications are then managed via an encrypted HTTPS connection.
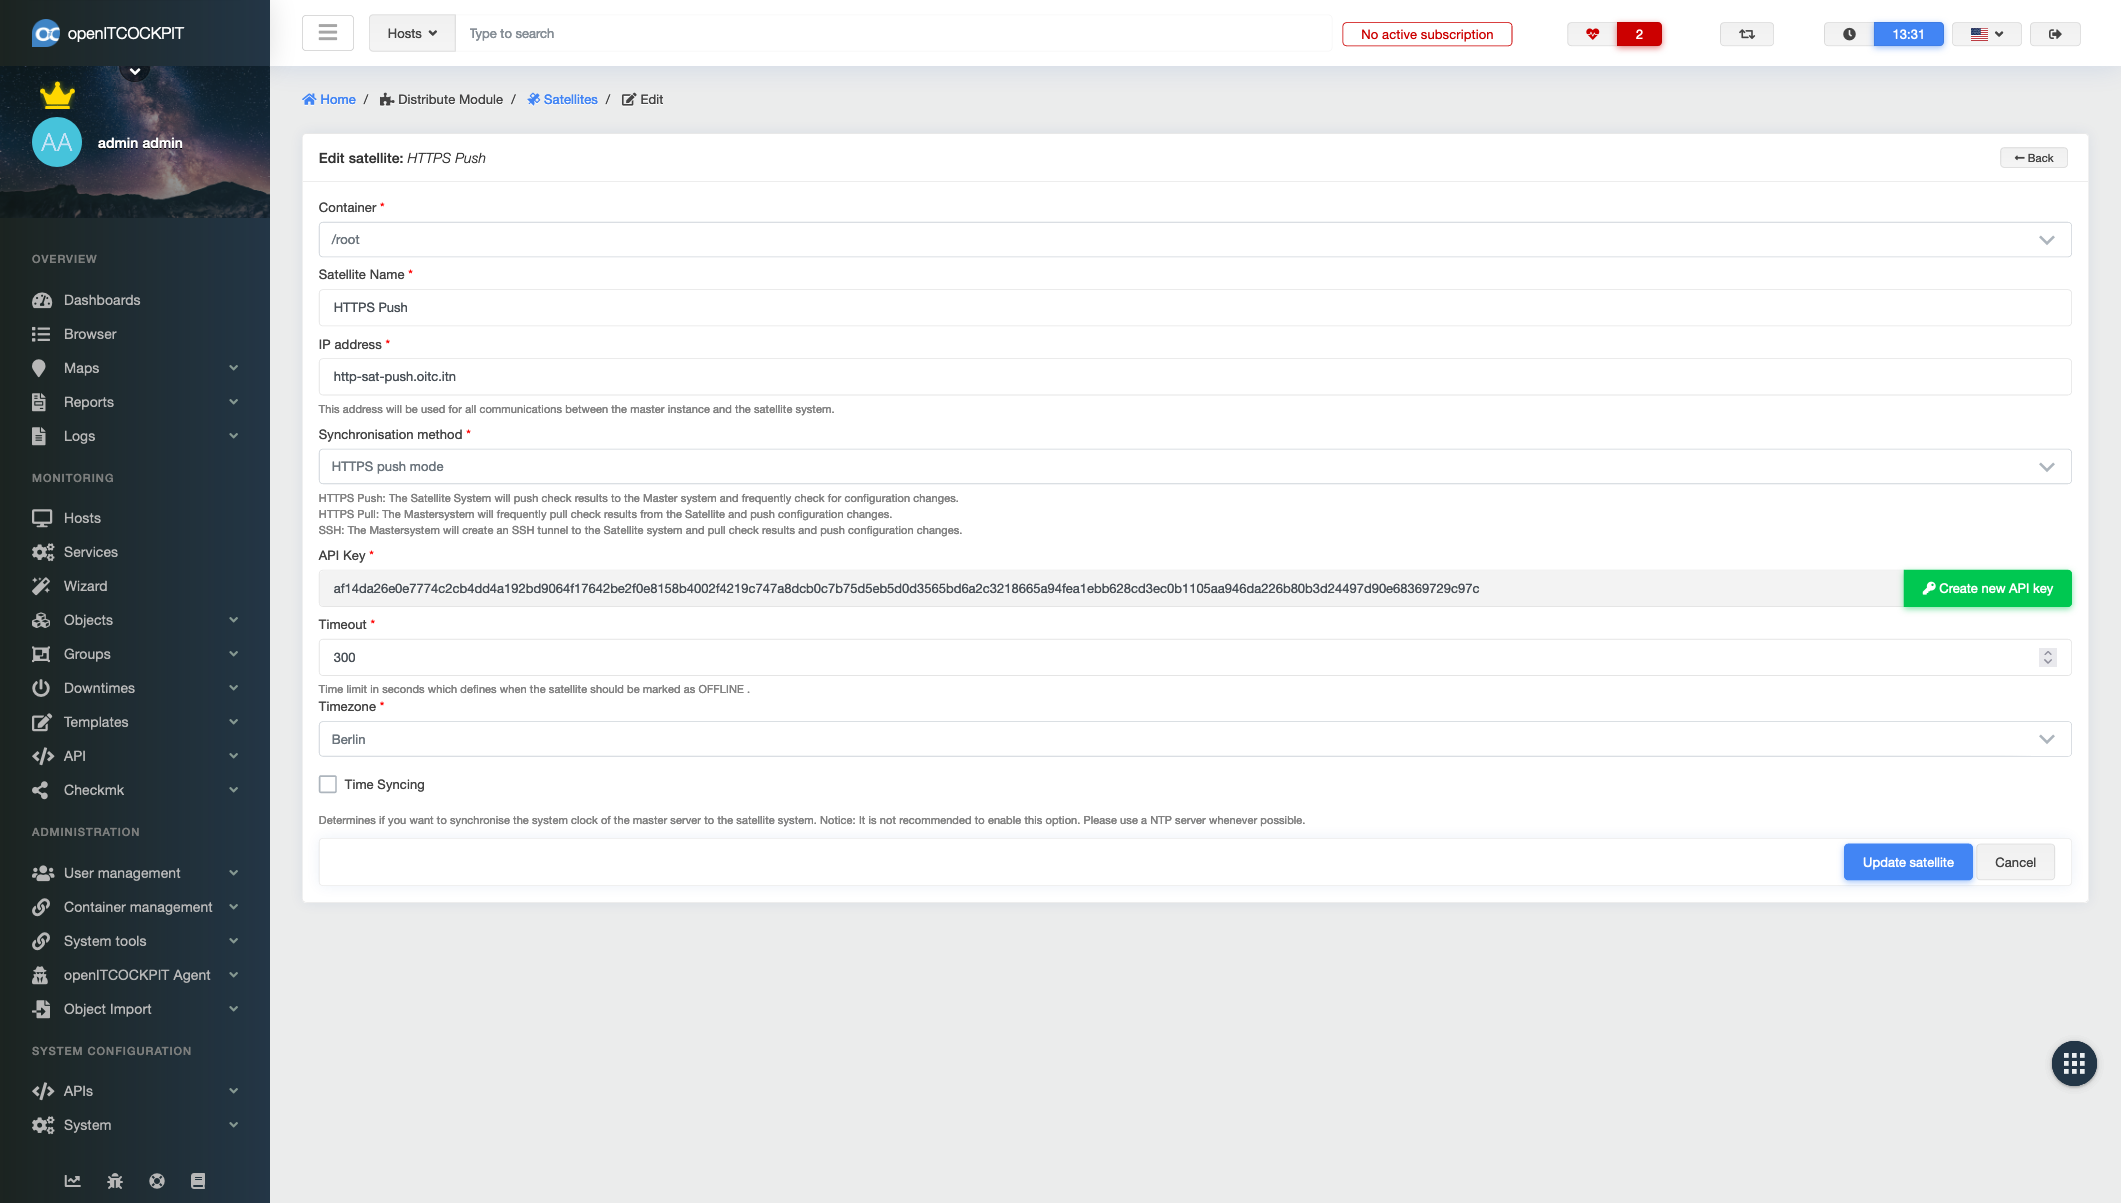
HTTPS-Push
The satellite system transmits the check results to the master system and regularly checks for configuration changes.
For the incoming communication path, the satellite establishes a connection to the openITCOCKPIT server.
During configuration, only an API key needs to be entered. This is used by the satellite system to authenticate itself to the master system.
On the satellite system, communication is managed by the NSTA service. This requires that the configuration of /opt/openitc/etc/nsta/nsta.ini must be edited as follows:
[nsta]
mode=https_push
satellite-id=ADD_YOUR_SATELLITE_ID_HERE
api-key=ADD_YOUR_API_KEY_HERE
endpoint=https://demo.openitcockpit.io
insecure-https=true
system-metrics-interval=15
You will need to restart the NSTA service for the changes to take effect.
systemctl restart nsta
Communications are then managed via an encrypted HTTPS connection.
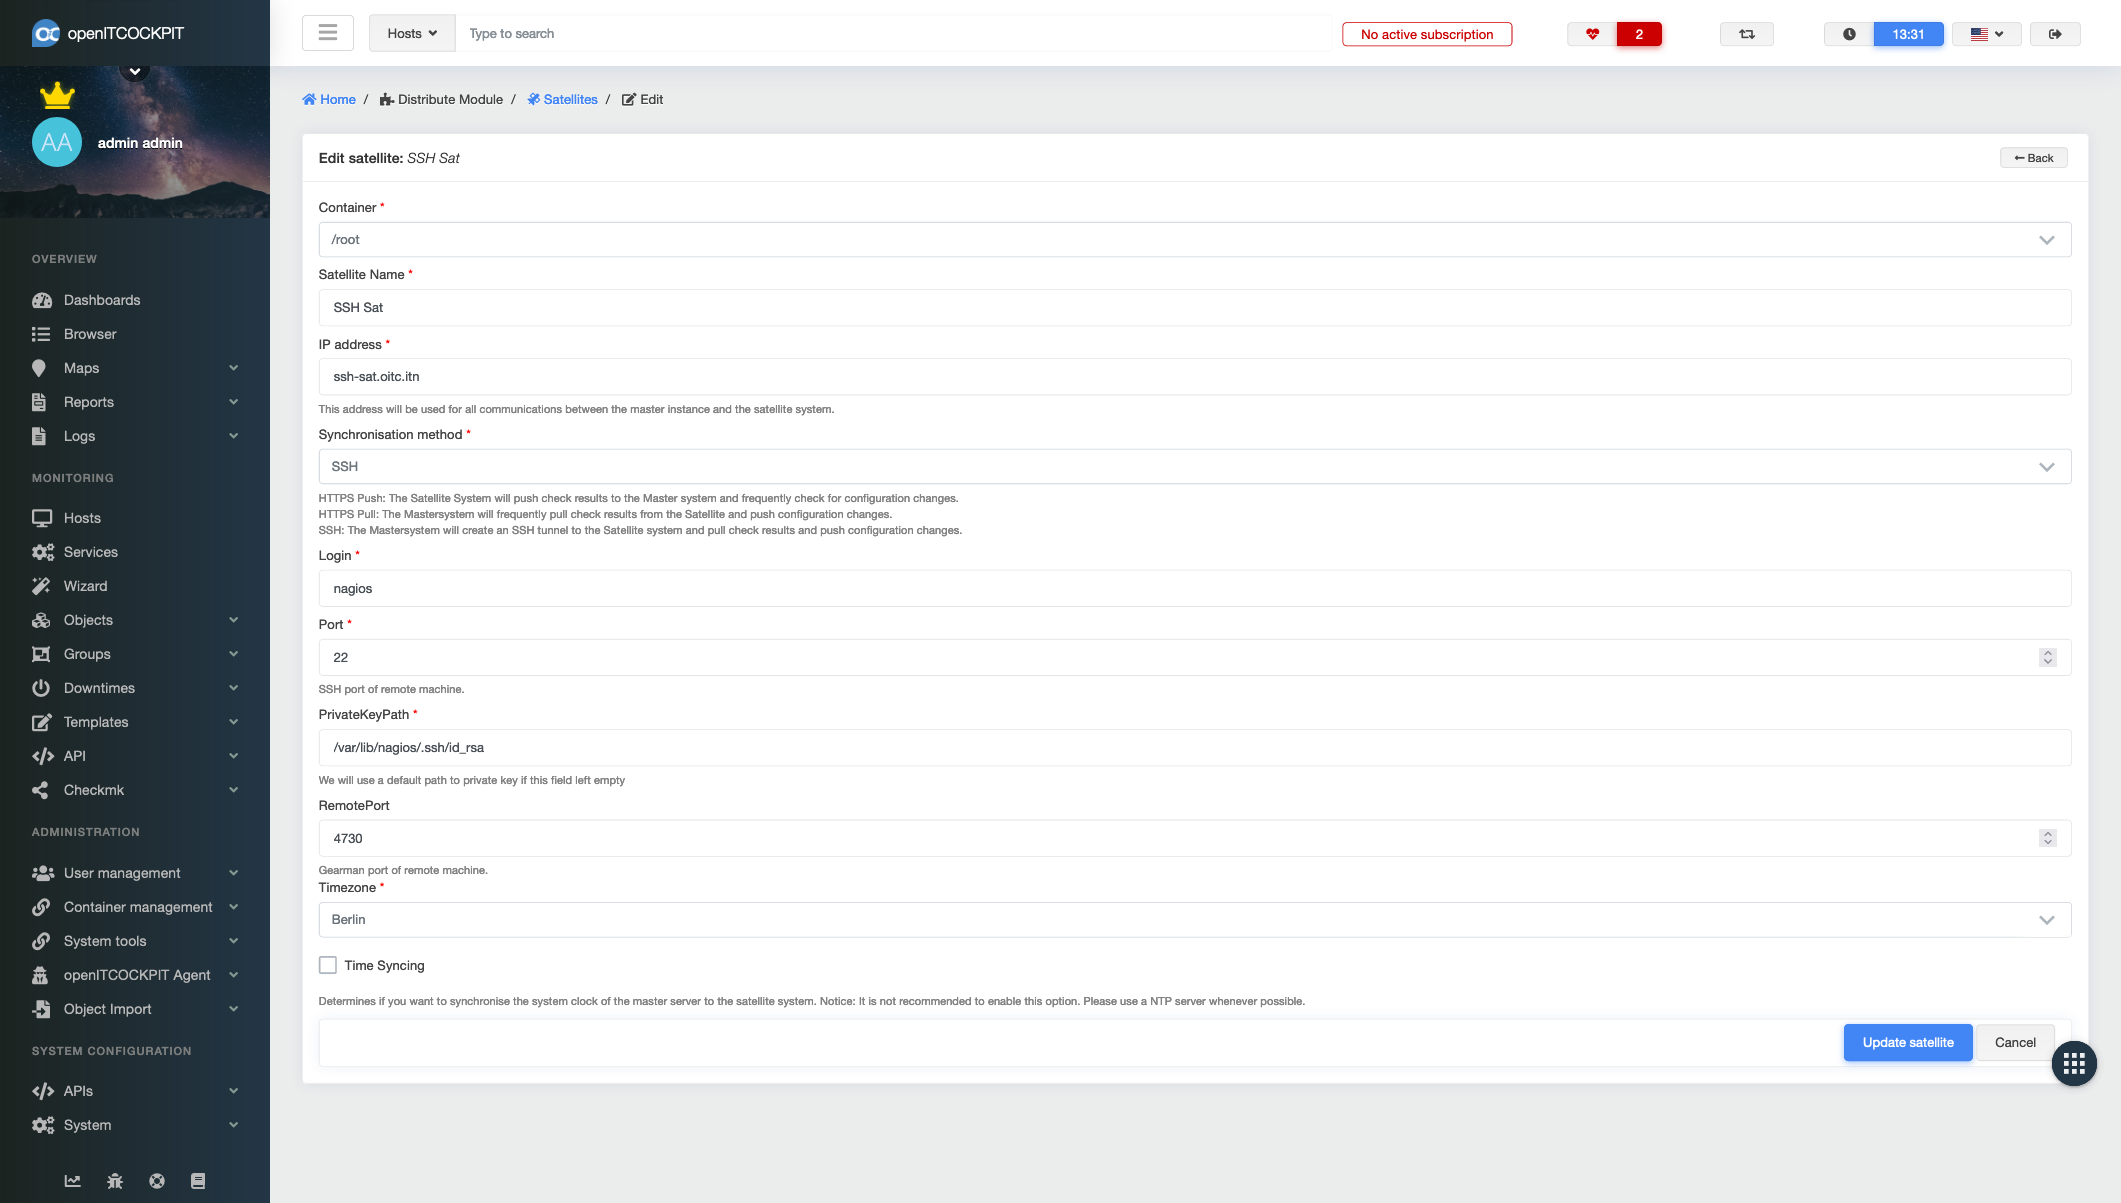
SSH
The master system creates an SSH tunnel to the satellite system, retrieves the test results, and transfers any changes in the configuration.
For the outgoing communication path, the openITCOCKPIT server establishes a connection to the satellite.
In SSH mode, a user name, port and private key path are required for the connection. The SSH keys must, of course, be exchanged for the specified user from the master system to the satellite in advance.
In addition, the remote port for the Gearman running on the satellite can also be specified.
Communications are then managed via an encrypted SSH connection.
For all the synchronisation methods, the final step is setting the time zone and then synchronising the system time.
If SSH is used for transmitting data, having NSTA on the satellite system is not required.
All Options
| Field | Required | Description |
|---|---|---|
| Containers | Container in which the satellite is to be created | |
| Satellite name | Name of the satellite to be created | |
| IP adress | IP address or hostname of the satellite. This address is used for all communications between the master instance and the satellite system | |
| Synchronisation method | Synchronisation method used to determine the data transfer type | |
| Time zone | The time zone for the satellite | |
| Zeitsynchronisation | Specifies whether you want to synchronise the master server's system clock with the satellite system. Note: It is not recommended that this option be enabled. Please use an NTP server if possible instead. | |
| HTTPS PULL mode | ||
| URL | Satellite URL | |
| Check certificate | Only valid certificates will be accepted | |
| Aktiviere Proxy | Determines whether the proxy entered below should be used to connect to the satellite system | |
| Proxy URL | Proxy URL | |
| API key | API key authentication for the satellite | |
| Interval | Time interval in seconds in which the master system records the check results | |
| Timeout | Timeout in seconds. This defines when the satellite should be marked as OFFLINE. | |
| HTTPS PUSH mode | ||
| API key | API key authentication for the satellite | |
| Timeout | Timeout in seconds. This defines when the satellite should be marked as OFFLINE. | |
| SSH | ||
| Sign in | User to be used for logging into the satellite system via SSH | |
| Port | SSH port remote computer | |
| PrivateKeyPath | We use a default private key path if this field is left blank | |
| RemotePort | Gearman port remote machine |
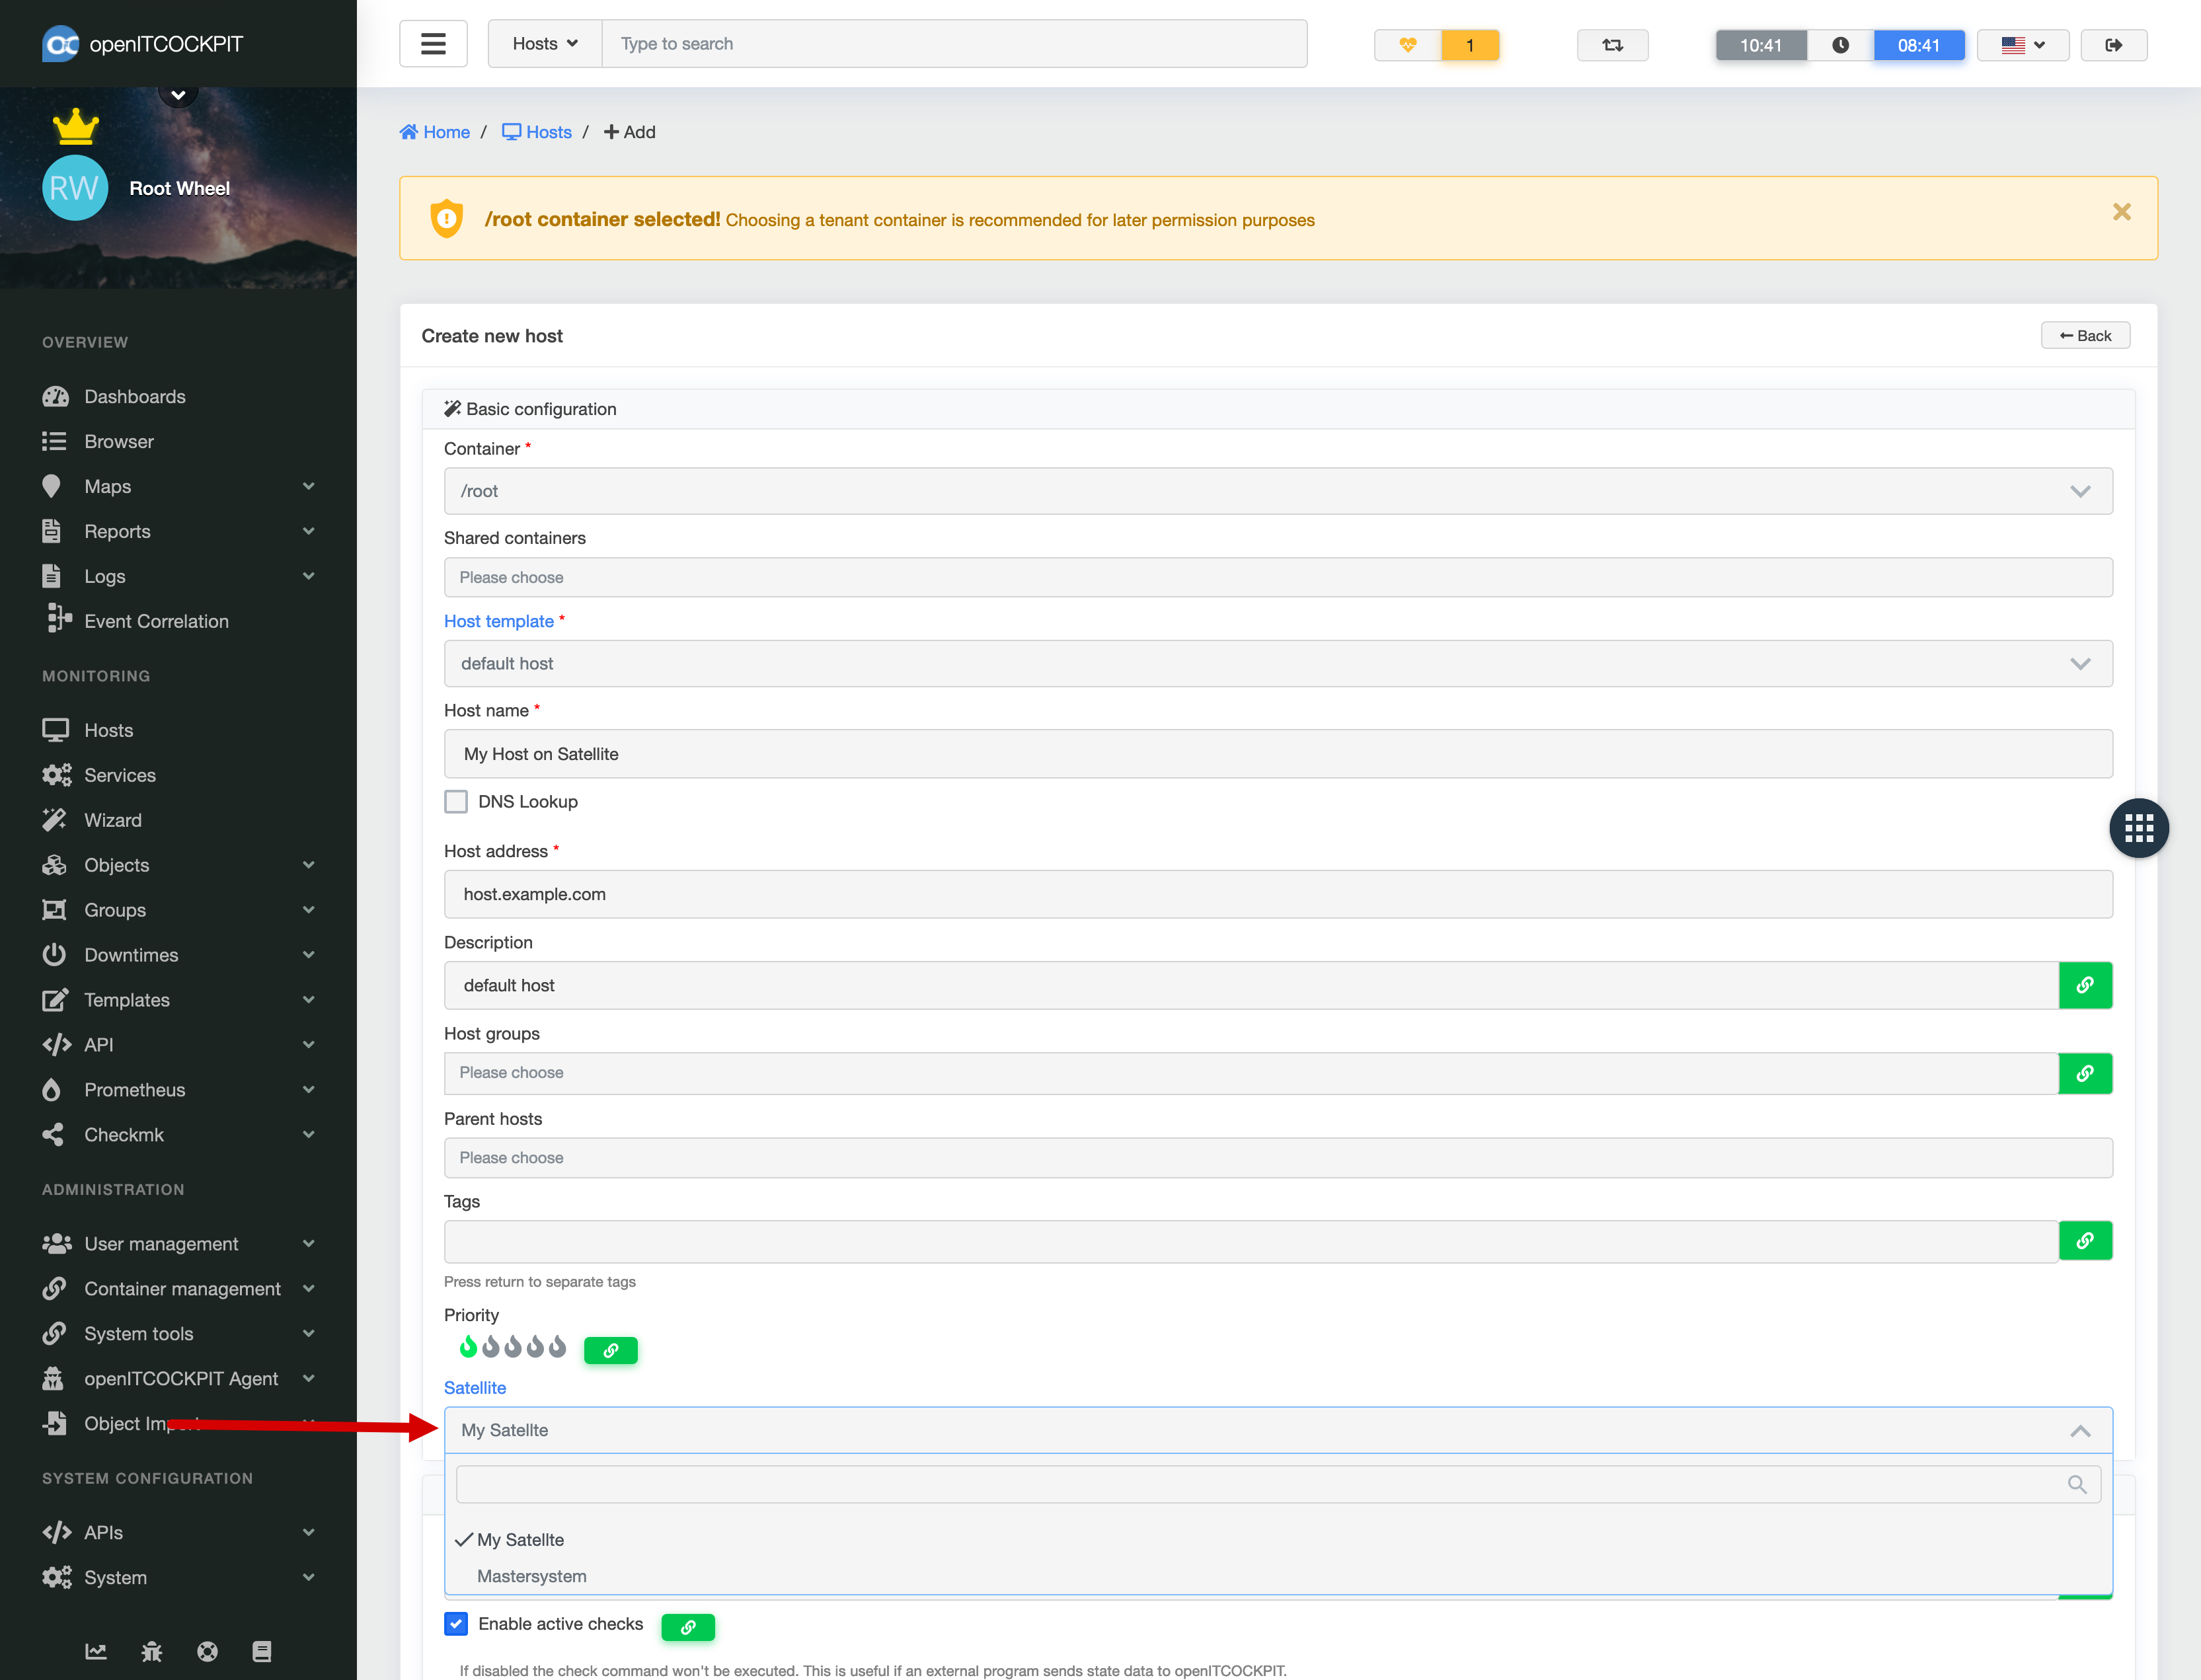
Creating a host on a satellite
When creating a host, you can choose the satellite system for running the checks from a drop-down list. openITCOCKPIt will manage all the necessary configuration changes independently in the background.
Hosts can be moved from the master system to a satellite and back at any time.
State is no longer current
The openITCOCKPIT master system carries out a "freshness check" at regular intervals. The system checks whether all satellite systems have transmitted their check results at the expected times.
If the status "State is no longer current" appears, this is usually due to one of the following reasons:
- Different system times between the master system and satellite. Using an NTP server or activating system time synchronisation via NSTA.
- The connection between the master system and satellite is broken
- the satellite system is overloaded
- more than one master is querying the satellite
Activating the satellite frontend
Using the web interface for the satellite systems is optional and not activated by default. To enable this, the following two commands must be run on the satellite:
touch /opt/openitc/etc/frontend/enable_web_interface
/opt/openitc/frontend/UPDATE.sh
After these two commands have run successfully, the first user can then be created:
sudo -u www-data /opt/openitc/frontend/bin/cake user --username admin --password admin1234
All other users can then be created and managed via the web interface.
Settings
Settings for the satellite can be done in the file /opt/openitc/frontend/config/interface.yml.
Here you can edit the configuration for interface, retention time, perfdata and docker.
Example:
- Deactivate social buttons on the login-page
show_link_in_login: 0 - Retention time for host statehistory
age_host_statehistory: 90