Monitoring using NRPE
NRPE gives system admins the ability to run monitoring plugins on a remote system. For this to function you must first have a running NRPE server and have installed monitoring plugins on the remote system.
It is recommended that you use the openITCOCKPIT Monitoring Agent to run plugins on the remote host, as this setup is far less complex. You can decide which method you prefer.
Installing the NRPE plugin for openITCOCKPIT
Establish an SSH connection to your openITCOCKPIT server and install the following package:
apt-get install --no-install-recommends nagios-nrpe-plugin
It is recommended that you link the check_nrpe plugin to the default plugin folder for openITCOCKPIT.
ln -s /usr/lib/nagios/plugins/check_nrpe /opt/openitc/nagios/libexec/check_nrpe
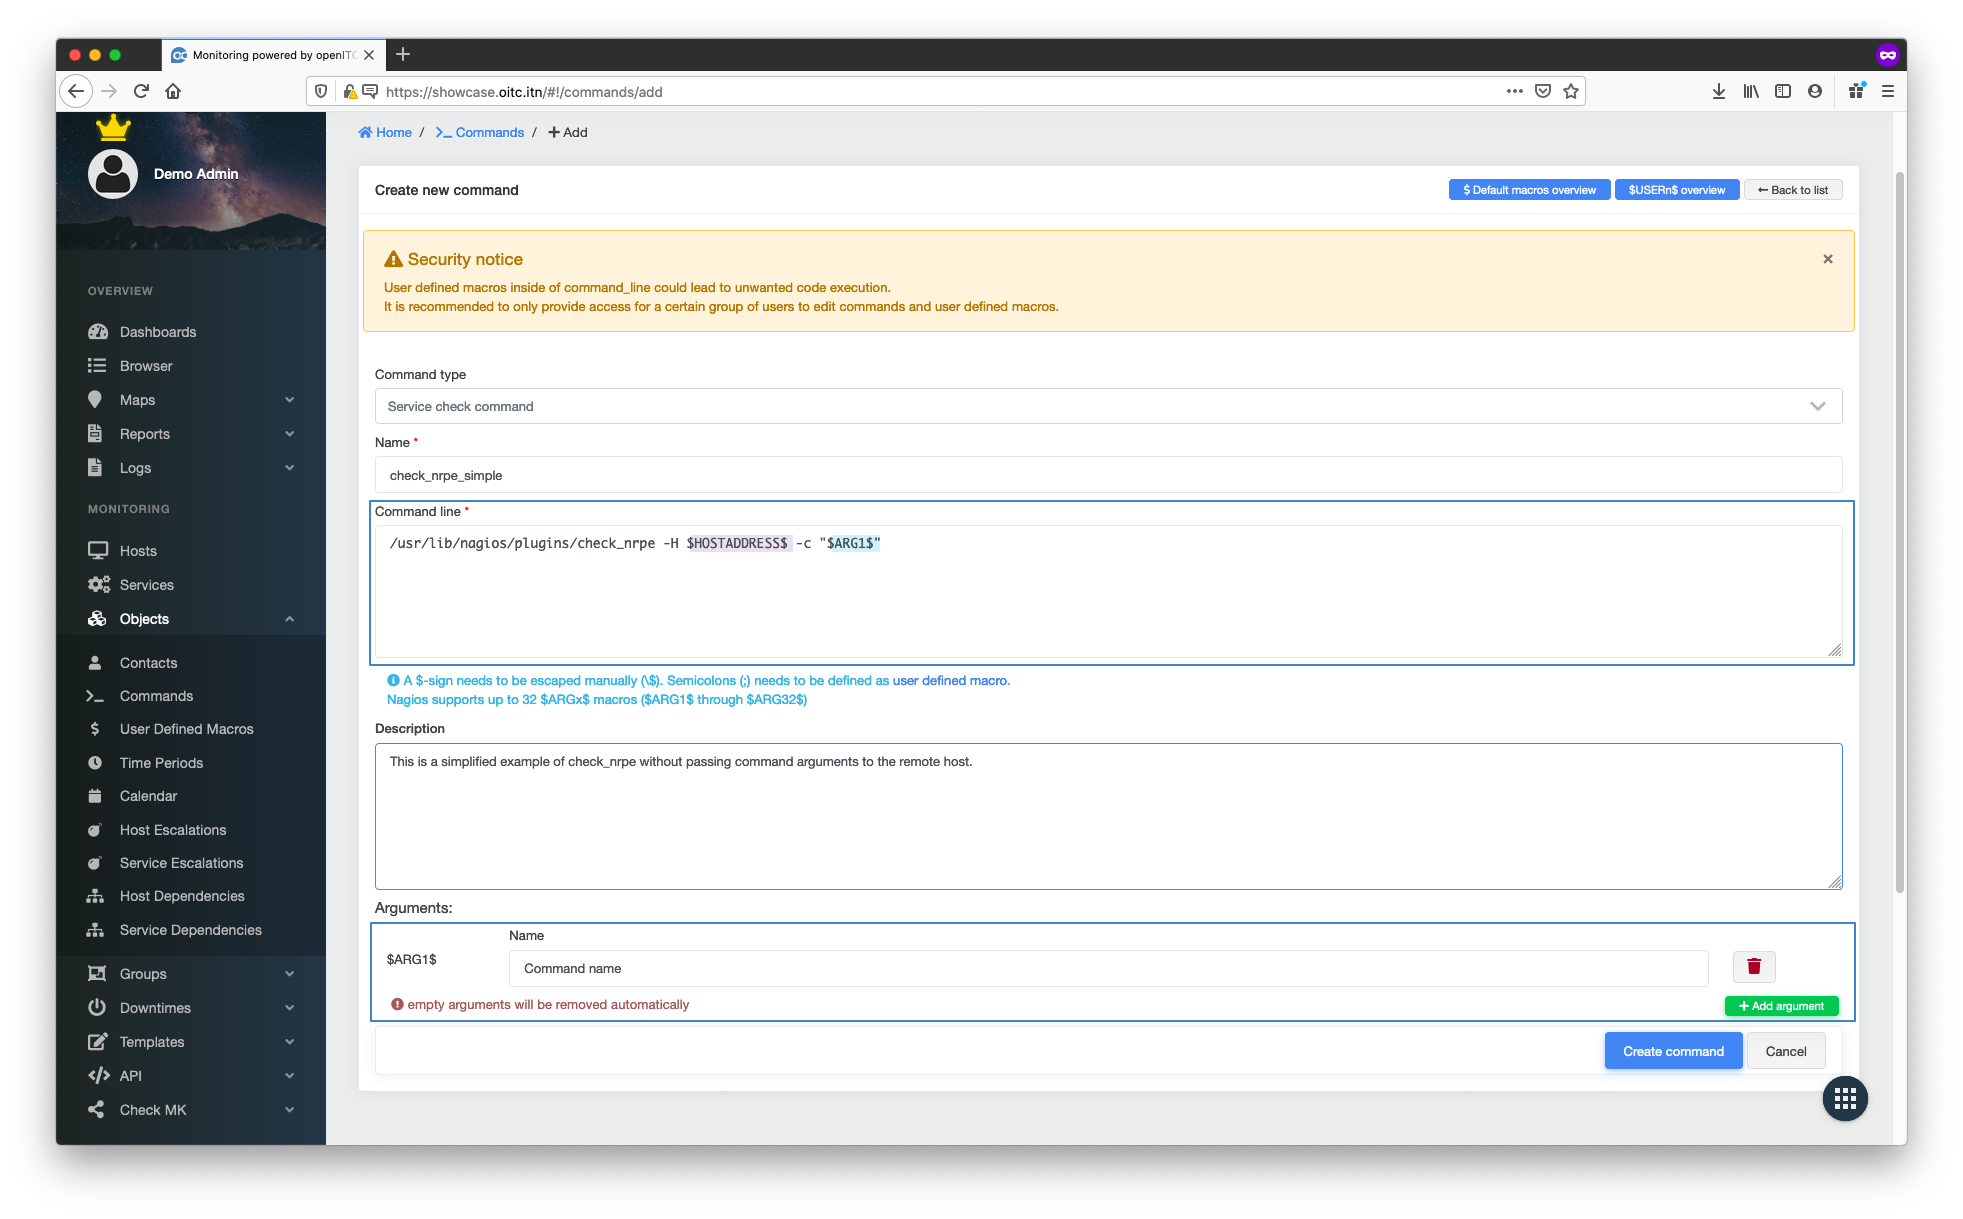
To be able to use the new plugin, you will need to create a new command under Objects -> Commands. To do this, click
on the + New button.
| Command definition | |
|---|---|
| Command type | Service check command |
| Command name | check_nrpe_simple |
| Command line | /usr/lib/nagios/plugins/check_nrpe -H $HOSTADDRESS$ -c "$ARG1$" |
| Command argument ($ARG1) | Command name |
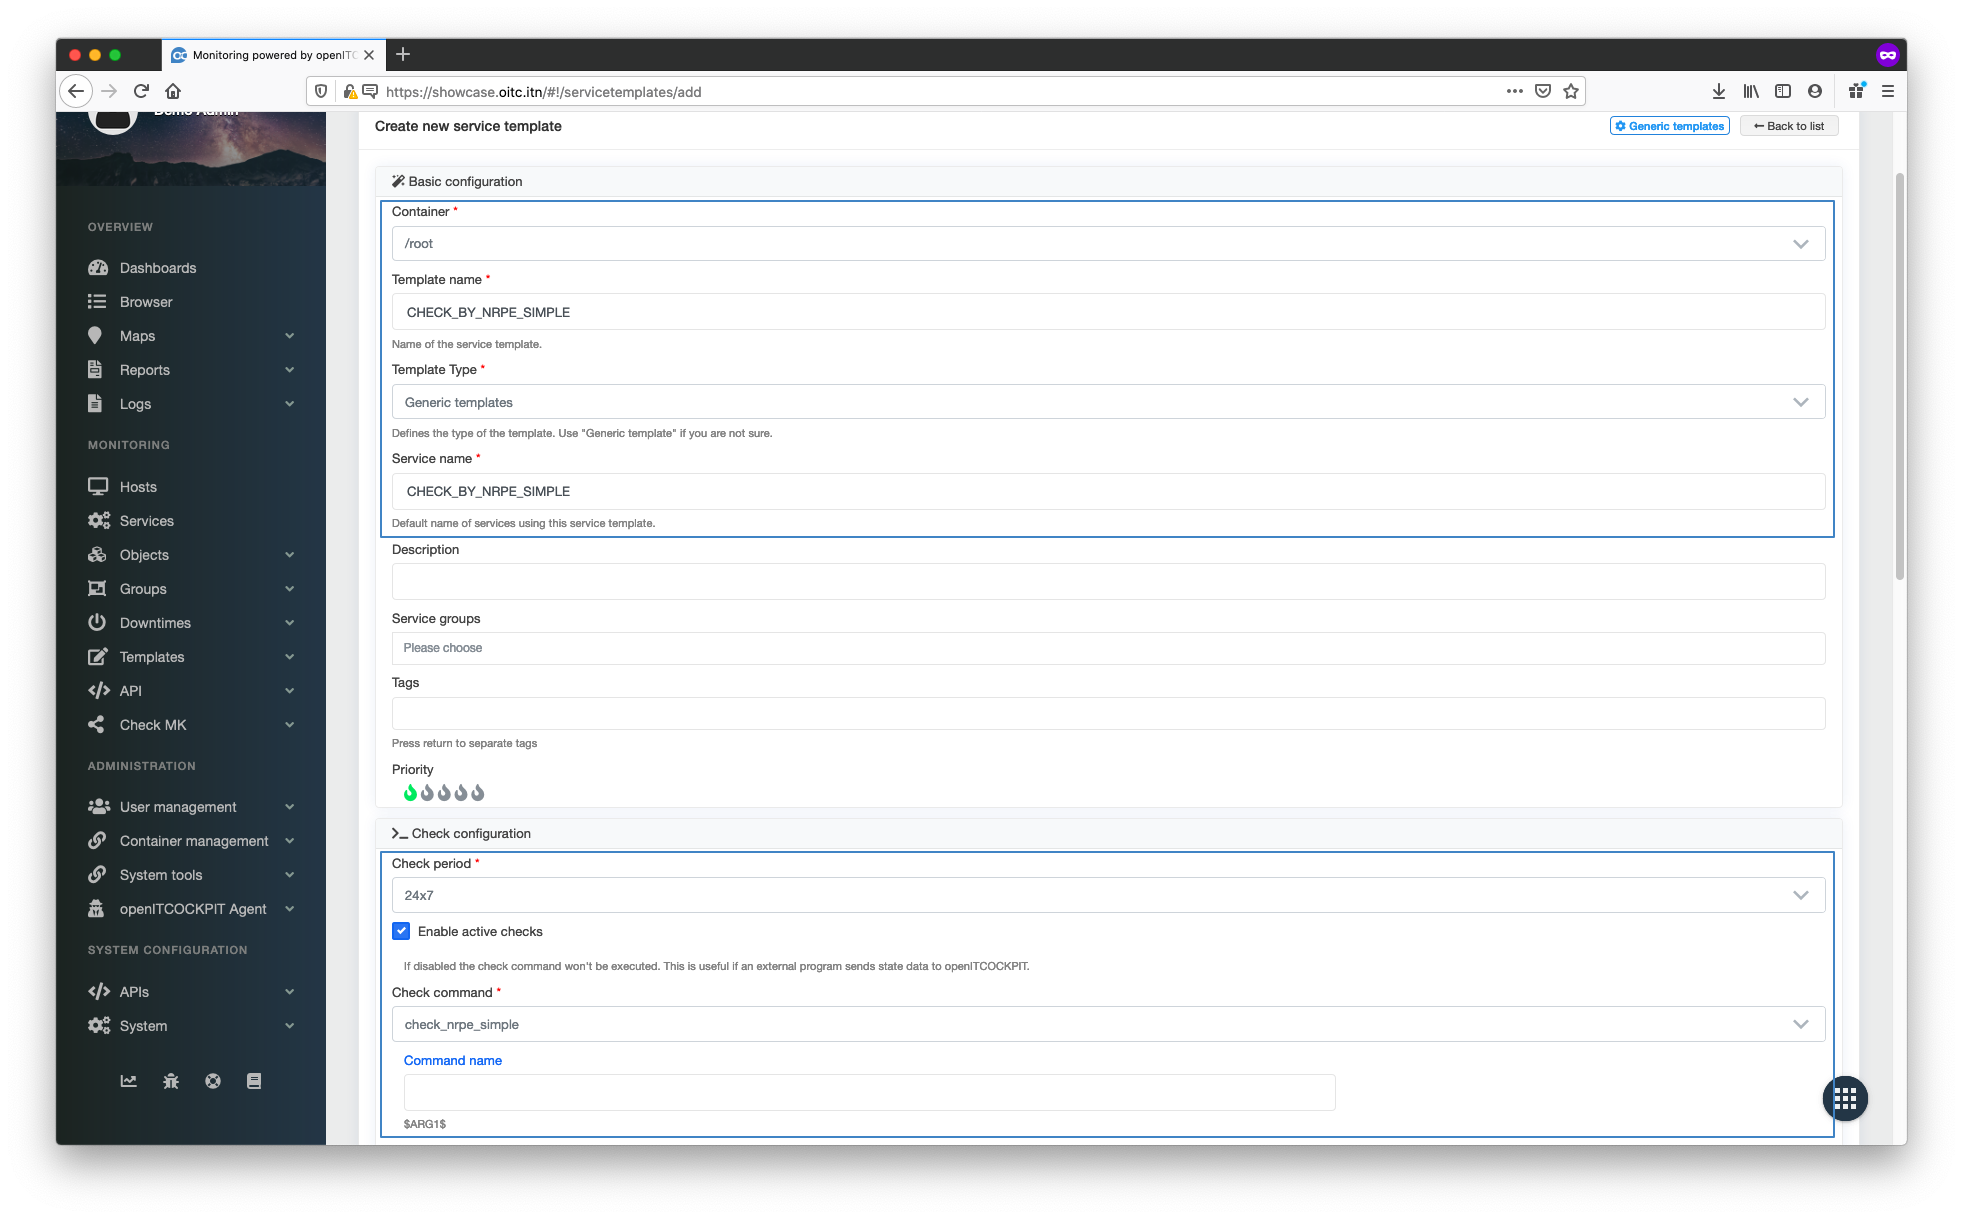
To use the check_nrpe nrpe plugin, you also need to create a new service template. To create this, navigate
to Monitoring -> Vorlagen -> Servicevorlagen and click the + New button.
Set the container to /root. This will ensure the service template is visible to all users of the system. And this
example, we'll assign CHECK_BY_NRPE_SIMPLE as the name for the service.
| Service templates definitions | |
|---|---|
| Template name | CHECK_BY_NRPE_SIMPLE |
| Template Type | Generic templates |
| Service name | NRPE Simple |
| Check period | 24x7 |
| Enable active checks | Yes |
| Check command | check_nrpe_simple |
| Command name (ARG1) | blank |
| Notification period | 24x7 |
Installing NRPE server on the target system
To be able to use NRPE, you must have nagios-nrpe-server installed on the remote host. Once this has been done,
establish an SSH connection to the remote host and install the following package:
apt-get install nagios-plugins nagios-nrpe-server
You can then open the file /etc/nagios/nrpe.cfg with the editor of your choice
Search for allowed_hosts and add the IP address of your openITCOCKPIT server.
allowed_hosts=127.0.0.1,::1,172.16.166.154
The default configuration comes with predefined basic checks. These sample checks are now available to be used.
Using the default configuration, this will check the disk /dev/hda1 which no longer exists on most systems. In our
case we will replace this with /dev/vda1.
command[check_users]=/usr/lib/nagios/plugins/check_users -w 5 -c 10
command[check_load]=/usr/lib/nagios/plugins/check_load -w 15,10,5 -c 30,25,20
command[check_vda1]=/usr/lib/nagios/plugins/check_disk -w 20% -c 10% -p /dev/vda1
command[check_zombie_procs]=/usr/lib/nagios/plugins/check_procs -w 5 -c 10 -s Z
command[check_total_procs]=/usr/lib/nagios/plugins/check_procs -w 150 -c 200
Whenever you change the configuration the nagios-nrpe-server.service must be restarted for the changes to take effect.
systemctl restart nagios-nrpe-server.service
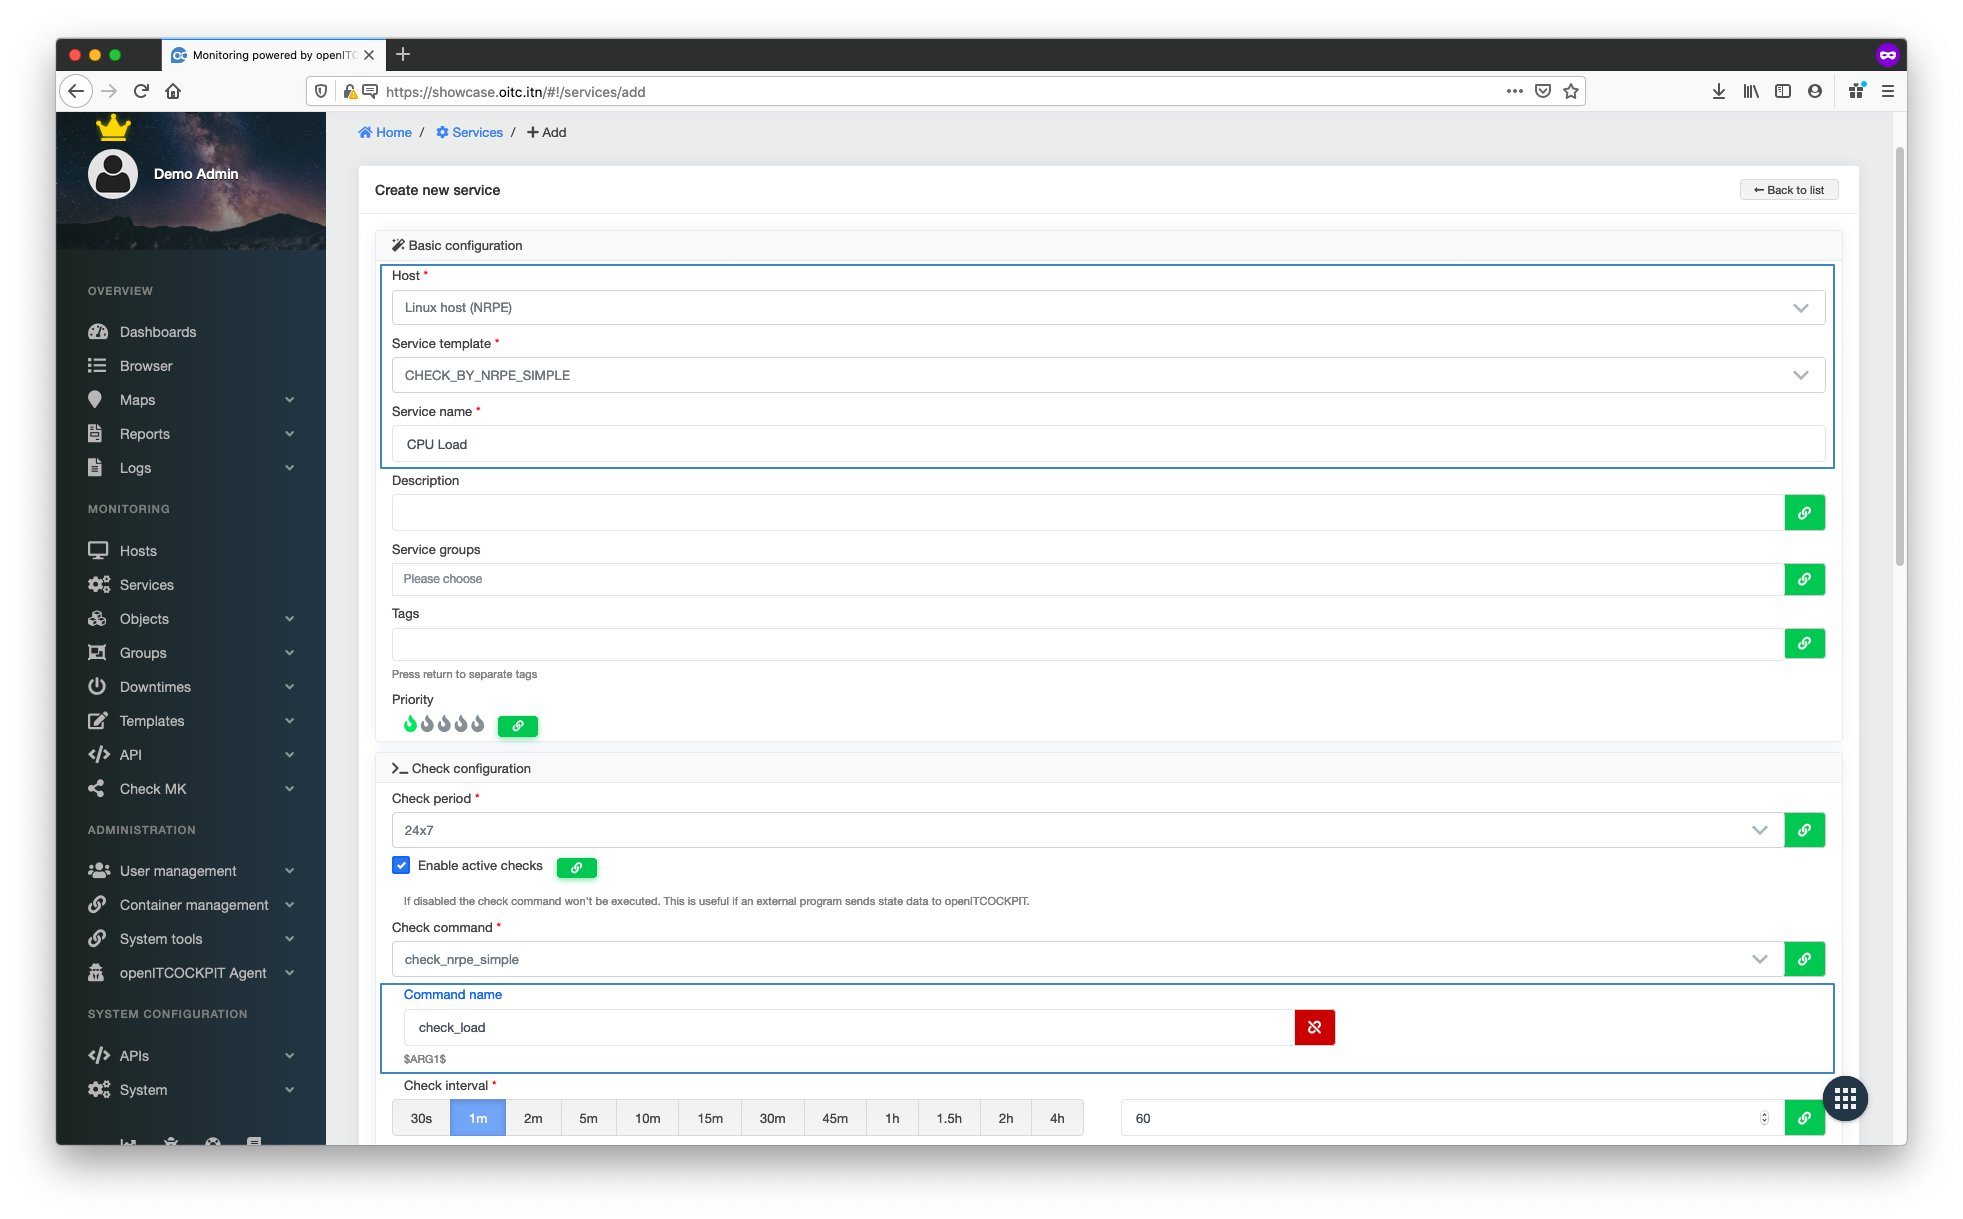
Creating services
Navigate to Monitoring -> Services and click the + New button.
First you will need to select a host on which to create the service and then select the CHECK_BY_NRPE_SIMPLE service
template. The system will now load all predefined values for the service template.
Change the service name to CPU Load, set check_load as the command name ($ARG1$) and then click Create Service.
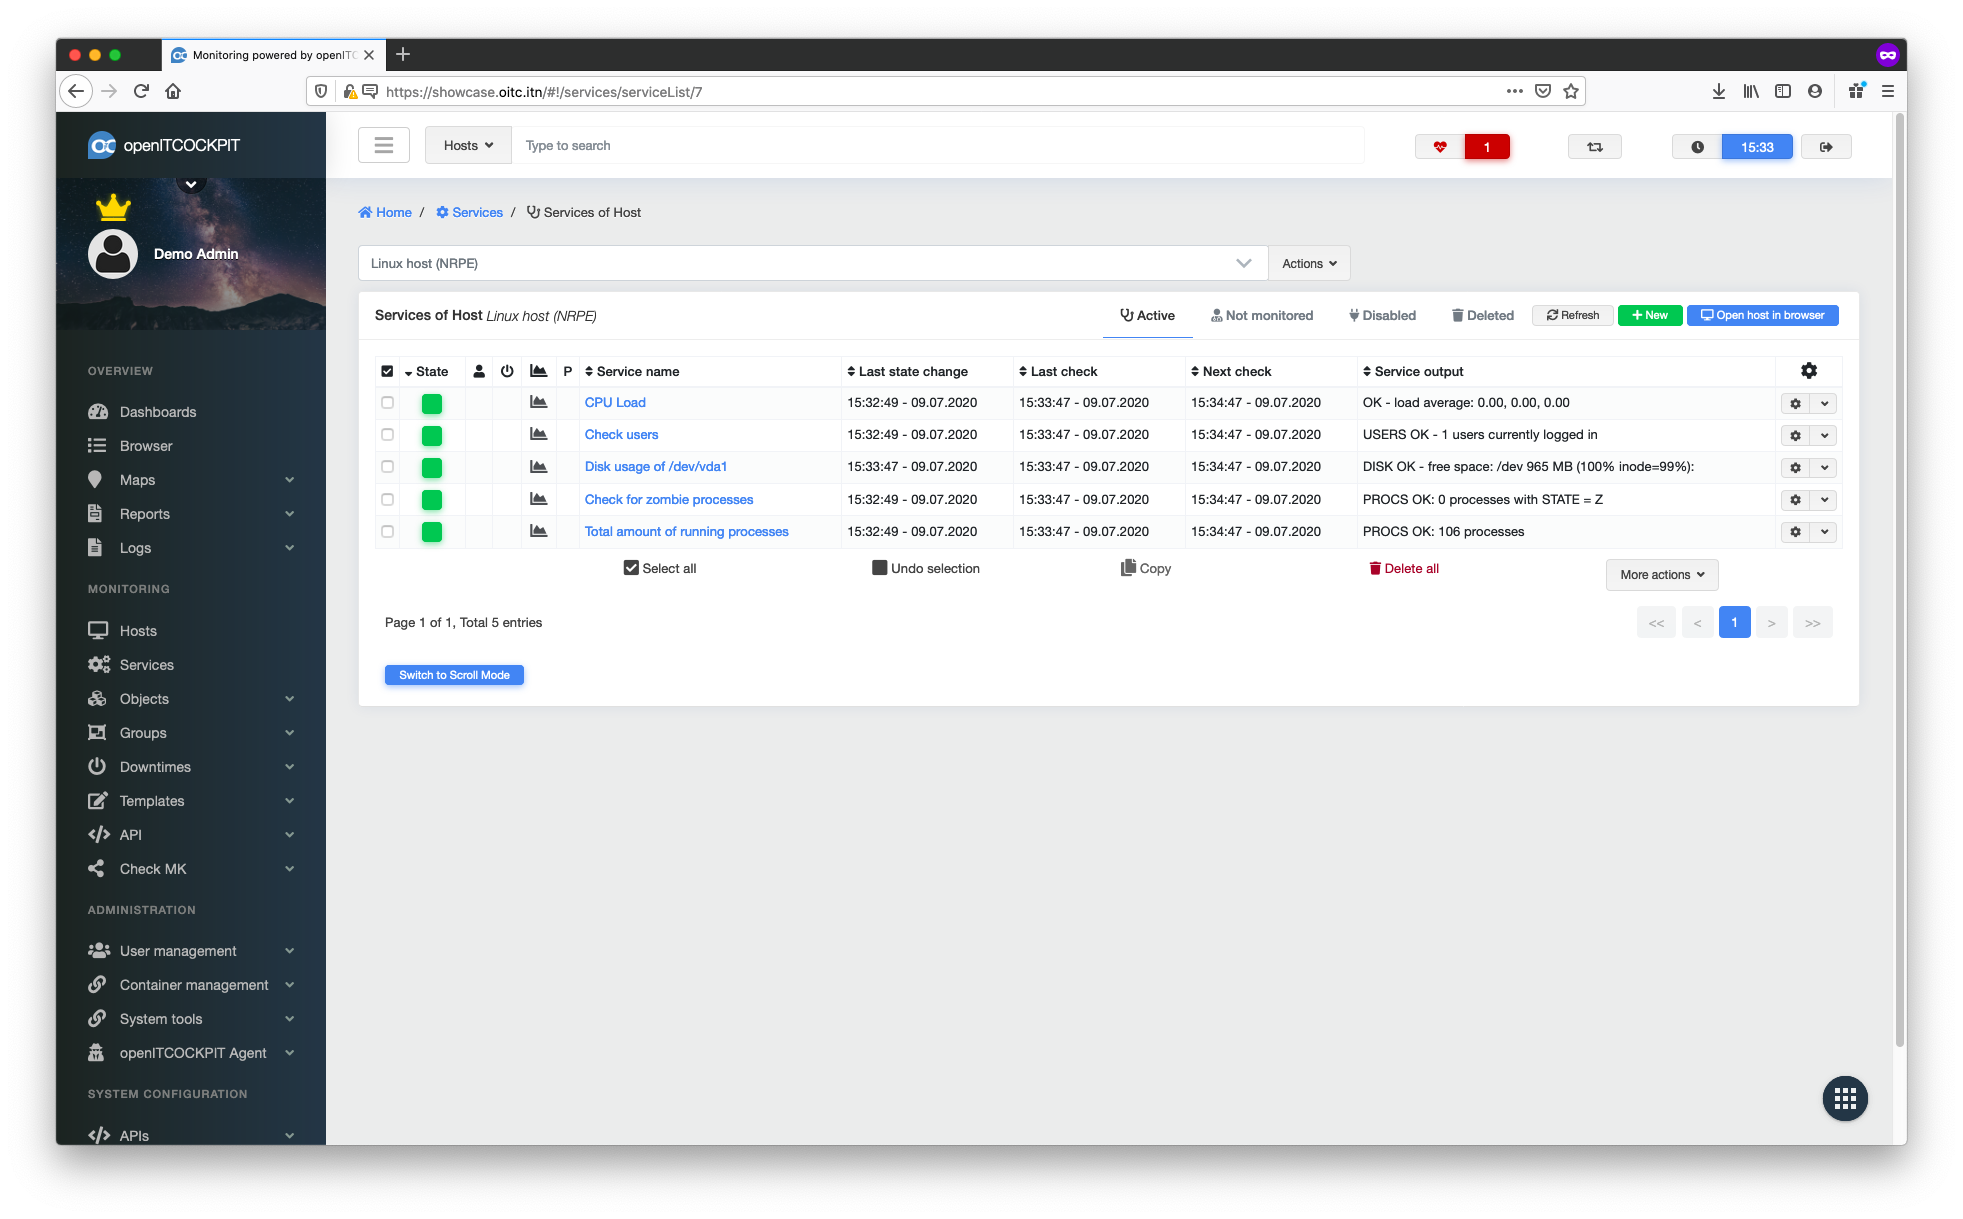
Repeat this step for all NRPE commands. The command names are defined in the file nrpe.cfg on the target host. In this
incidence we have the following standard commands: check_users, check_load, check_vda1, check_zombie_procs
and check_total_procs.
Once all the services have been created, you must update the monitoring configuration.
Your new services will now be monitored by the system.