Monitoring with Checkmk CE
Checkmk is seamlessly integrated into the openITCOCKPIT interface. Hosts running the Checkmk agent or an SNMP exporter can thus be scanned using the openITCOCKPIT interface. For the purposes of this tutorial, we will be monitoring an Ubuntu Linux system.
Installing the Checkmk module for openITCOCKPIT
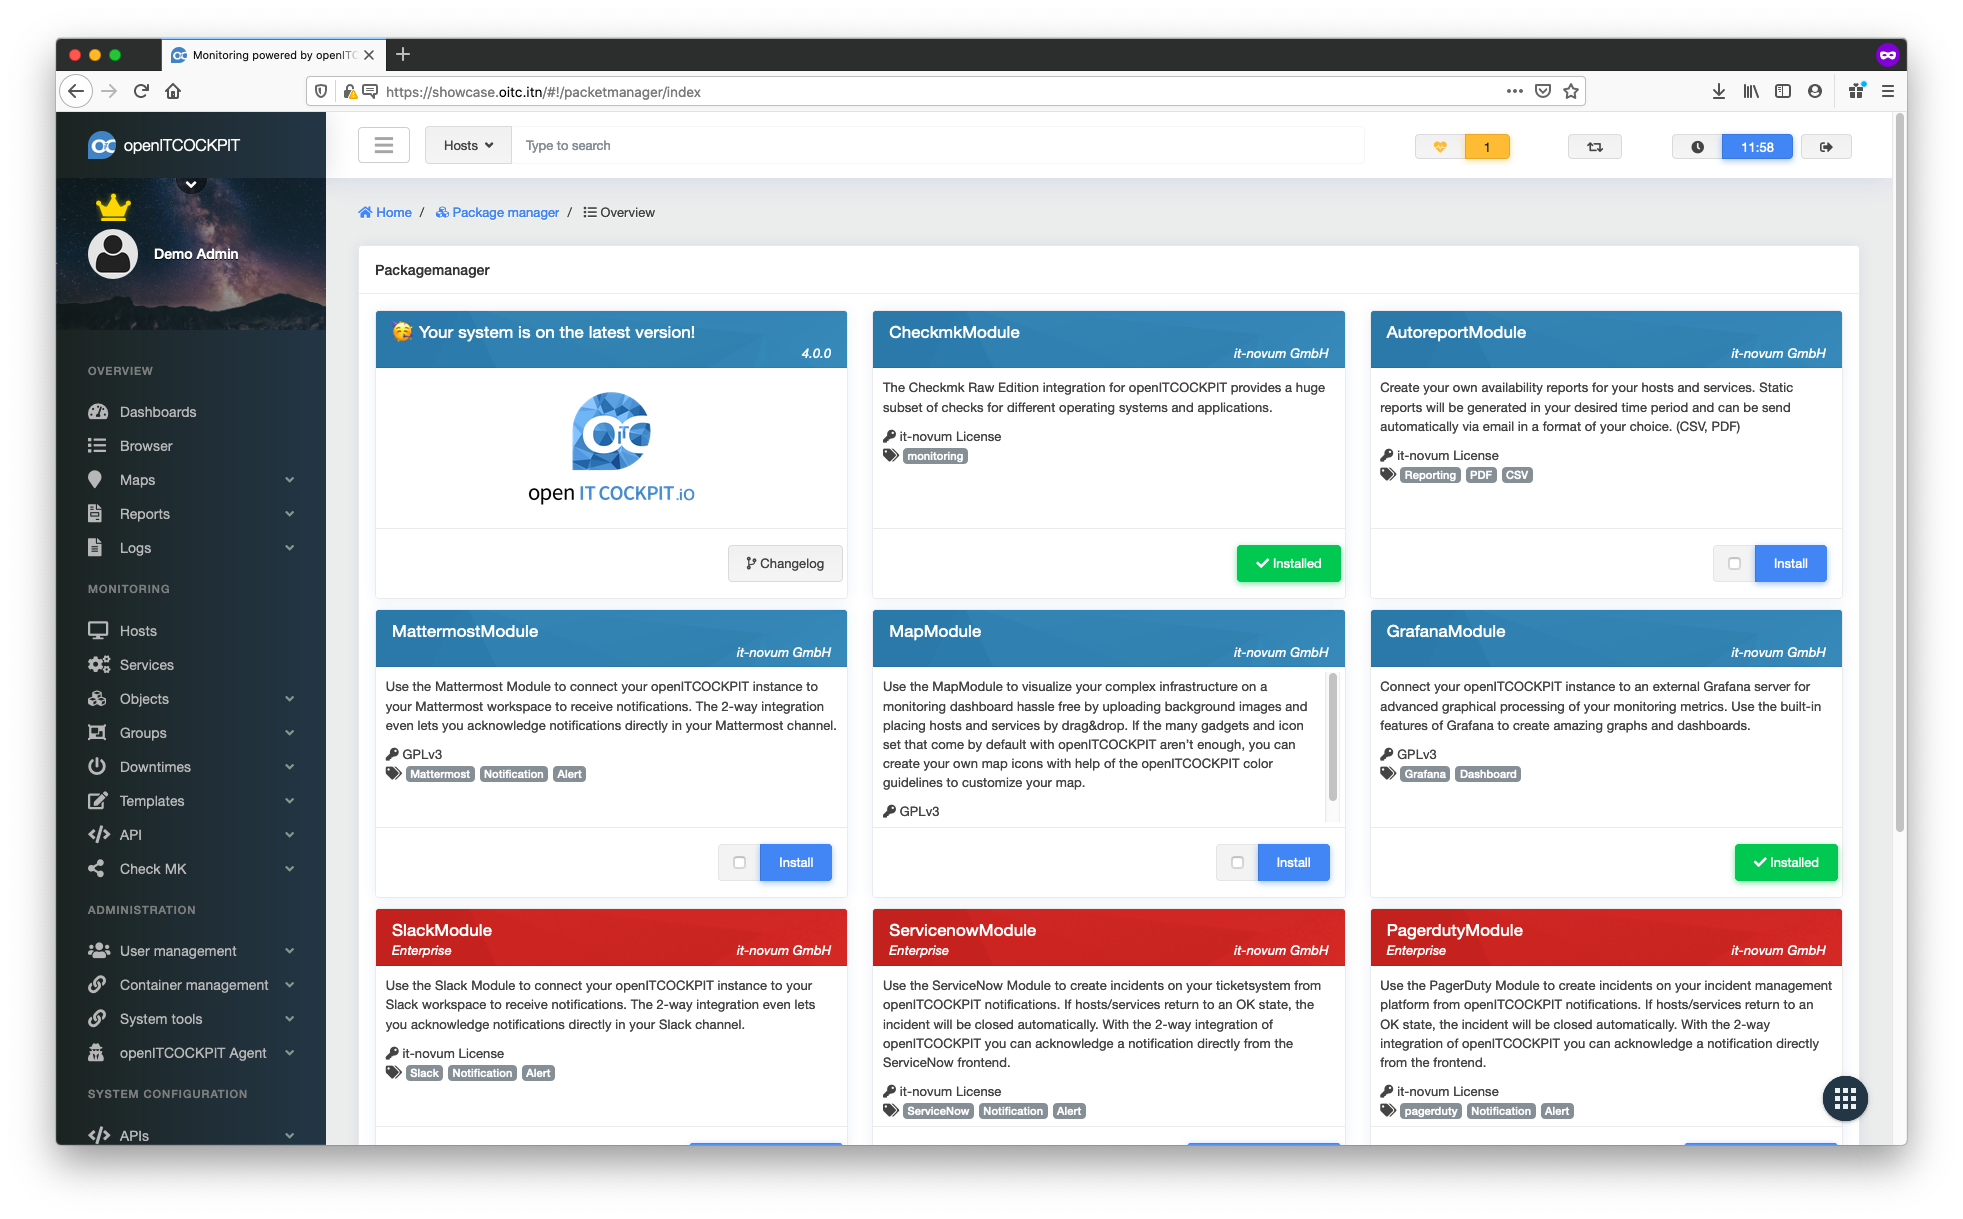
The Checkmk extension for openITCOCKPIT is provided as a module. Making such tools available in this way has the advantage of keeping the openITCOCKPIT core small and flexible.
openITCOCKPIT Community Licence is required
To get access to the community modules, you need to register your openITCOCKPIT instance using the free community licence.
Navigate to Management -> System Tools -> Package Manager and install the CheckmkModule

Follow the instructions provided
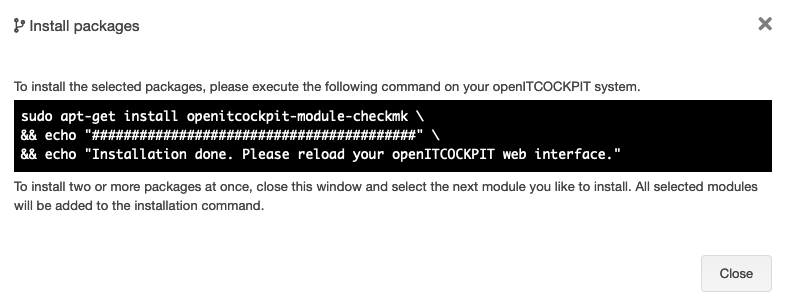
The installation will be complete when you see the following
message: Installation done. Please reload your openITCOCKPIT web interface.
Navigate back in your web browser and press Strg + R or Cmd + R to refresh the page.
The CheckmkModule should now be displayed as installed.
Each module provides the ability to extend openITCOCKPIT's available permissions. By default, all permissions are
granted to the Administrator user role.
If your current user is mapped to another user role, make sure you grant that role the appropriate permissions.
Navigate to Administration -> User Management -> Manage User Roles and select your user role.

New permissions are not automatically granted (except for users who hold the Administrator user role). This is because not every user is allowed to use modules that, for example, were only installed for test or evaluation purposes.
Installing Checkmk Agent on the target system
As already mentioned, we use the Checkmk agent for monitoring remote systems.
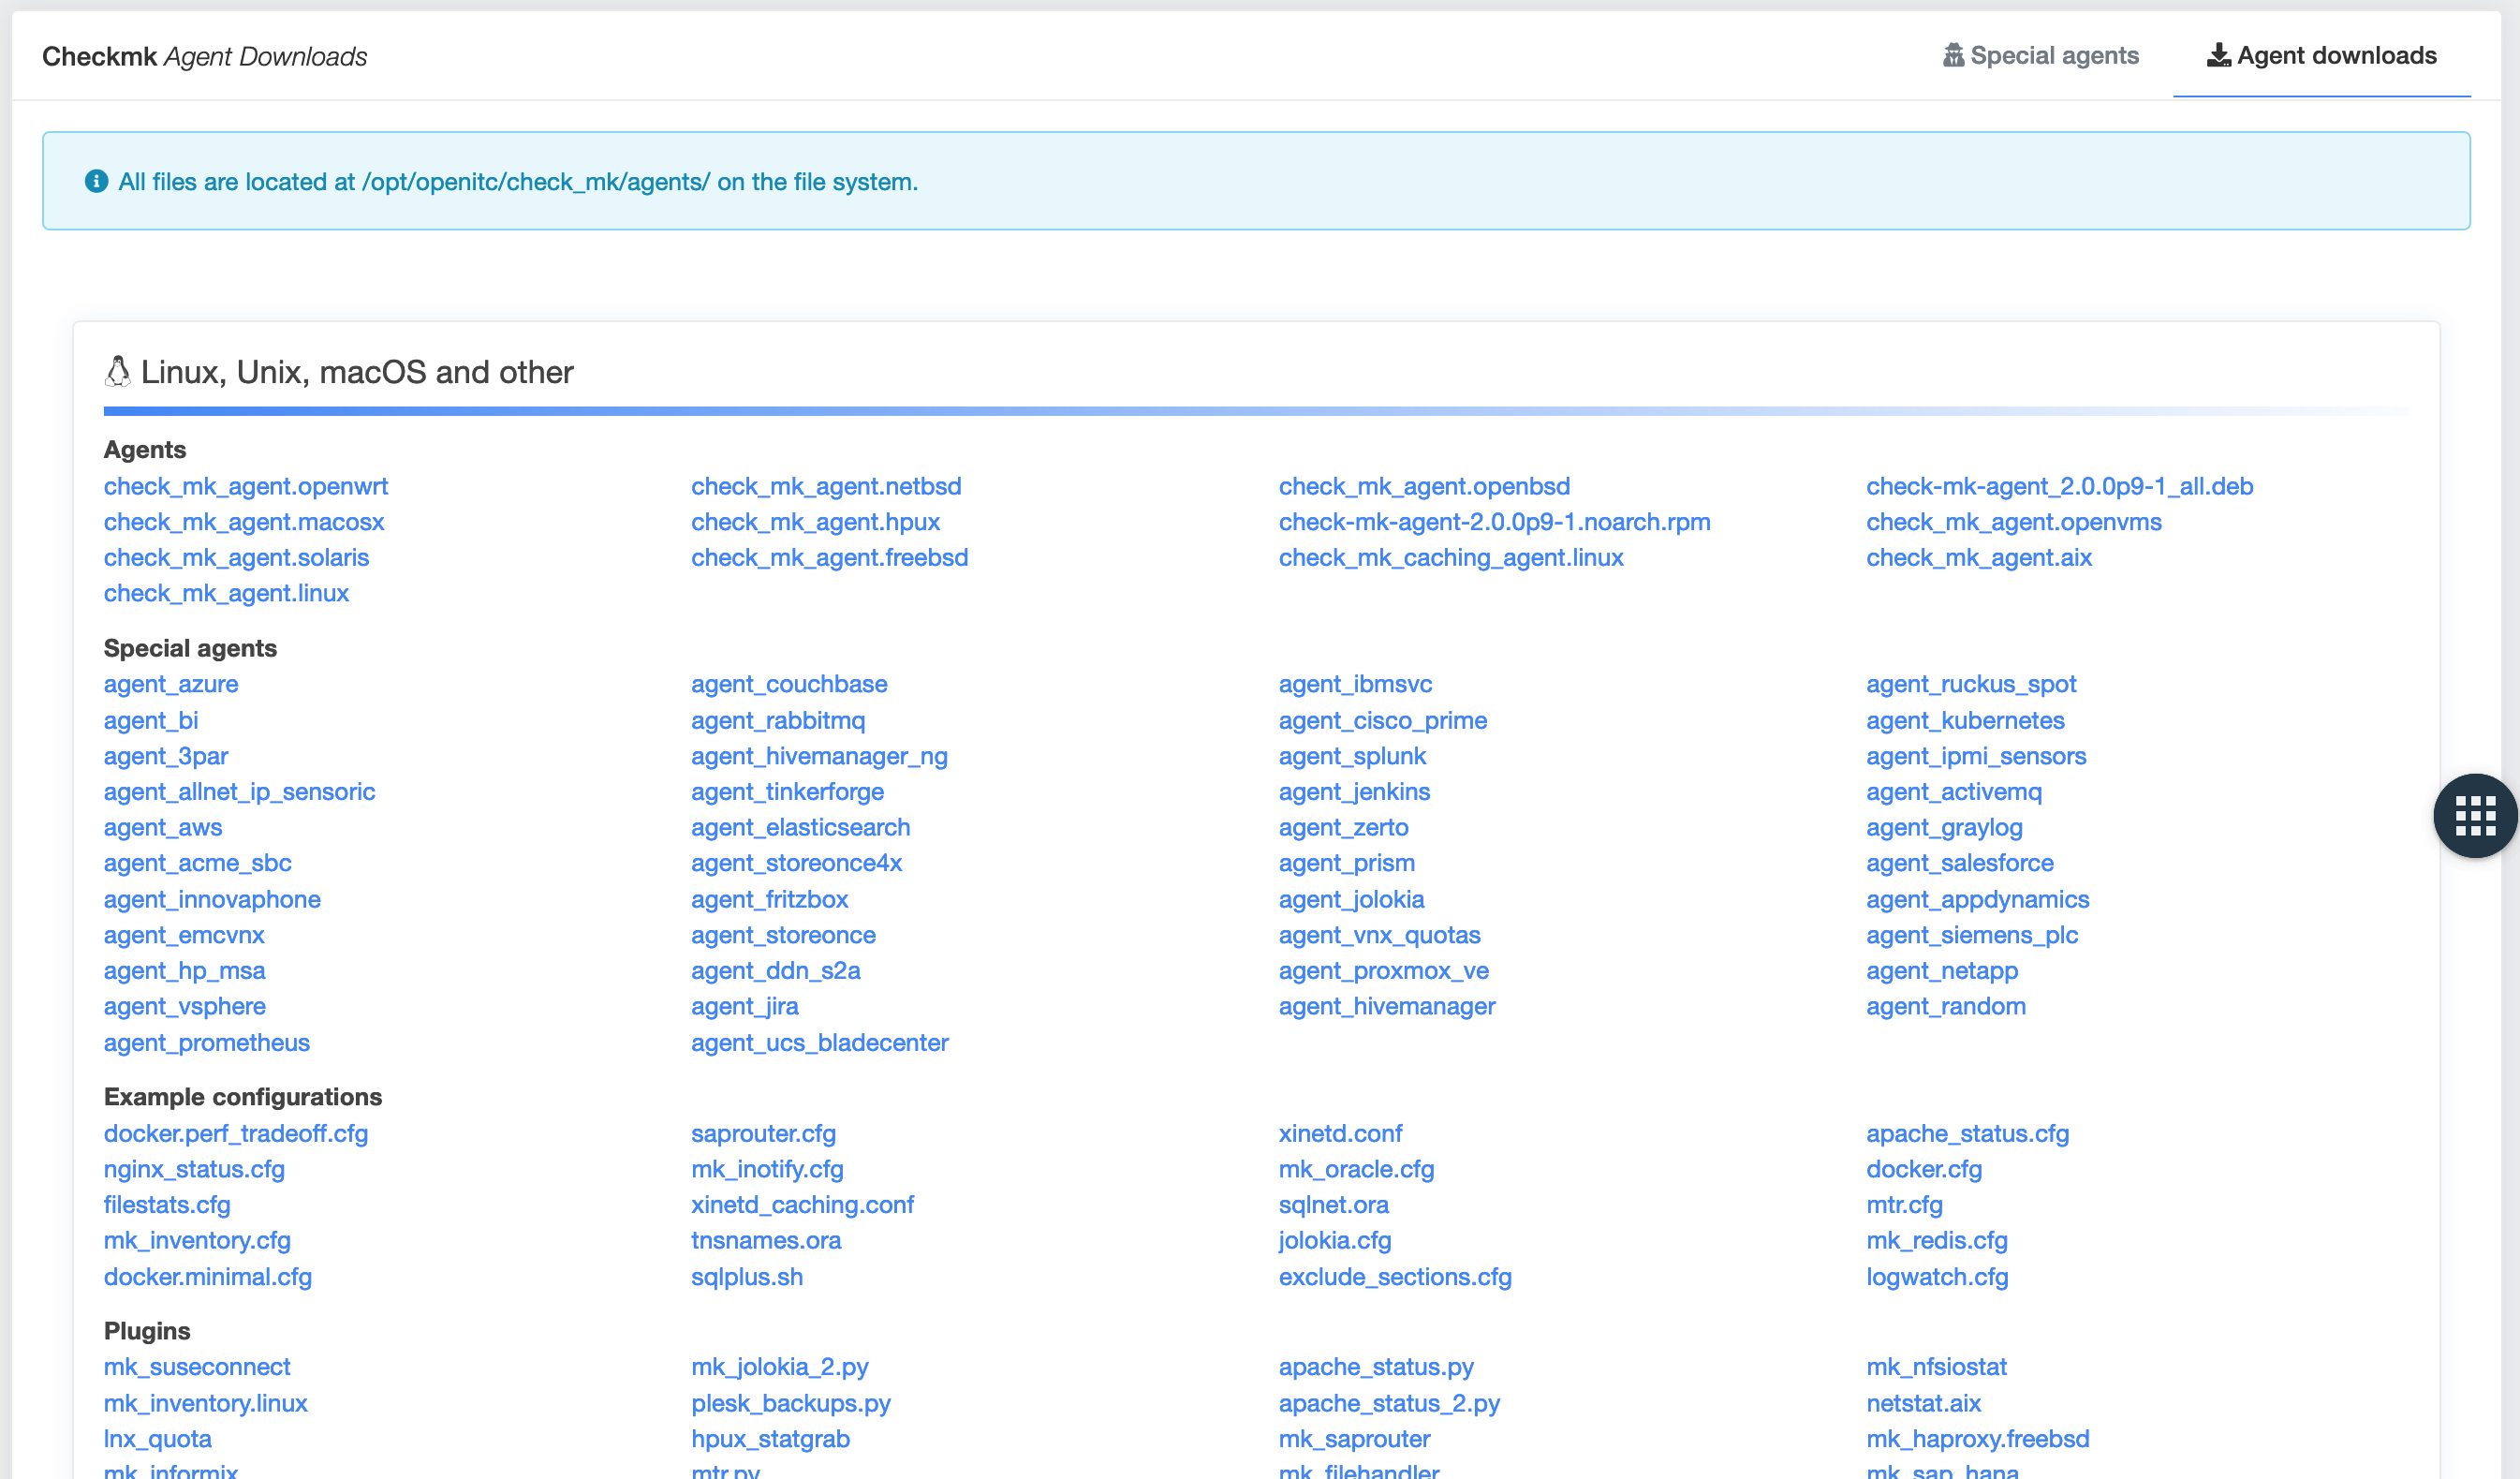
To begin using this tool, you must first copy the Checkmk agent from your openITCOCKPIT server to the target system:
scp /opt/openitc/check_mk/agents/check_mk_agent.linux root@172.16.166.179:/usr/local/bin/check_mk_agent
Tip
"All Checkmk agents for the various operating systems can be found here"
/opt/openitc/check_mk/agents/
Now connect to the remote host via SSH
The Checkmk agent is not run as a daemon but rather by xinetd.
apt-get install xinetd
chmod +x /usr/local/bin/check_mk_agent
Security Notice
By default, Checkmk uses unencrypted plain text communication!
Next you need to copy the following configuration to /etc/xinetd.d/check_mk:
service check_mk
{
    type           = UNLISTED
    port           = 6556
    socket_type    = stream
    protocol       = tcp
    wait           = no
    user           = root
    server         = /usr/local/bin/check_mk_agent

    # configure the IP address(es) of your openITCOCKPIT server here:
    #only_from      = 127.0.0.1 10.0.20.1 10.0.20.2

    # Don't be too verbose. Don't log every check. This might be
    # commented out for debugging. If this option is commented out
    # the default options will be used for this service.
    log_on_success =

    disable        = no
}
To enable the new configuration, you must restart xinetd:
systemctl restart xinetd.service
That's everything that needs to be done on the remote host.
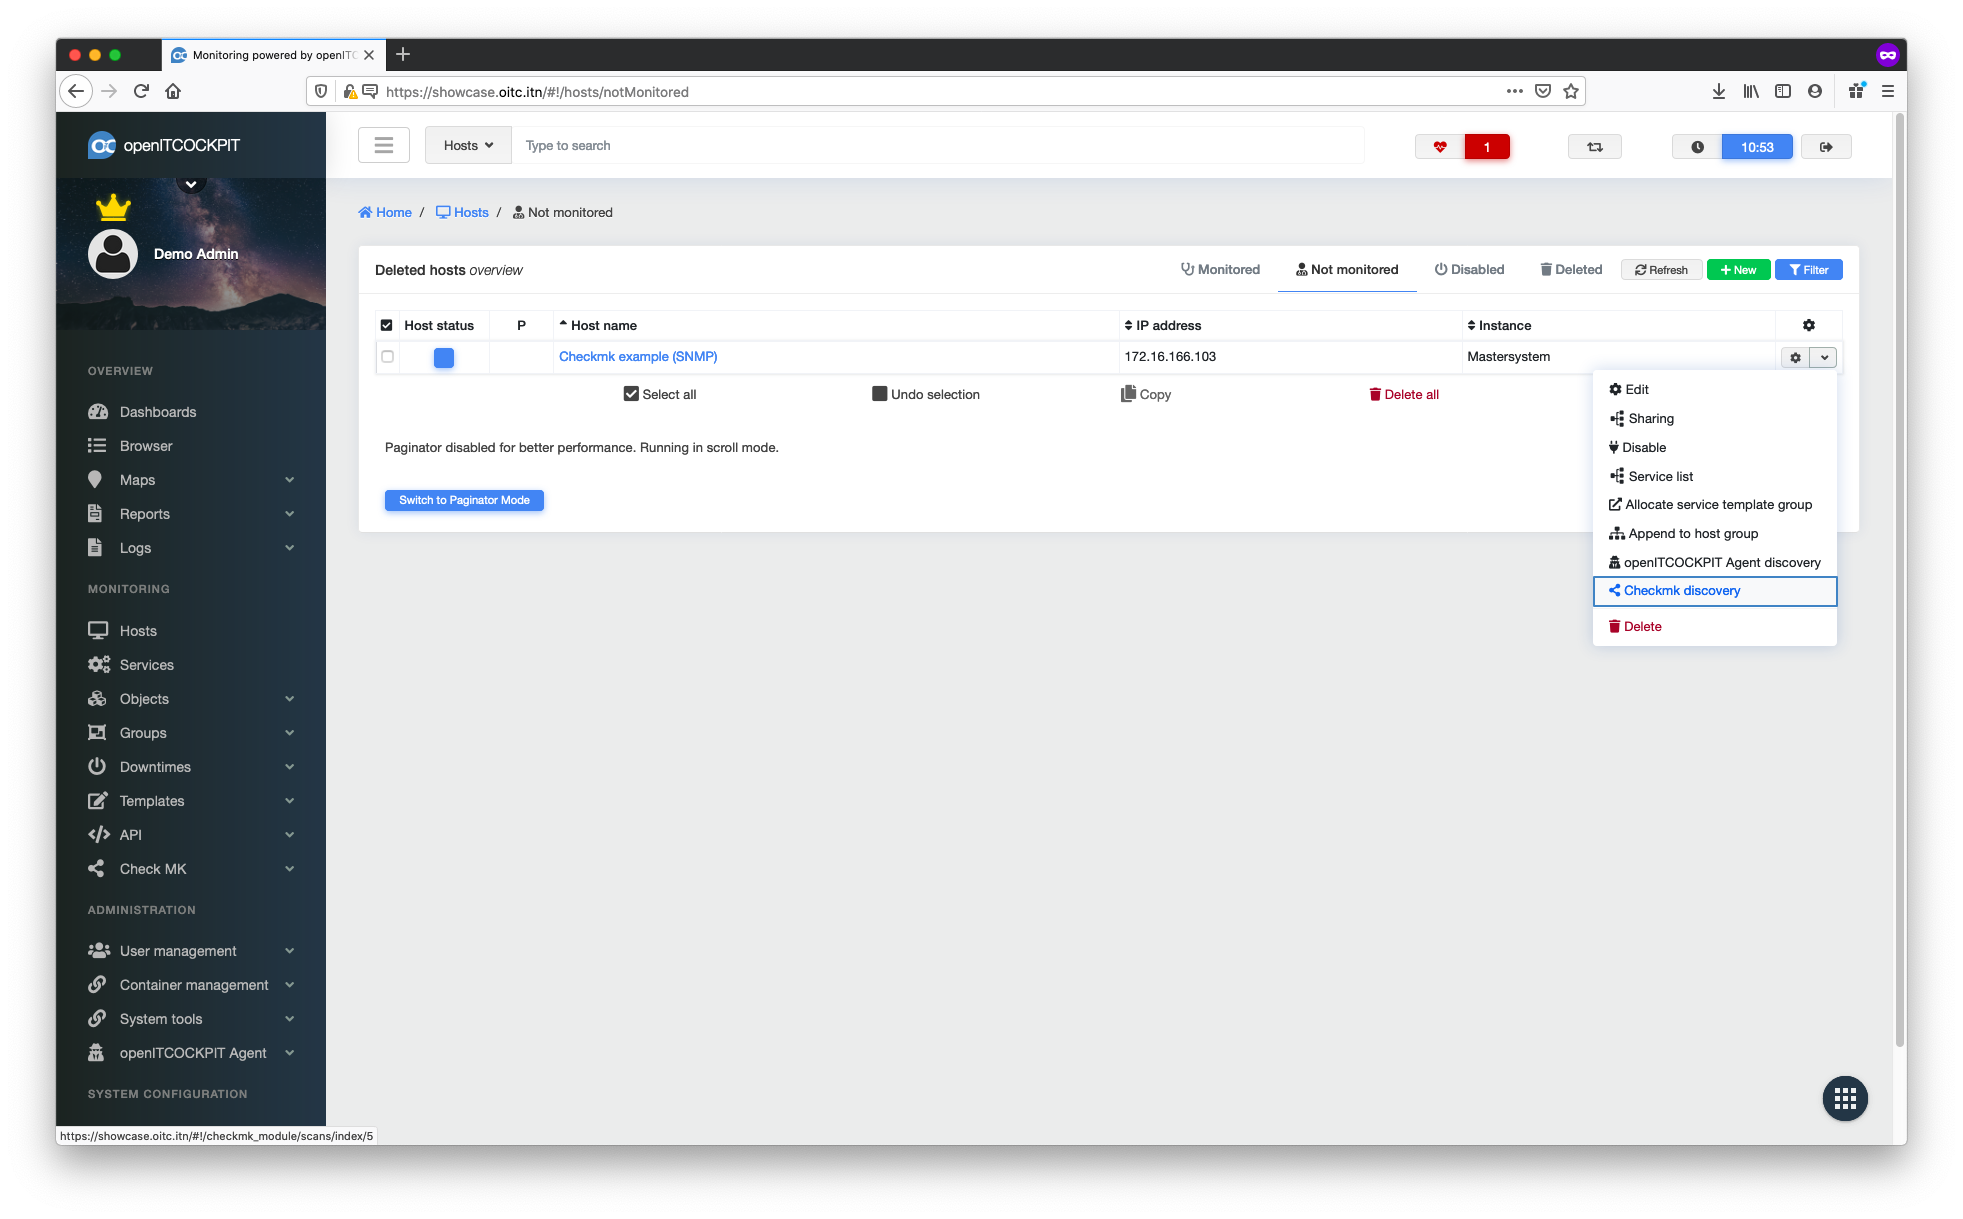
Scanning target host to create checks automatically
In the host systems’ context menu, select the Checkmk detection option.
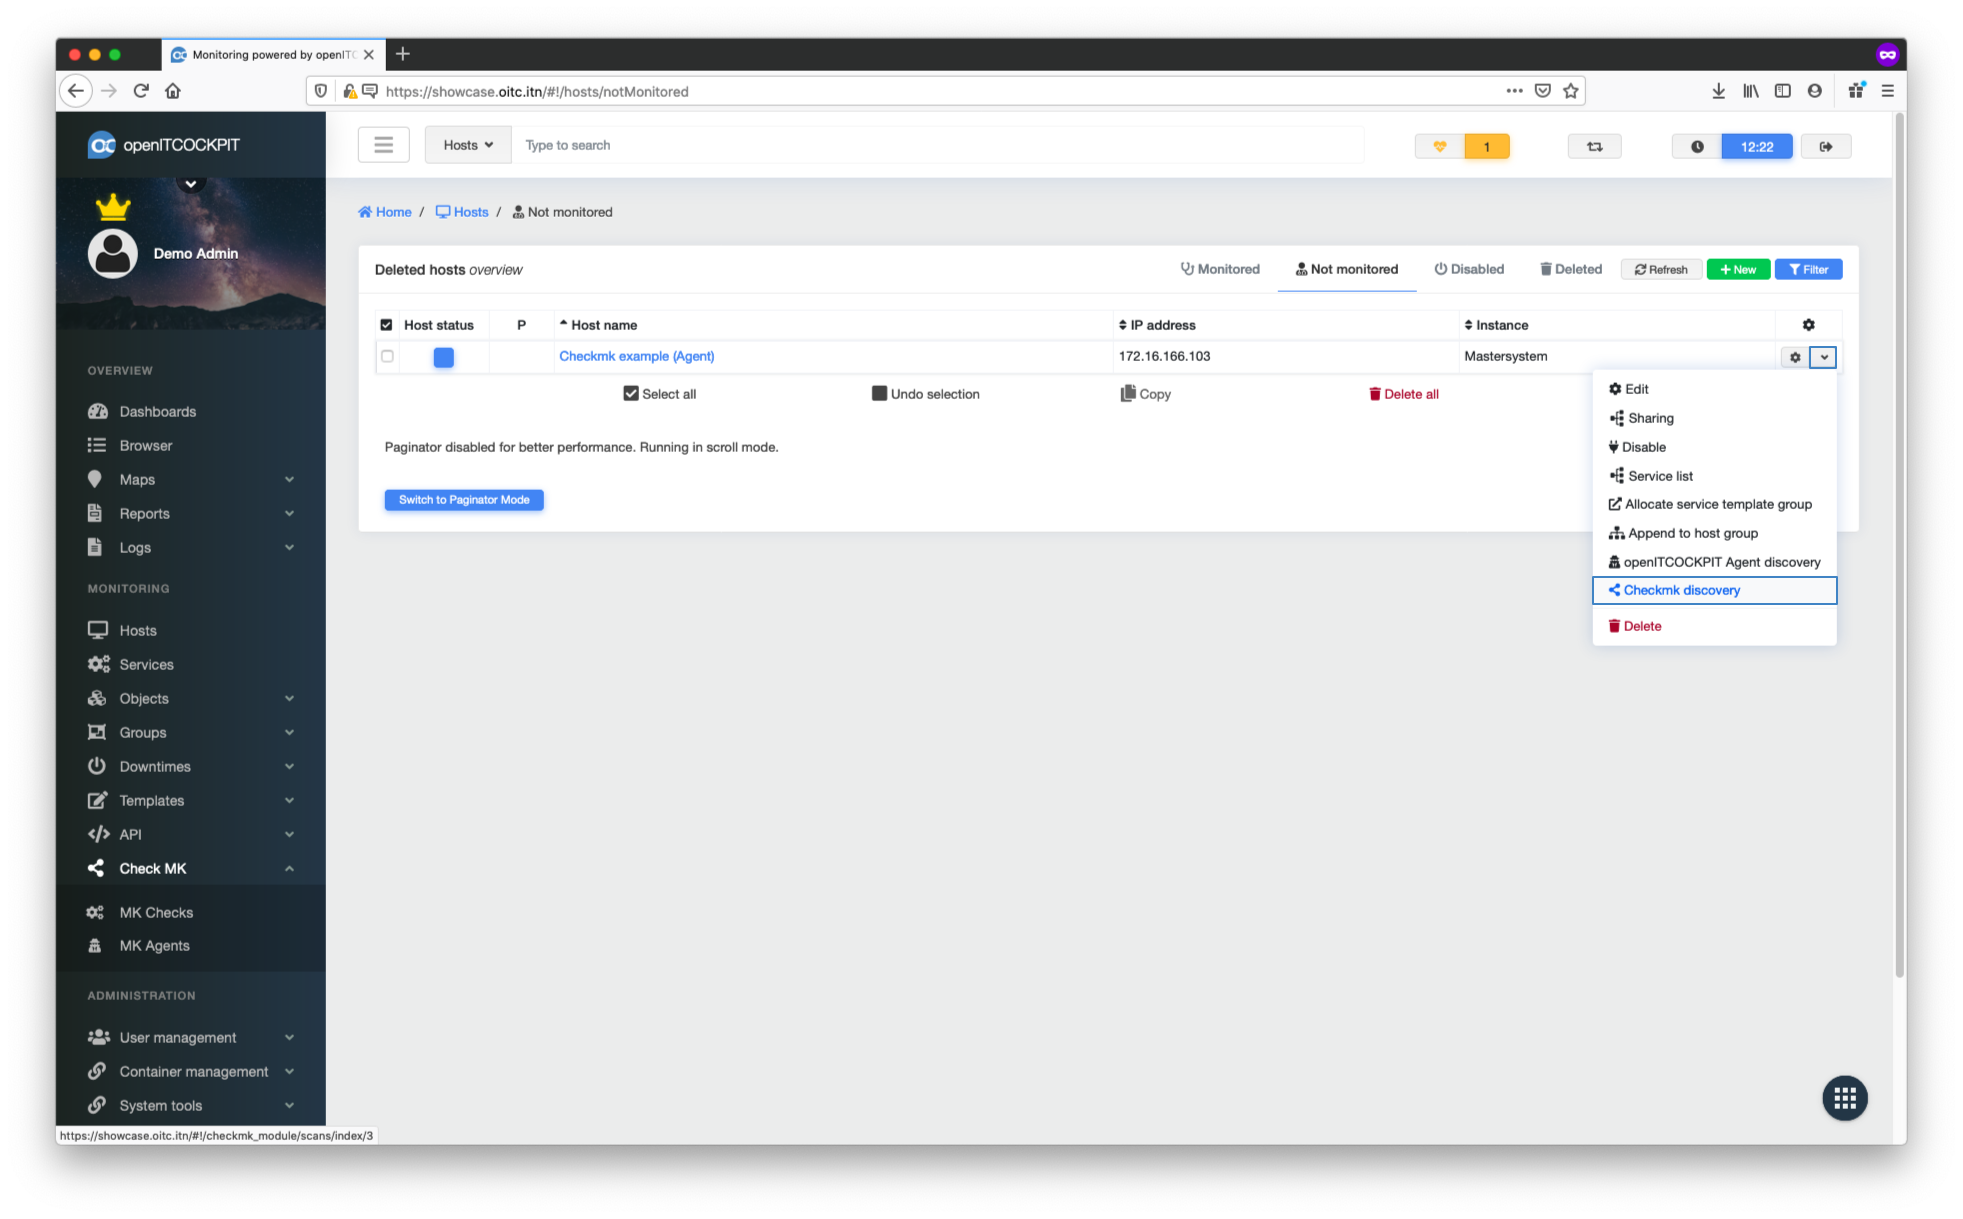
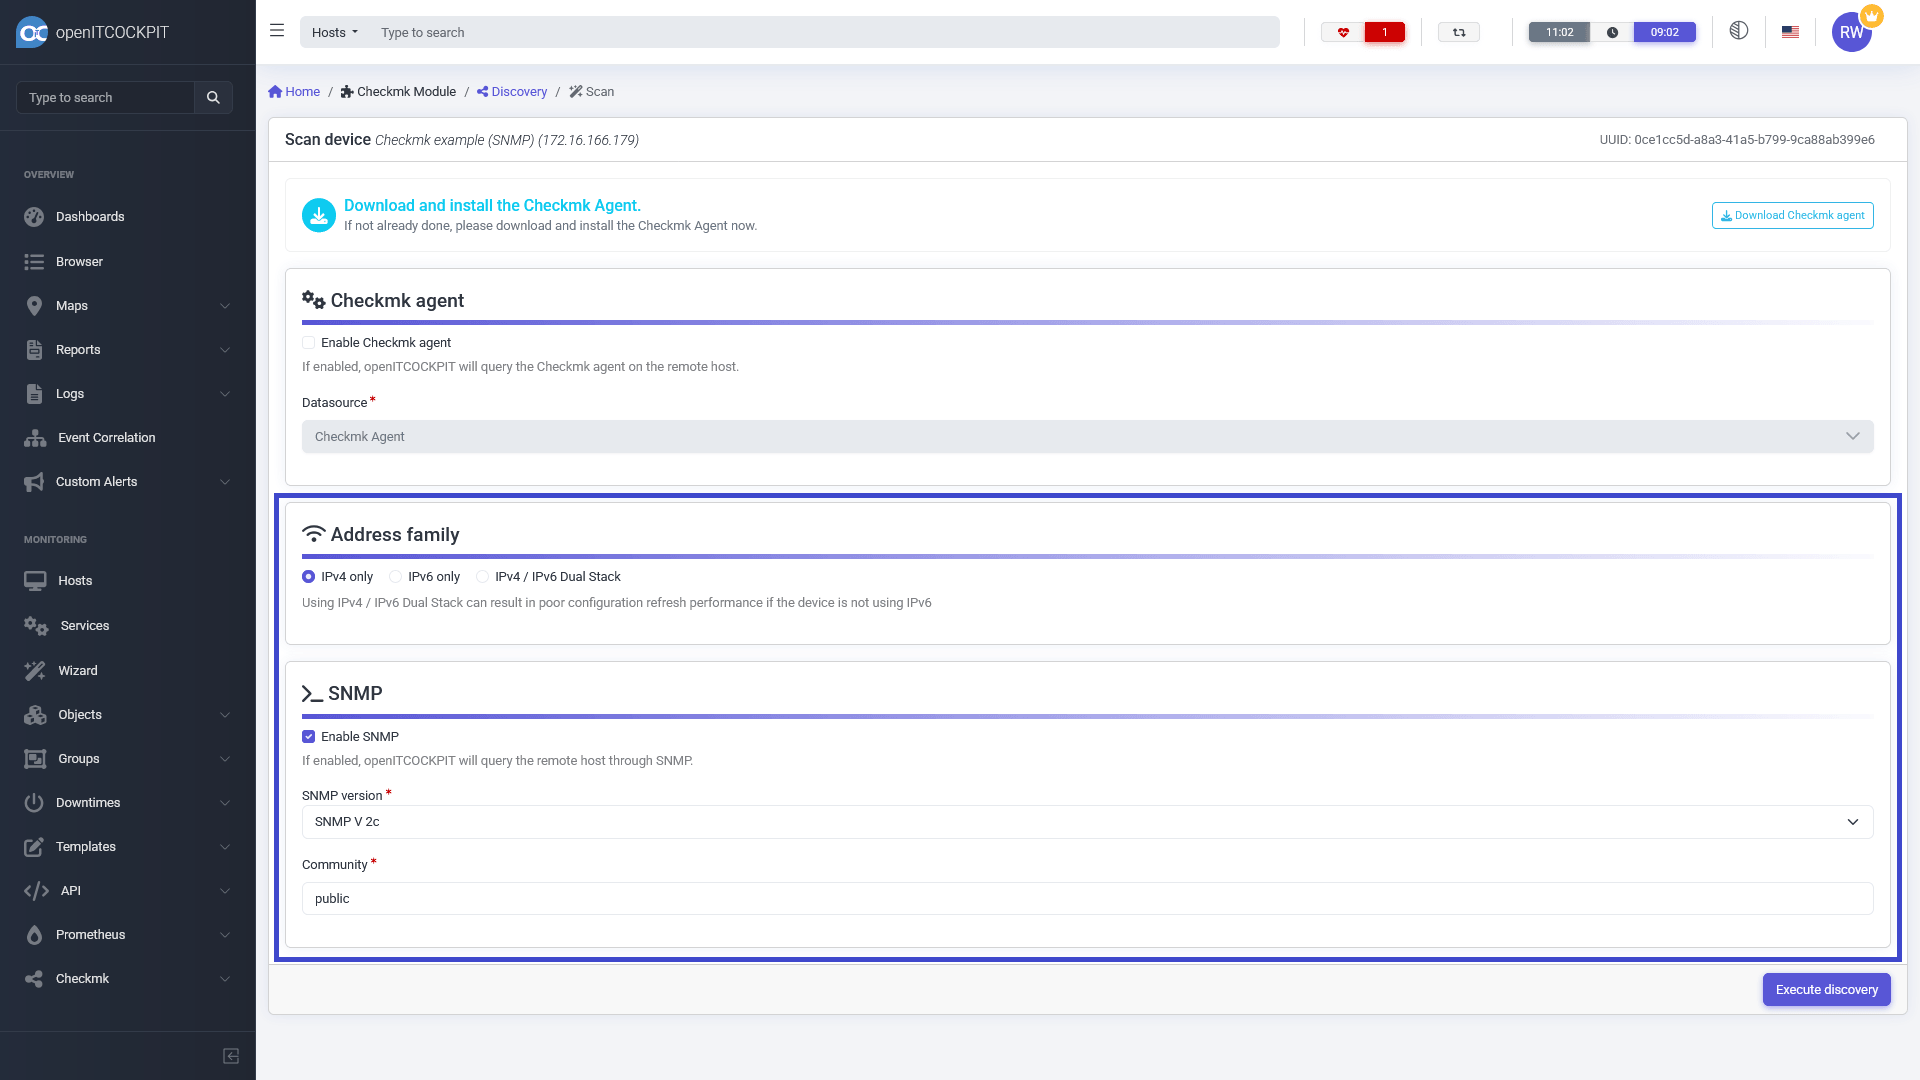
Now select "Use the Checkmk agent for detection". Select Checkmk Agent as the data source.
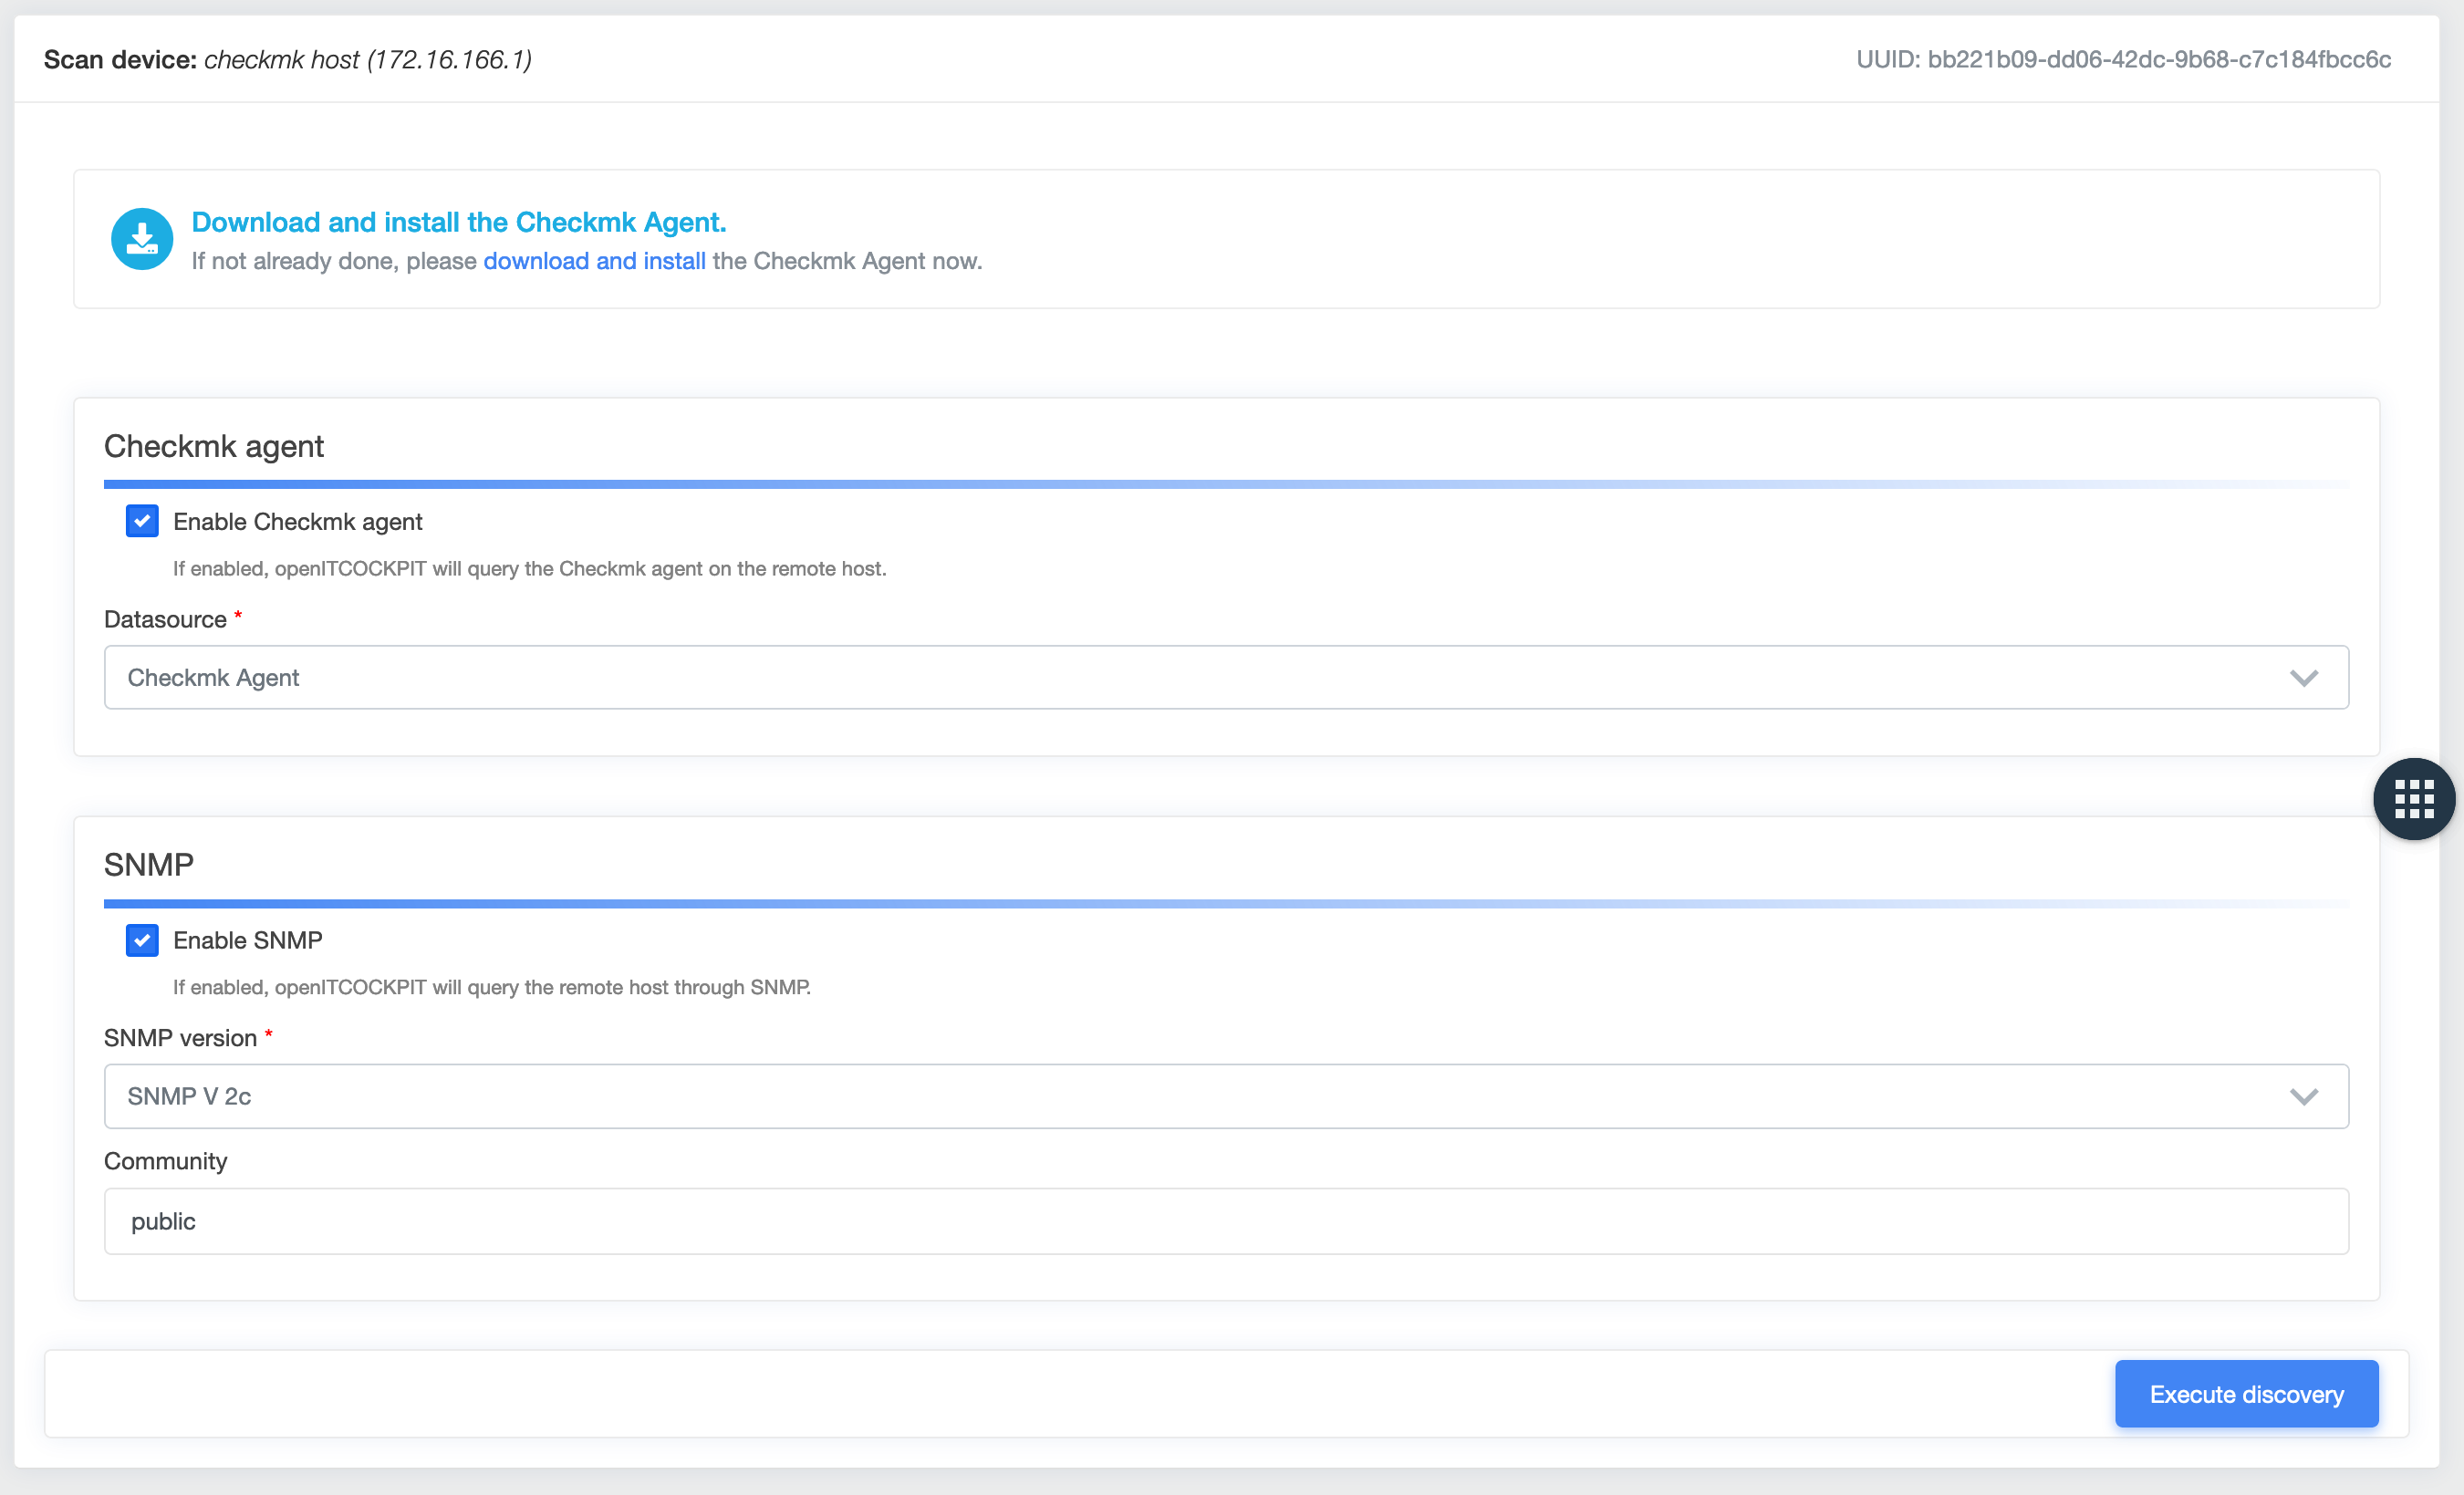
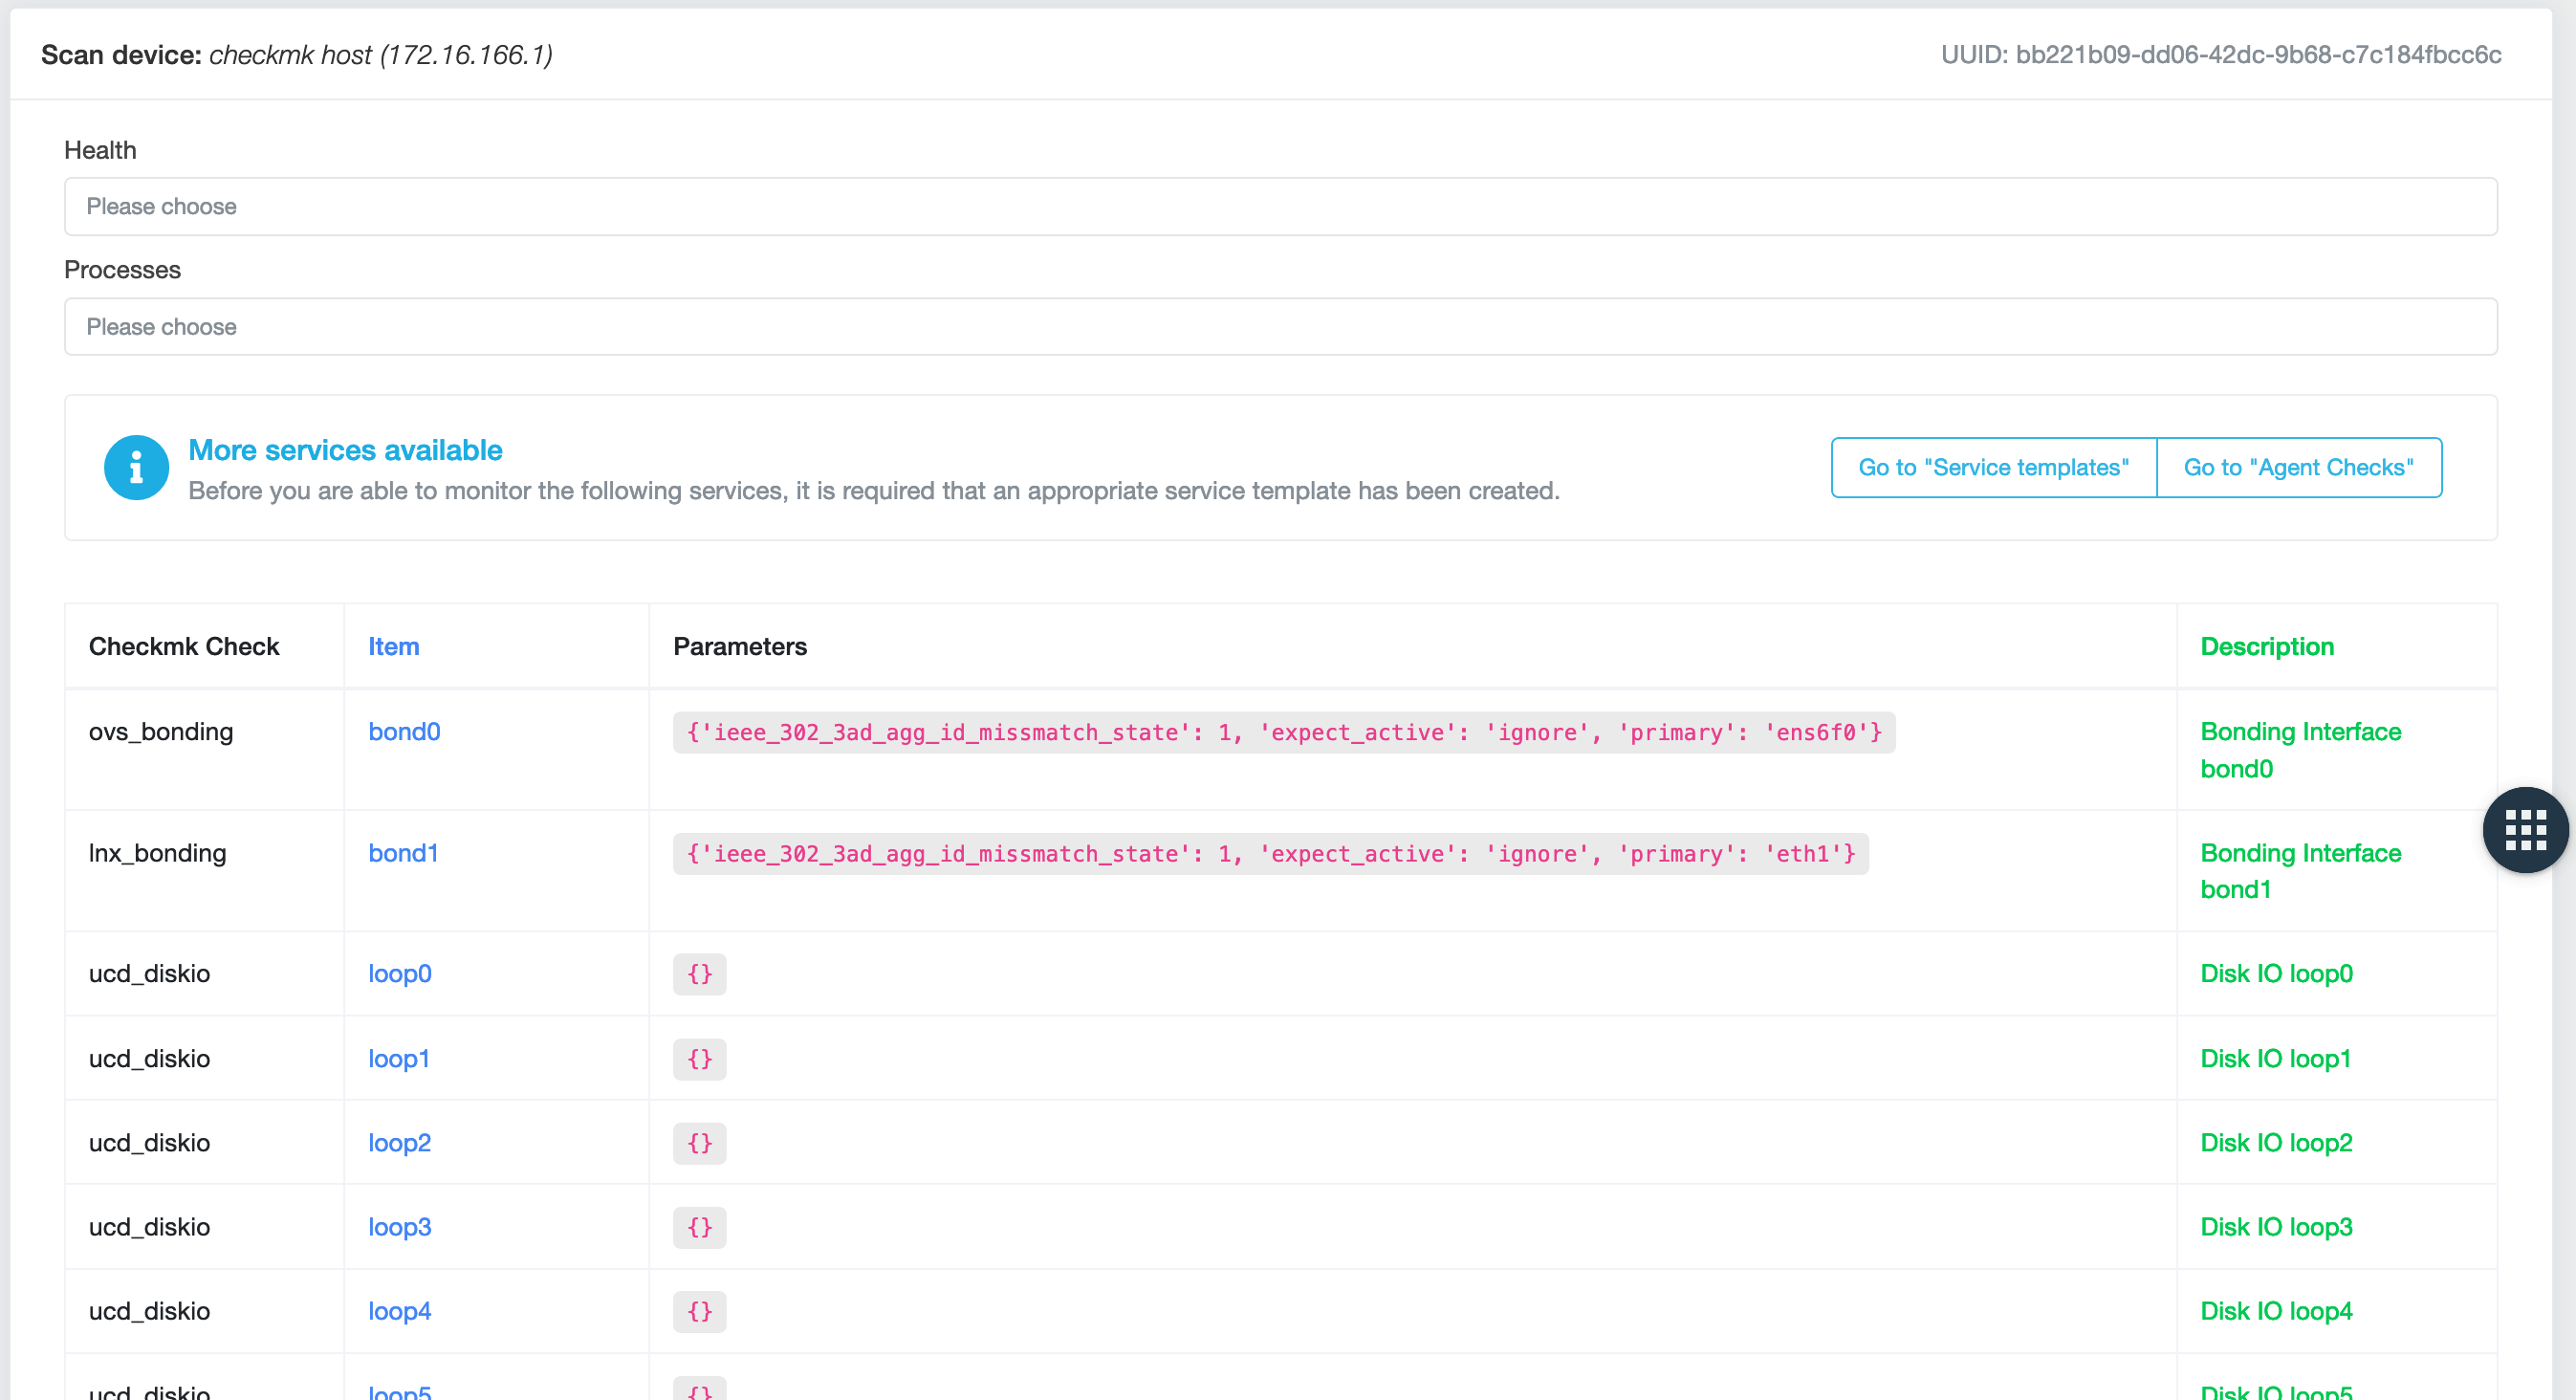
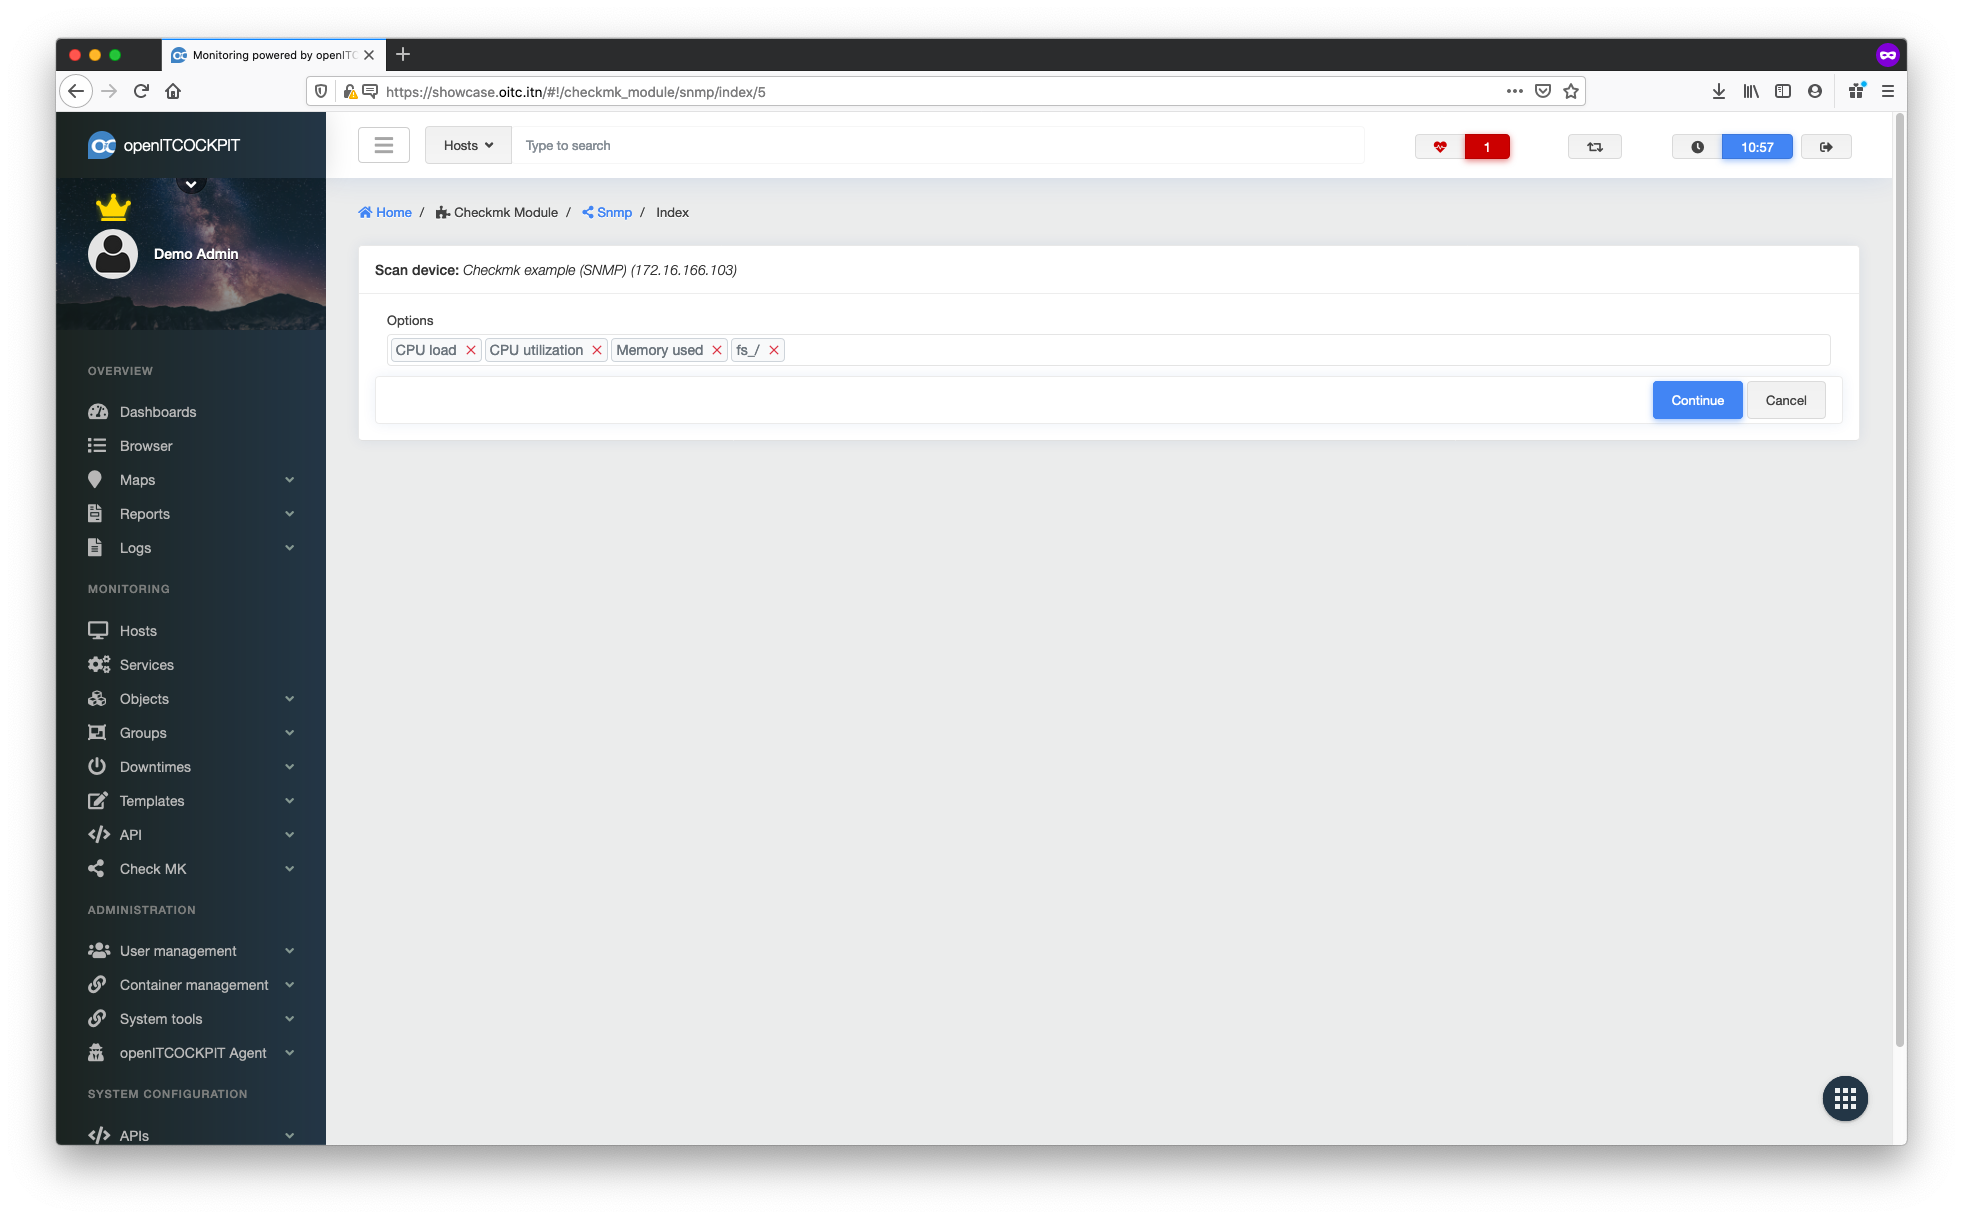
Once the discovery process has completed, you can select any services you wish to monitor. Click Save to continue.
To enable the new configuration, you must update the monitoring configuration.
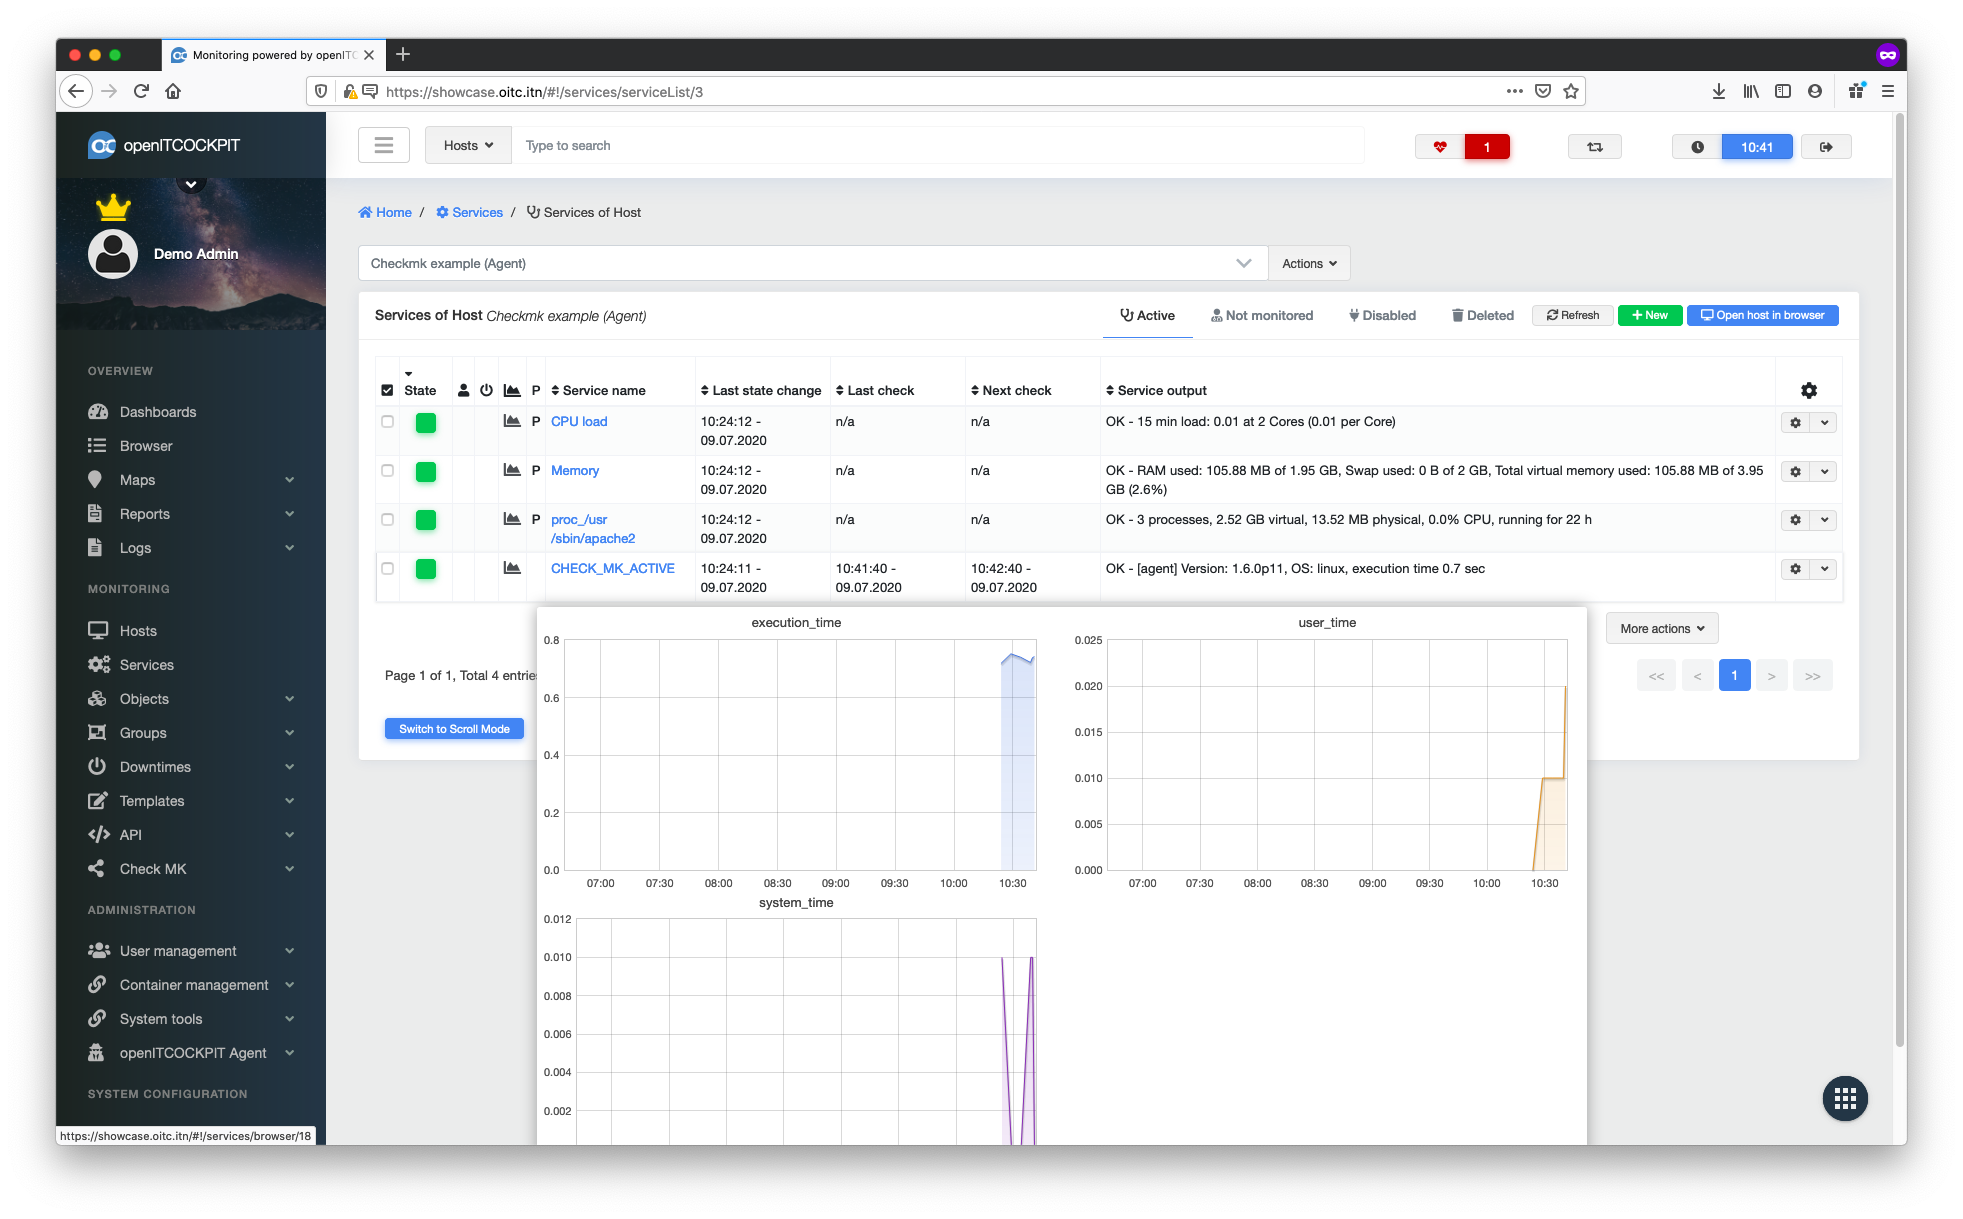
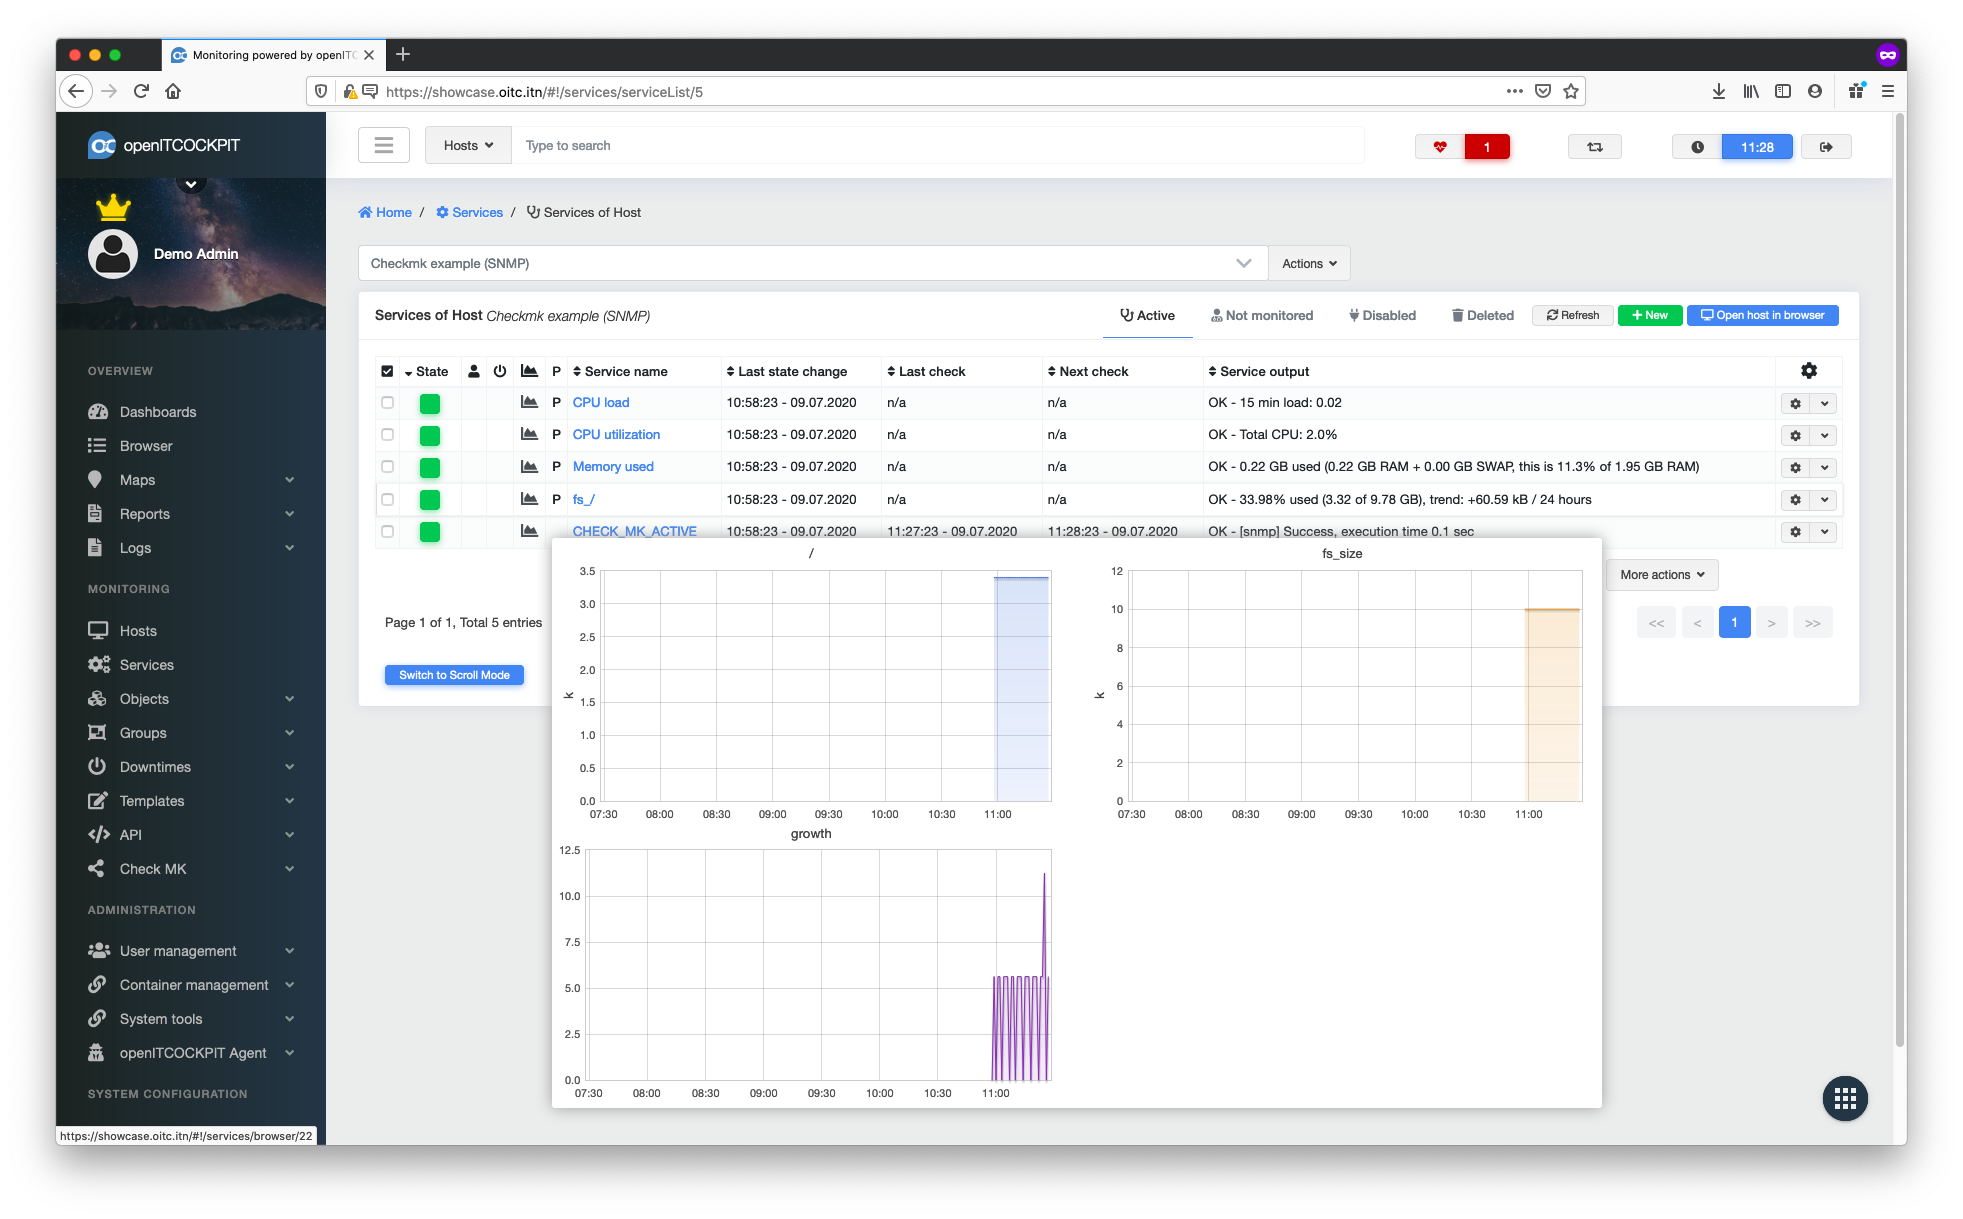
Once this has been done, the system will begin monitoring the selected services a few seconds later. It will also generate graphs whenever this is possible.
Monitoring via SNMP with Checkmk
Many devices such as routers, switches, sensors or operating systems can be monitored via SNMP (Simple Network Management Protocol). Before continuing with this guide, make sure you have read the section entitled Monitoring with Checkmk.
Get SNMP data for the target device
Before you get started, please check whether your monitoring server is able to query SNMP data from the target device.
The program snmpwalk can be used for this.
In this example we will query an Ubuntu Linux machine running snmpd version 2c and the community public.
snmpwalk -v2c -c public 172.16.166.179
You should then see output similar to this:
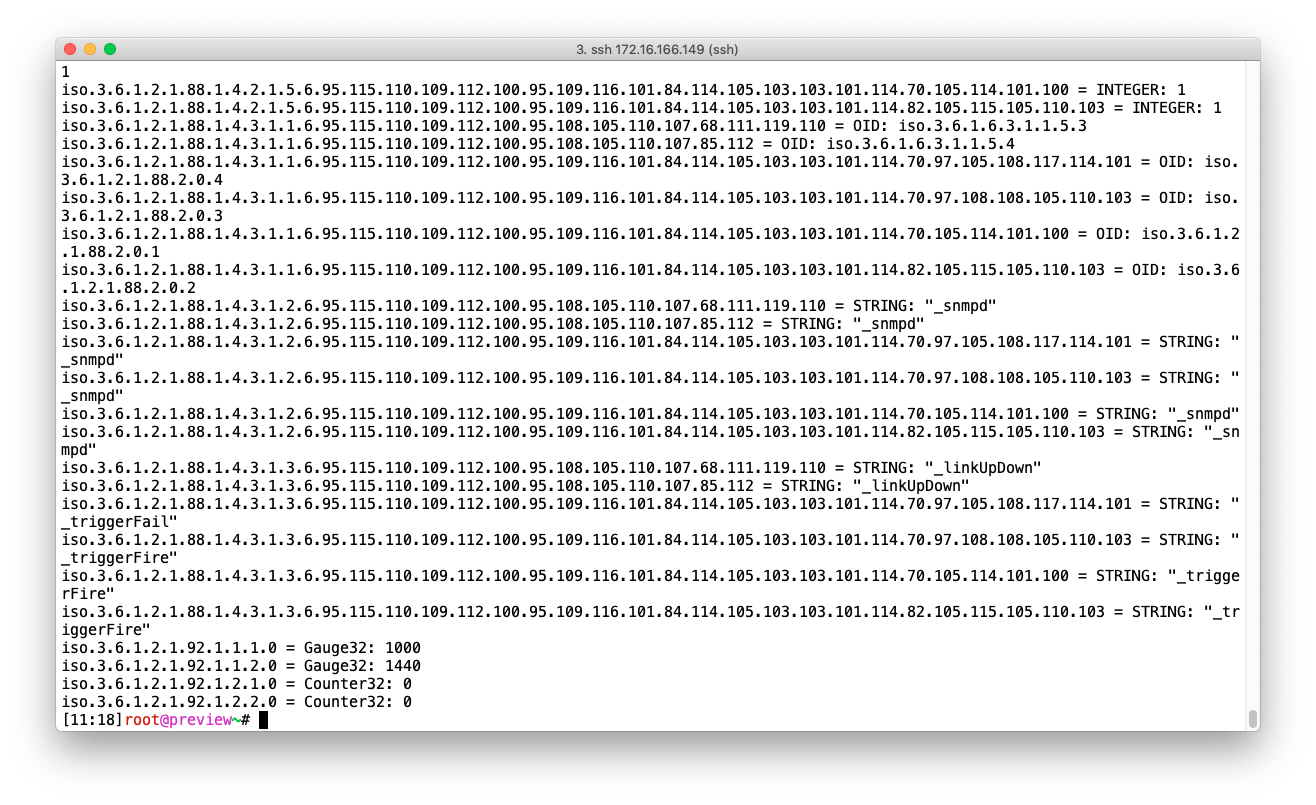
If your system is not able to connect to the target system, check your firewall settings to see whether you are using the wrong SNMP version.
Monitoring a Linux host using SNMP via Checkmk
Select the Checkmk detection option in the context menu for the host system.
Select the Enable SNMP option. The system will ask you for the required SNMP parameters. The SNMP configuration is
saved on a per host basis, so you won't have to enter this data again. Then click Run detection to continue.
Once the discovery process has completed, you can select any services you would like to monitor. Click Next to
continue.
To enable the new configuration, you must update the monitoring configuration.
Once this has been done, the monitoring system will begin monitoring the selected services a few seconds later. It will also generate graphs whenever this is possible.
Using description for SNMP interfaces
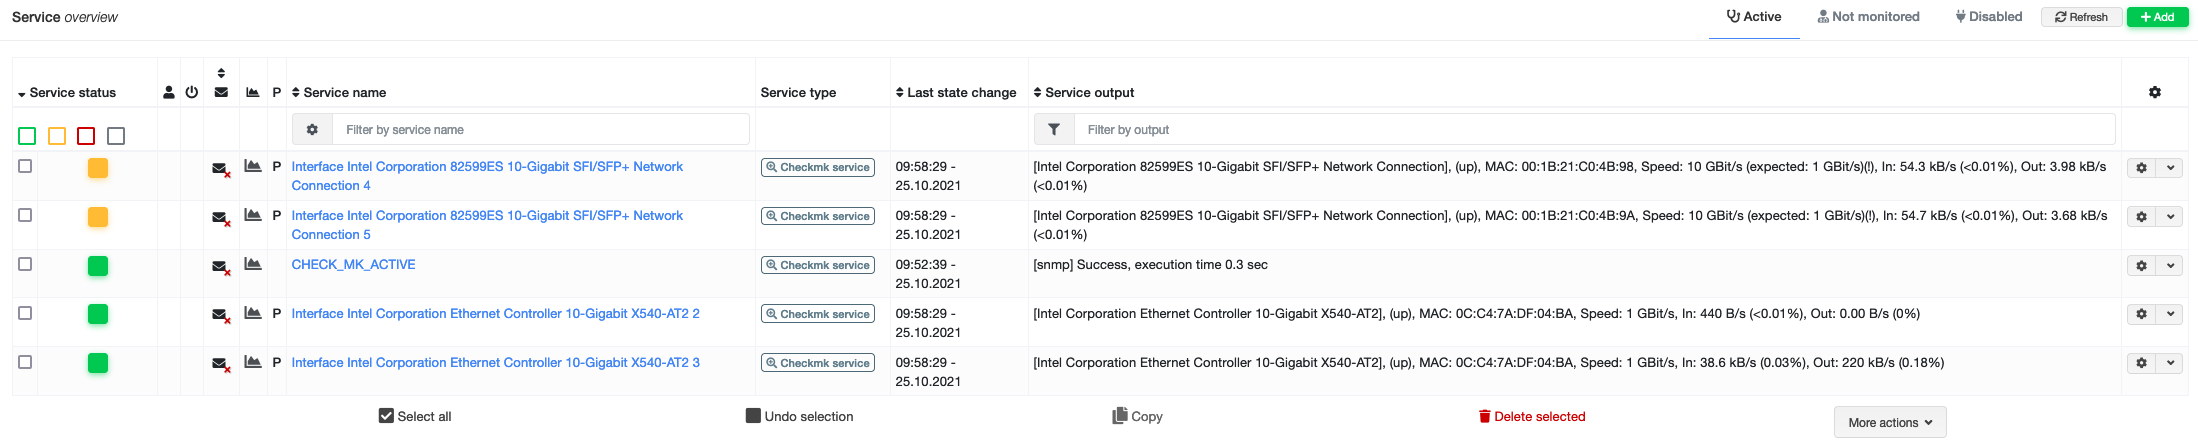
Depending on the device being monitored, it is advisable to use the SNMP description or alias instead of the index as the identifier for network interfaces.
By default, the index is used for monitoring interfaces. This can be easily recognised by the interface name.
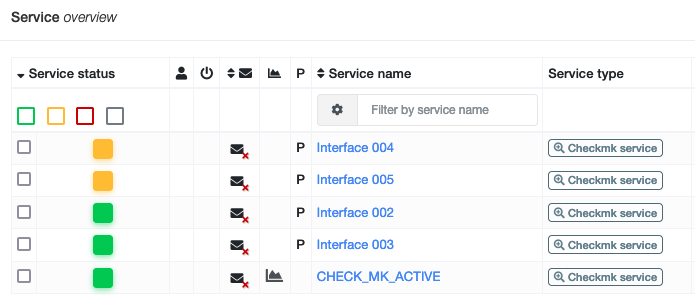
If you would prefer to use the interface description instead of the index, a new Checkmk rule must be created.
To do this, create the file
/opt/openitc/check_mk/etc/check_mk/conf.d/wato/interface_description_rule.mk
with the following content:
globals().setdefault('inventory_if_rules', [])

inventory_if_rules = [
{'id': '35a60268-6aa0-4fb8-8fed-ba51e6b1d1e3', 'value': {'discovery_single': (True, {'item_appearance': 'descr', 'pad_portnumbers': True}), 'matching_conditions': (True, {})}, 'condition': {}},
] + inventory_if_rules
Any new interface checks you create will now use the description.
If you choose to use the alias instead of the (description) , you must use the following: 'item_appearance': 'alias'
.
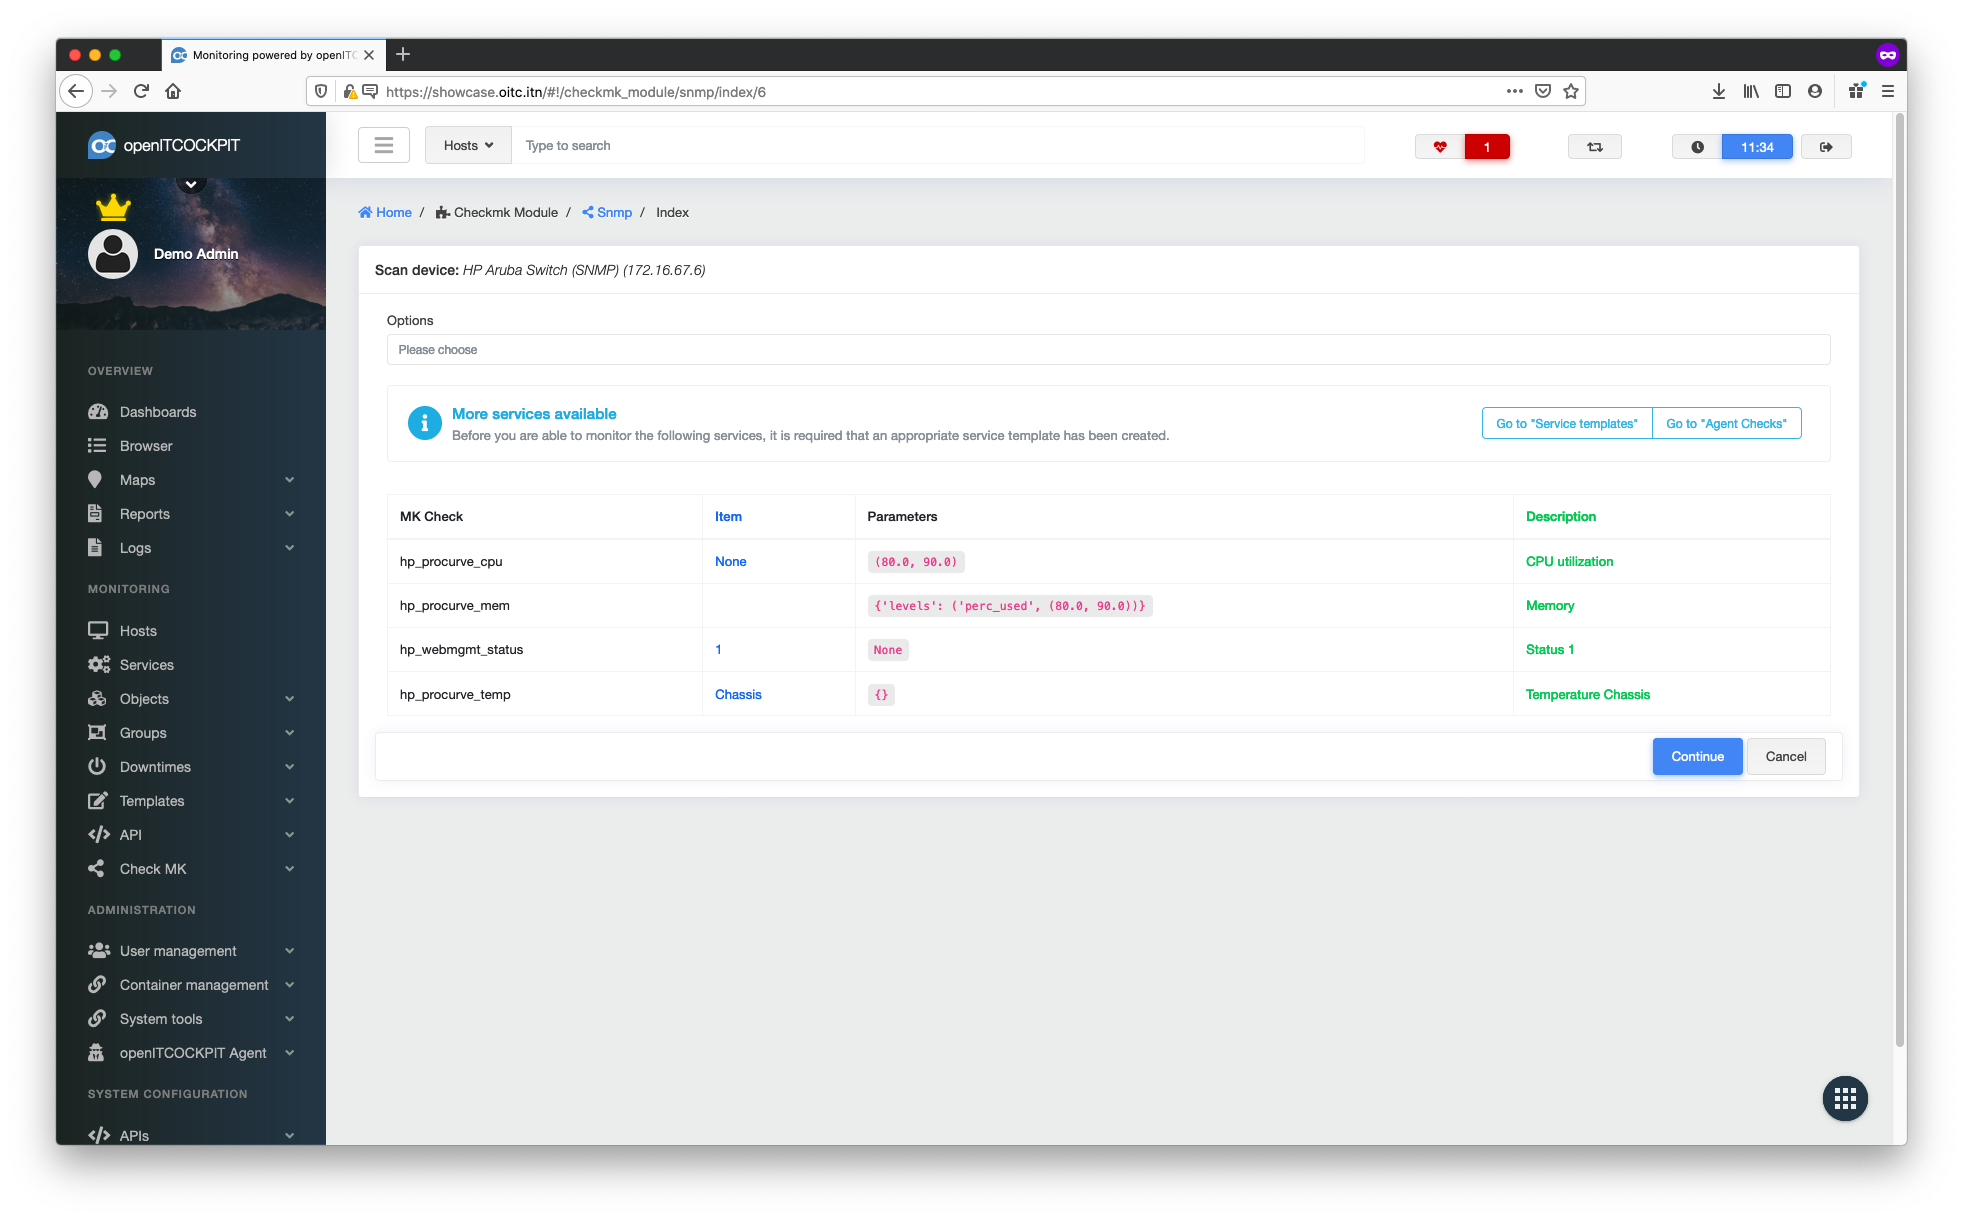
Create missing service templates for Checkmk.
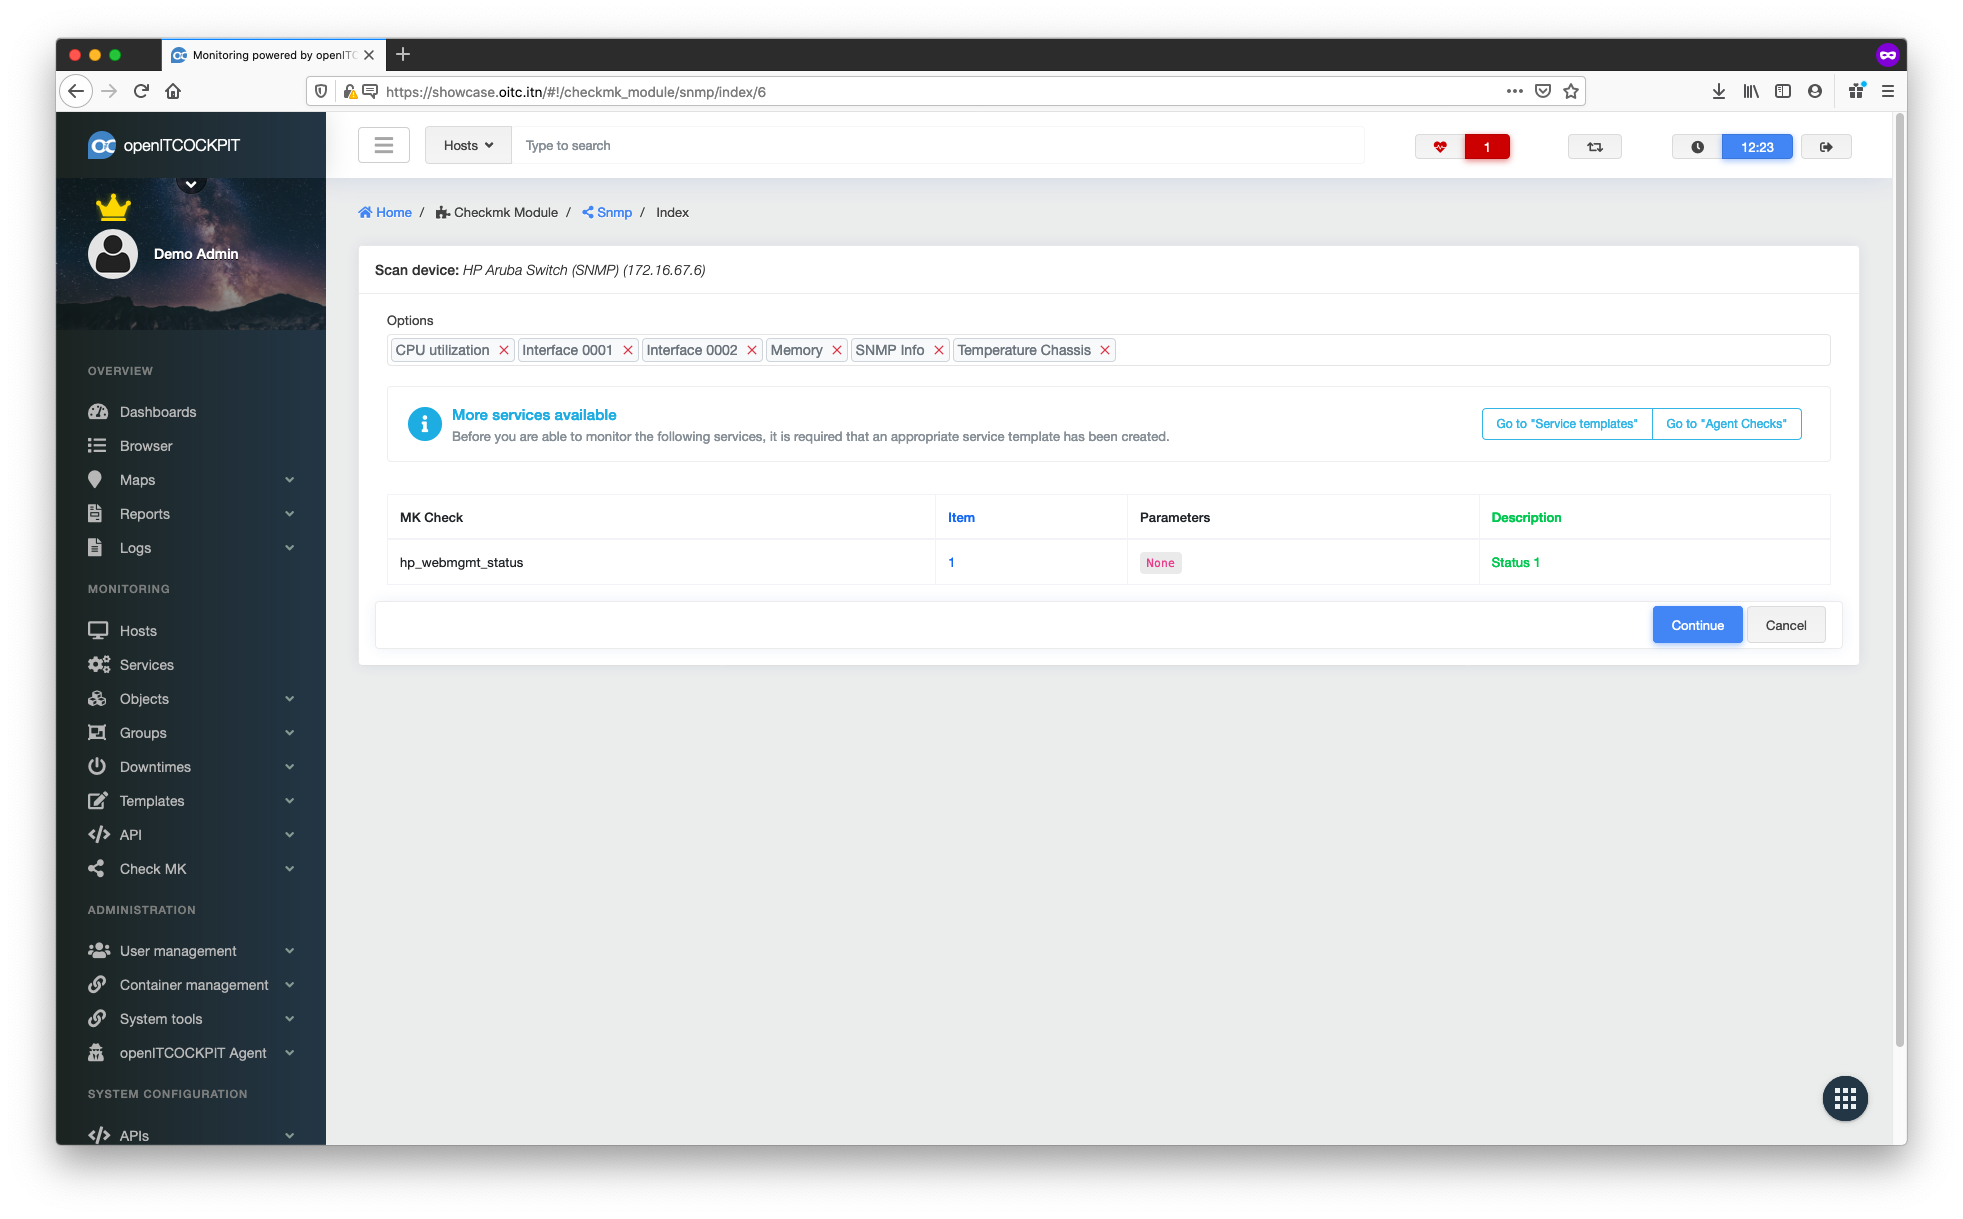
Depending on the device on which you want to perform a discovery, you may find that the Options selection box is empty
and the following
text Before you can monitor the following services, a corresponding service template must be created. appears,
followed by a table. If this is the case, you will have to create the missing service templates.
Creating missing service templates
Open a new browser window and navigate to Monitoring -> Templates -> Service Templates and click + New.
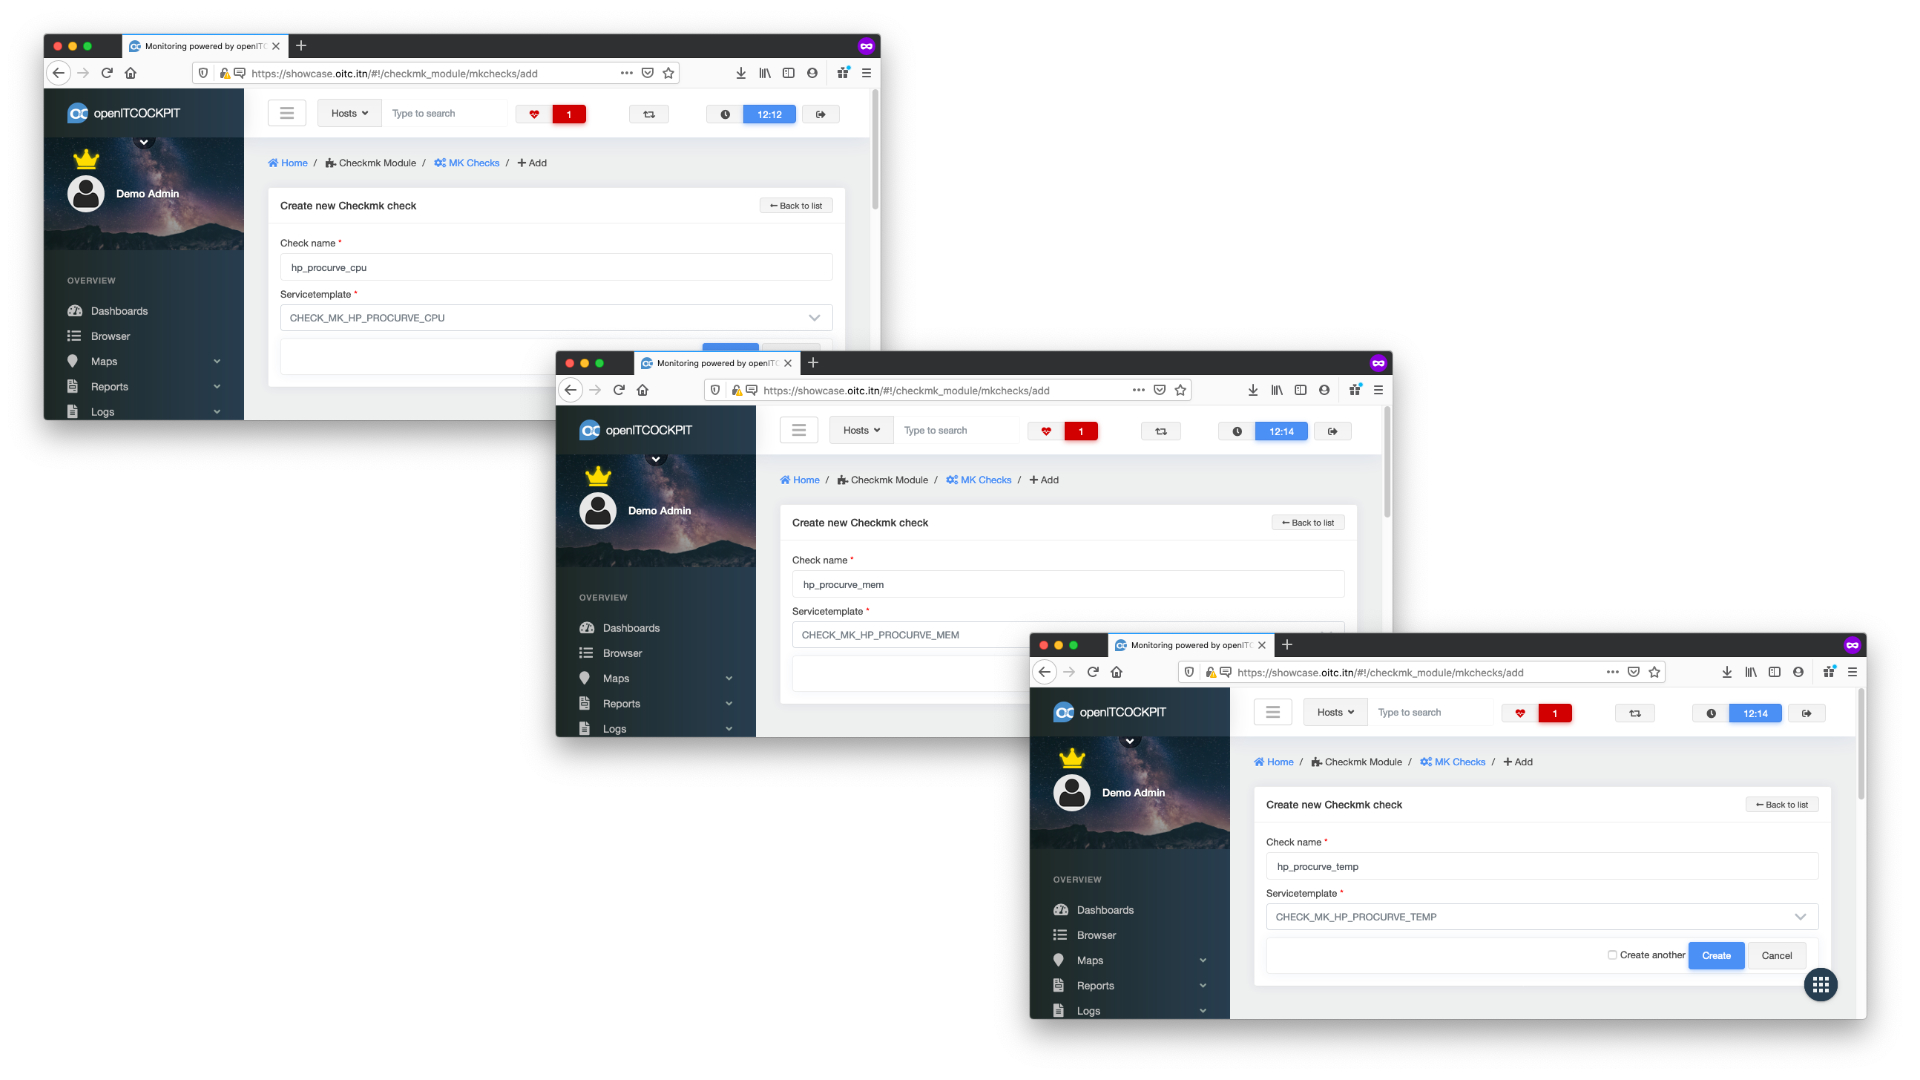
Create a service template for hp_procurve_cpu
It is recommended you use the same name for a service template as Checkmk uses (MK Check). In this case, the MK Check
is hp_procurve_cpu so we use CHECK_MK_HP_PROCURVE_CPU as the service template name. Set Checkmk templates as the
template type. Disable Enable active checks, use check_none as the check command and set the Parameter from the
table as ARG1.
Confirm with Create service templates
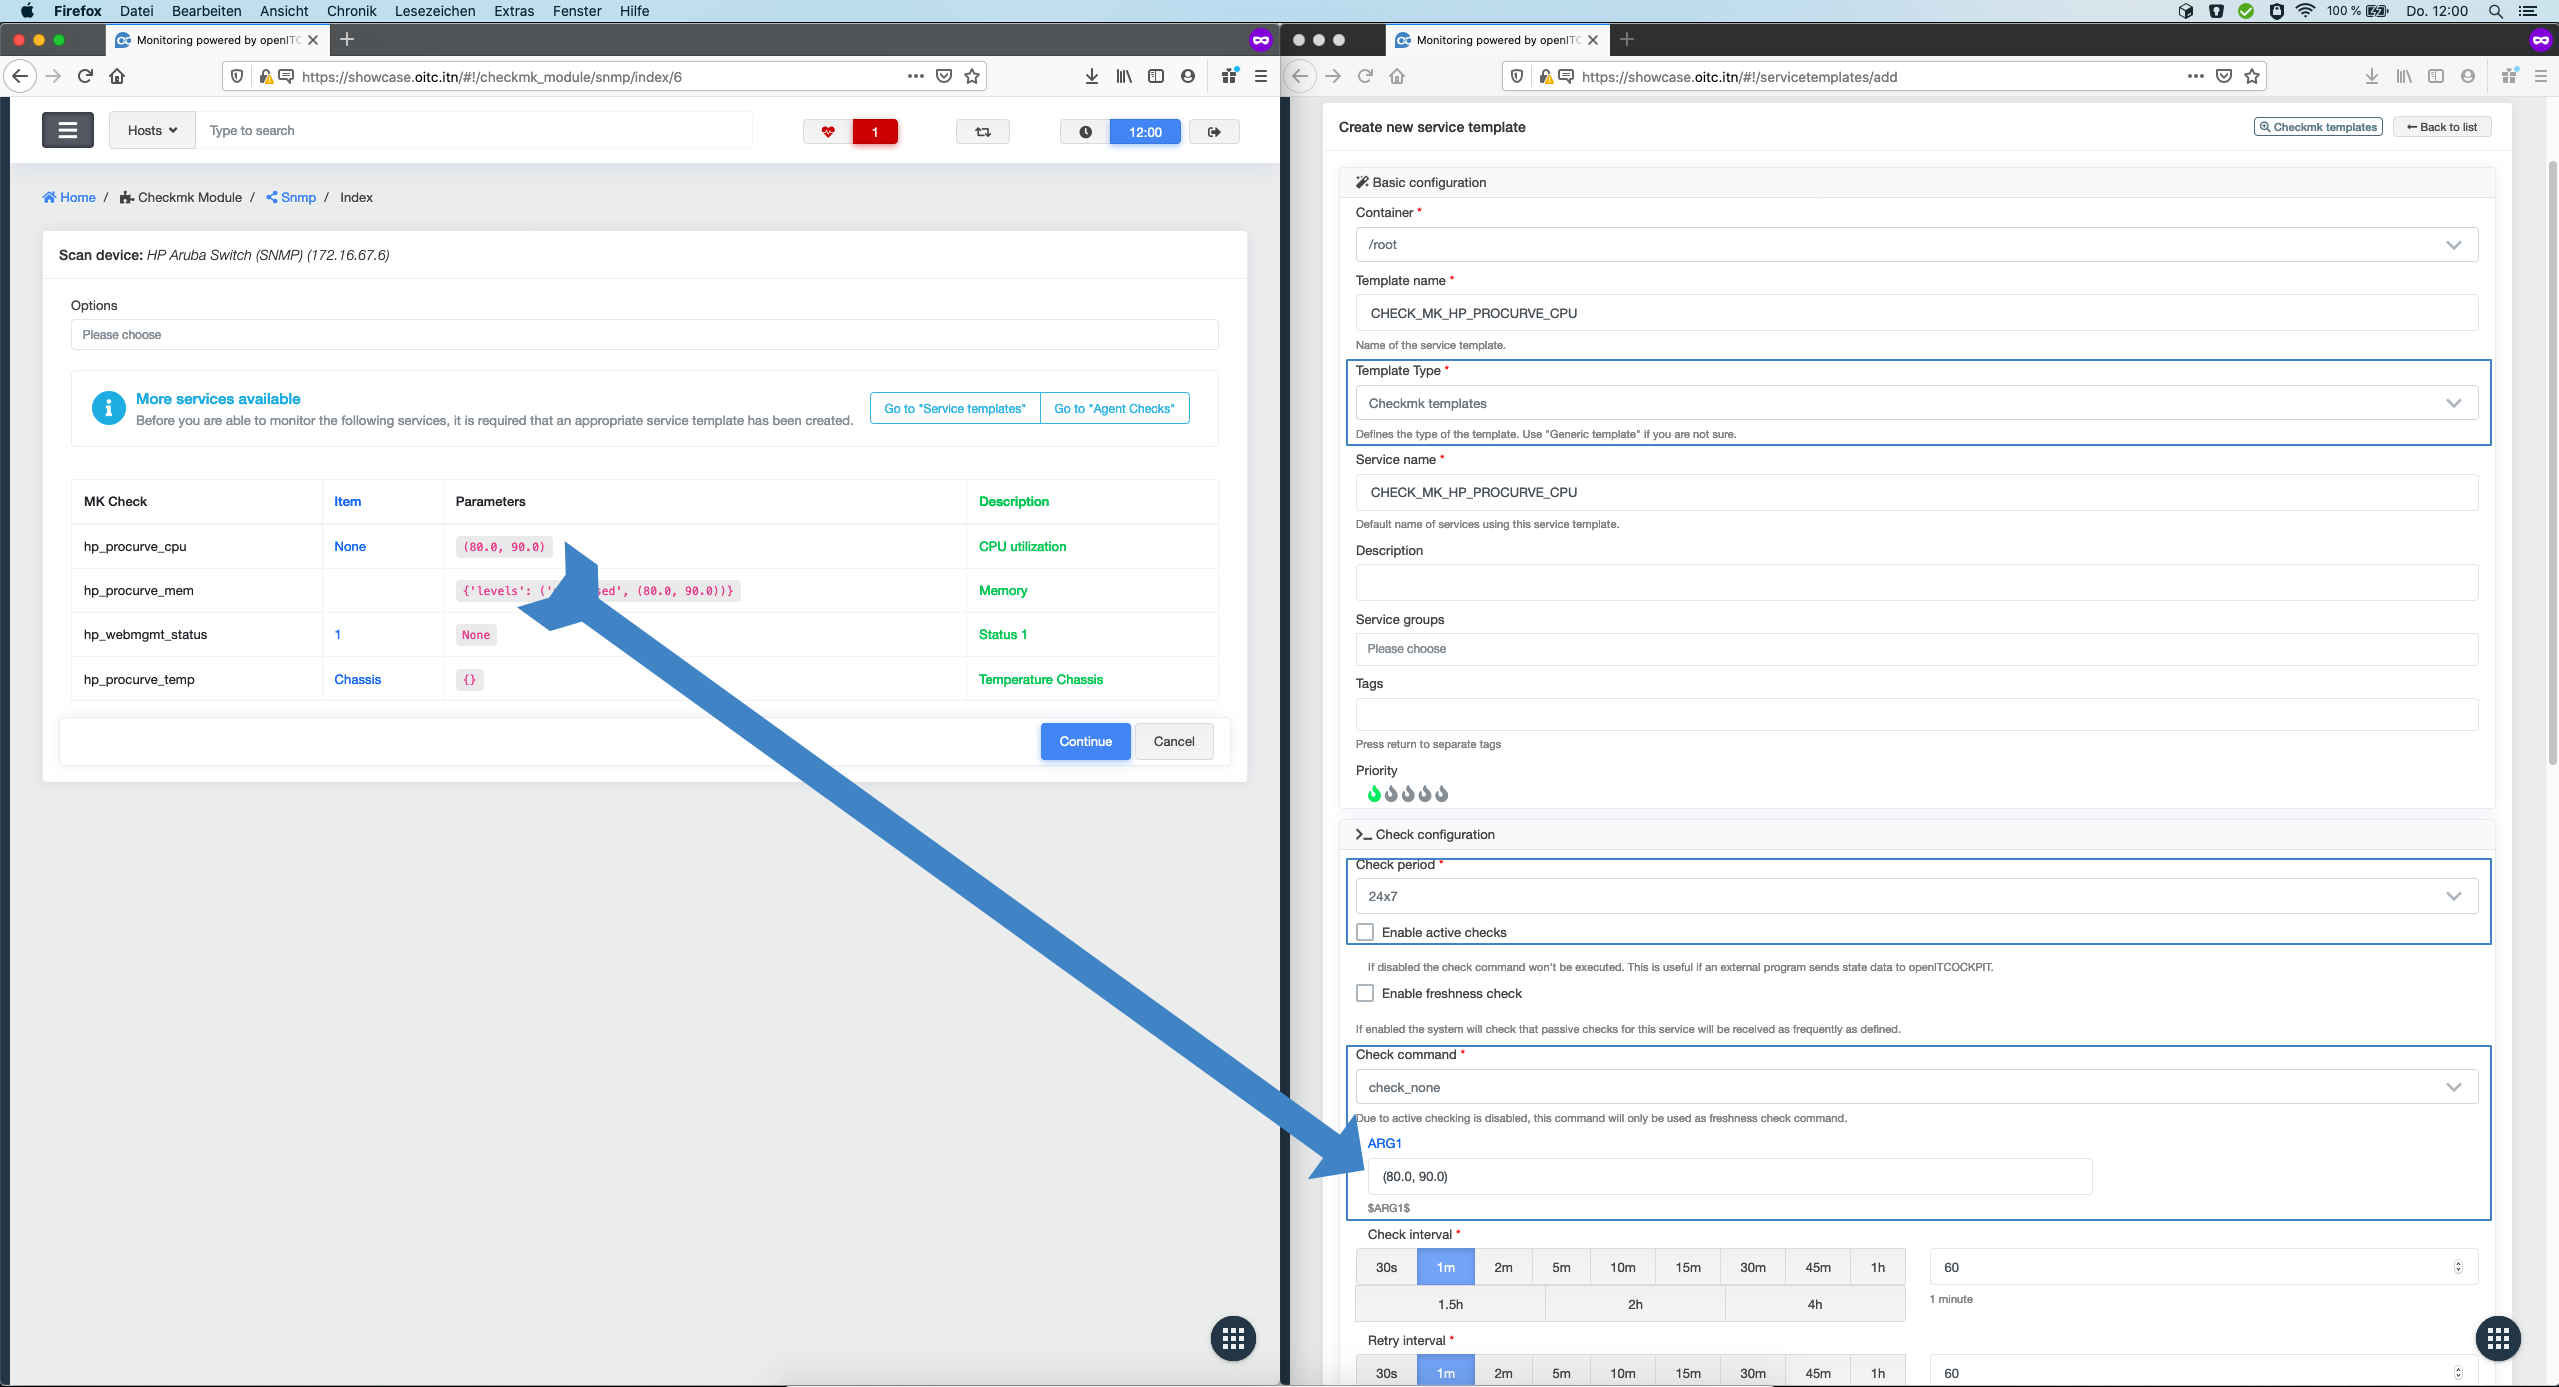
Servicevorlagen Parameter Übersicht:
| Parameter | Value |
|---|---|
| Template name | CHECK_MK_HP_PROCURVE_CPU |
| Service name | CPU load on HP Procurve |
| Template type | Checkmk templates |
| Enable active checks | No |
| Check command | check_none |
| ARG1 | (80.0, 90.0) |
| Check period | 24x7 |
| Max. number of check attempts | 1 |
| Check interval | 60 |
| Retry interval | 60 |
Repeat these steps for any service templates that may be missing.
Link service templates to MK Checks
Go to Check MK -> Mk Checks and click the + New button.
Set hp_procurve_cpu as Check name and select the corresponding service template CHECK_MK_HP_PROCURVE_CPU.

Now repeat this for all service templates.
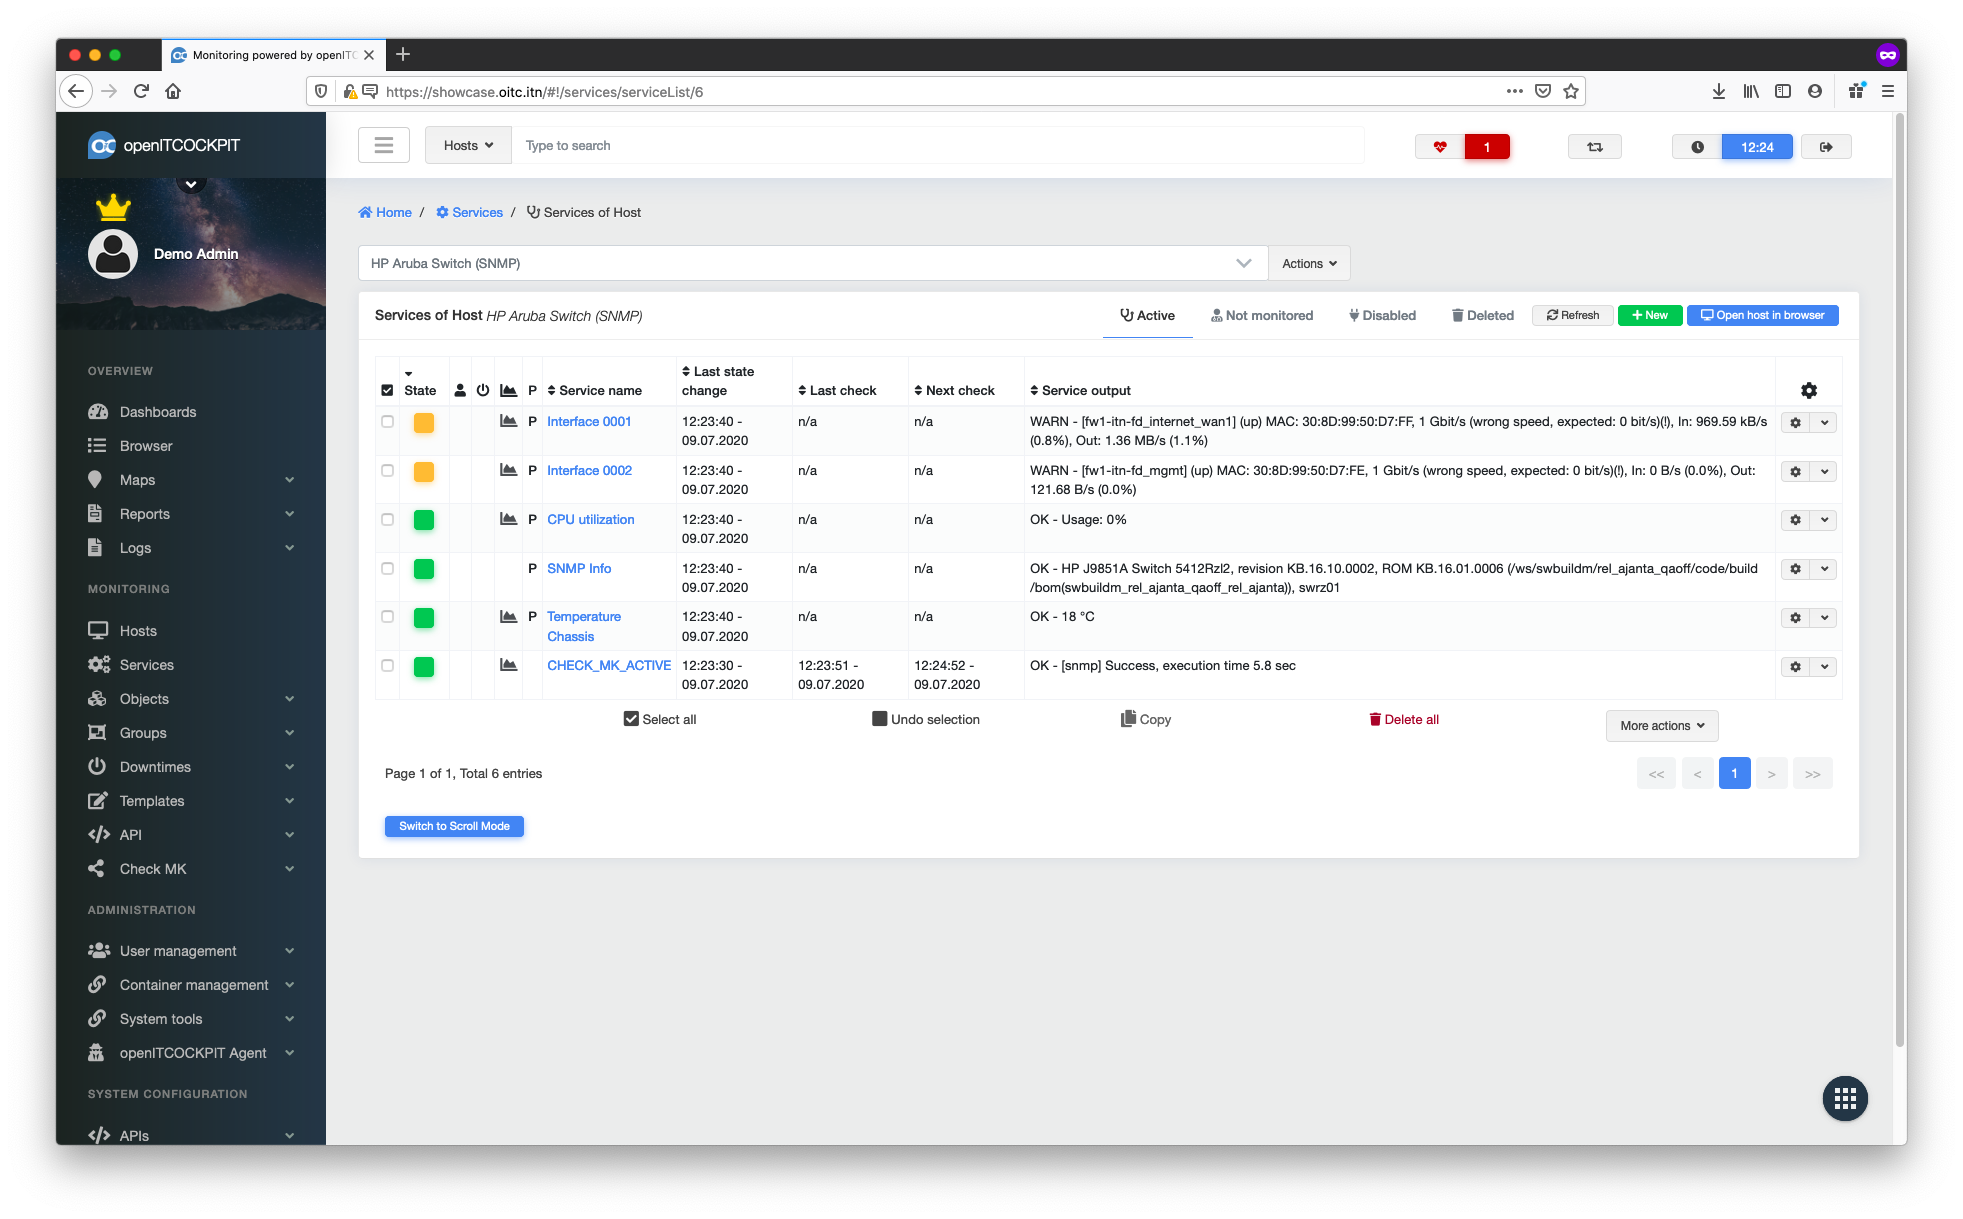
Creating services
You are now able to create the services you want to monitor. Restart SNMP Discovery and select all desired services from the list that appears.
To enable the new configuration, you must update the monitoring configuration.
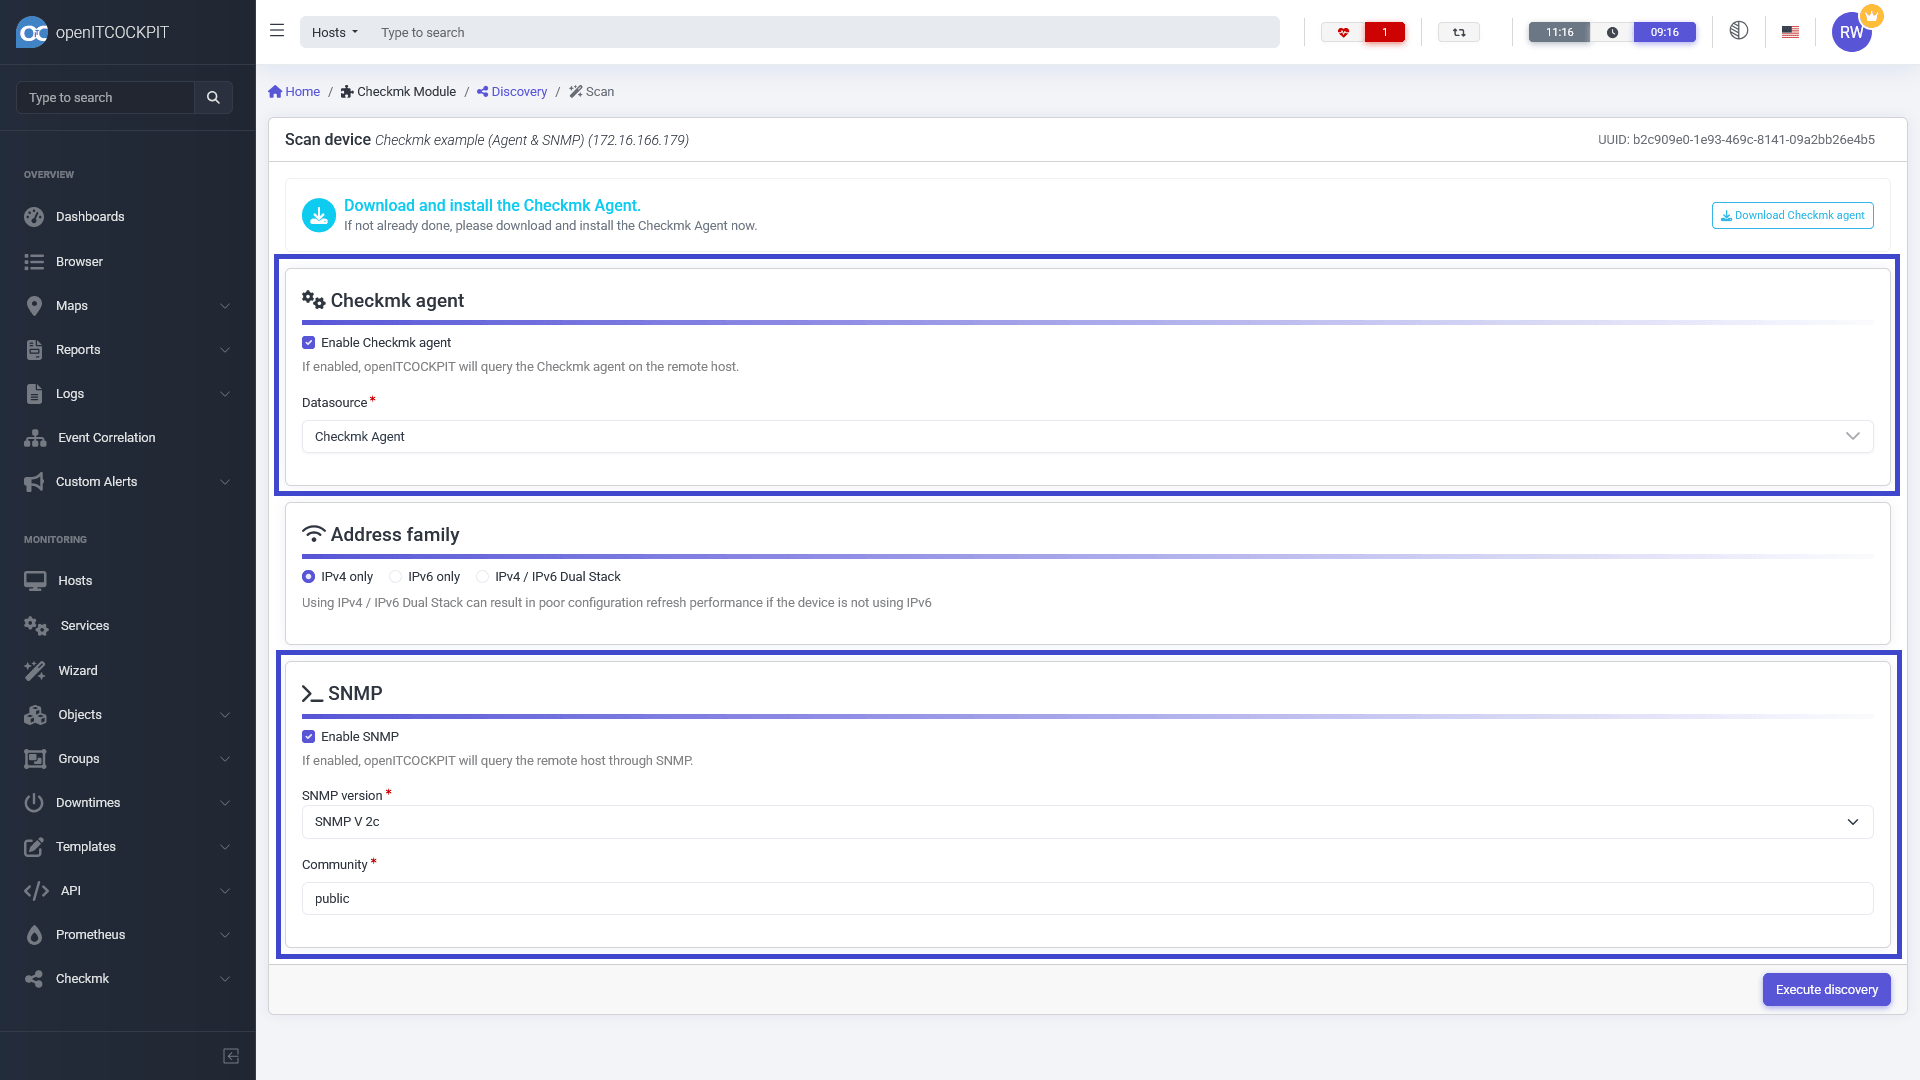
Mixing surveillance methods
You can use both SNMP and the Checkmk agent at the same time without issue. To do this, select Enable Checkmk agent,
select Checkmk Agent as the data soucre and Enable Enable SNMP as well as the SNMP version and your desired
community.
Define custom rules
Checkmk is a rule-based monitoring tool. Therefore, if needed, some standards can be adjusted through user-defined rules.
To ensure that custom rules are always loaded last and not overwritten by openITCOCKPIT, user-defined rules must be placed in the file
/opt/openitc/check_mk/etc/check_mk/conf.d/wato/zz_rules.mk. If the file does not exist, you can simply create it.
Interface description
When monitoring network interfaces, it is often useful to use the description or alias instead of the index for monitoring.
Copy the following rule into the file zz_rules.mk. Valid values for the item_appearance field are: alias, descr, or index.
inventory_if_rules = [
{'id': 'cf1d4626-052a-4b7d-9f17-8e42bab49222', 'value': {'discovery_single': (True, {'item_appearance': 'alias', 'pad_portnumbers': True}), 'matching_conditions': (True, {})}, 'condition': {}, 'options': {'disabled': False, 'comment': 'Use alias for Interfaces'}},
] + inventory_if_rules
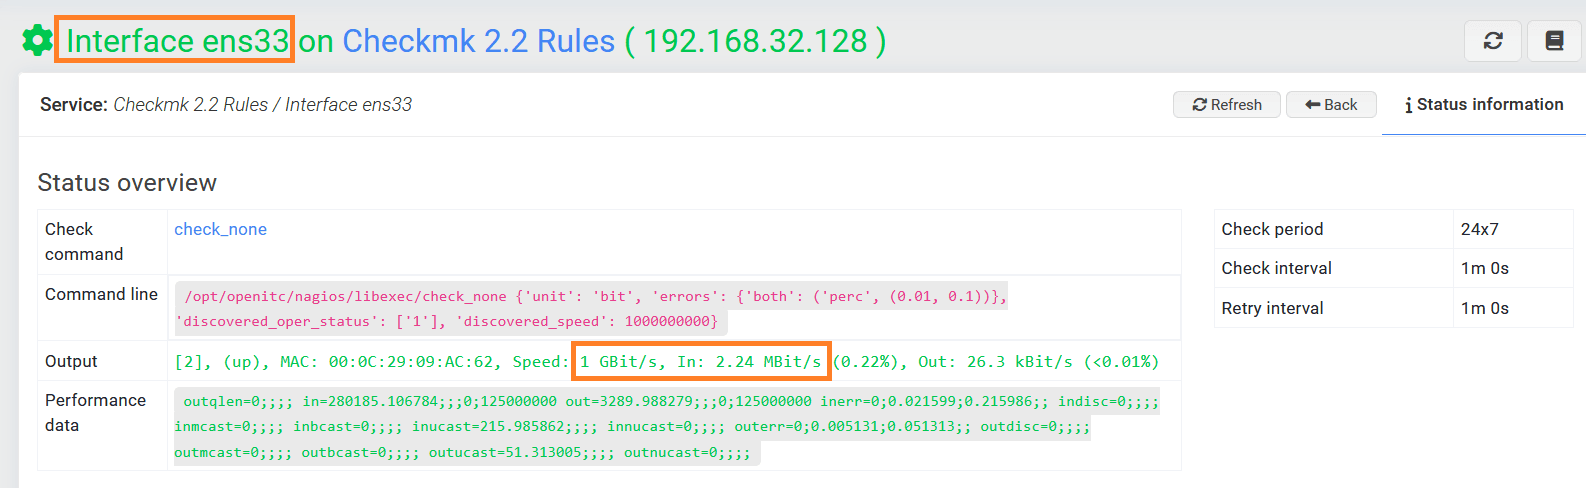
Interface Traffic in Bit/s
The unit of current traffic on a network interface can be changed from Byte/s (5 Mb/s) to Bit/s (40 Mbit/s) if needed.
Kopieren Sie dafür die folgende Regel in die Datei zz_rules.mk.
Copy the following rule into the file zz_rules.mk.
checkgroup_parameters['if'] = [
{'id': 'a25bc8b5-b827-4215-8df5-1b9abad01f5b', 'value': {'unit': 'bit'}, 'condition': {}, 'options': {'disabled': False, 'comment': 'SNMP Interface speed in bits'}},
] + checkgroup_parameters['if']
Creating the Checkmk agent
To create a Checkmk agent, go to Monitoring -> Checkmk -> Checkmk Agents in the main menu.
Then click on the "New" button in the overview section.
Now select a container, give it a name and then enter the appropriate command line command. The command you use will refer to a Checkmk script on the openITCOCKPIT server.
| Field | Required | Description |
|---|---|---|
| Container | The container in which the Checkmk Agent is to be installed | |
| Name | Name of the Checkmk agent | |
| Description | Description of the Checkmk agent | |
| Command line | Command line command for the Checkmk agent script |
Downloading Checkmk agents
You can easily download Checkmk agents via openITCOCKPIT by going to Monitoring -> Checkmk -> Checkmk Agents and then
to the Agent downloads tab.