Setting up email notifications
A standard notification method that you should definitely set up on your system is notify-by-email. This should be easy to achieve as most companies already have their own mail servers. To keep things simple, this tutorial will show you how to use an existing mail server as a relay host.
Installing the Postfix mail server
We recommend installing Postfix as a layer between your existing mail server and the monitoring system.
apt-get install postfix
Now set the IP address of your existing mail server in the file /etc/postfix/main.cf.
relayhost = 192.168.1.1
To enable the configuration, restart Postfix
systemctl restart postfix
Setting up the email configuration for openITCOCKPIT
The mail configuration for openITCOCKPIT is set in the file /opt/openitc/frontend/config/email.php gesetzt.
The configuration for your local Postfix installation is very simple. You just need to set 127.0.0.1 as the host, the port as 25 and username and password as null.
You can also use the following configuration:
<?php
return [
    /**
     * Do not change this
     *
     */
    'Email' => [
        'default' => [
            'transport' => 'default',
            'from'      => 'you@localhost',
            //'charset' => 'utf-8',
            //'headerCharset' => 'utf-8',
        ],
    ],

    /**
     * Email configuration.
     *
     * Make your email settings down below
     *
     */

    'EmailTransport' => [
        'default' => [
            'className' => \Cake\Mailer\Transport\MailTransport::class,
            /*
             * The following keys are used in SMTP transports:
             */
            'host'      => "127.0.0.1",
            'port'      => 25,
            'timeout'   => 30,
            'username'  => null,
            'password'  => null,
            'client'    => null,
            'tls'       => null,
            'url'       => env('EMAIL_TRANSPORT_DEFAULT_URL', null),
        ],
    ]
];
Changing the sender address
If you would like to change the address used for sending your emails, navigate to System configuration -> System -> System Settings. You can amend that information here.

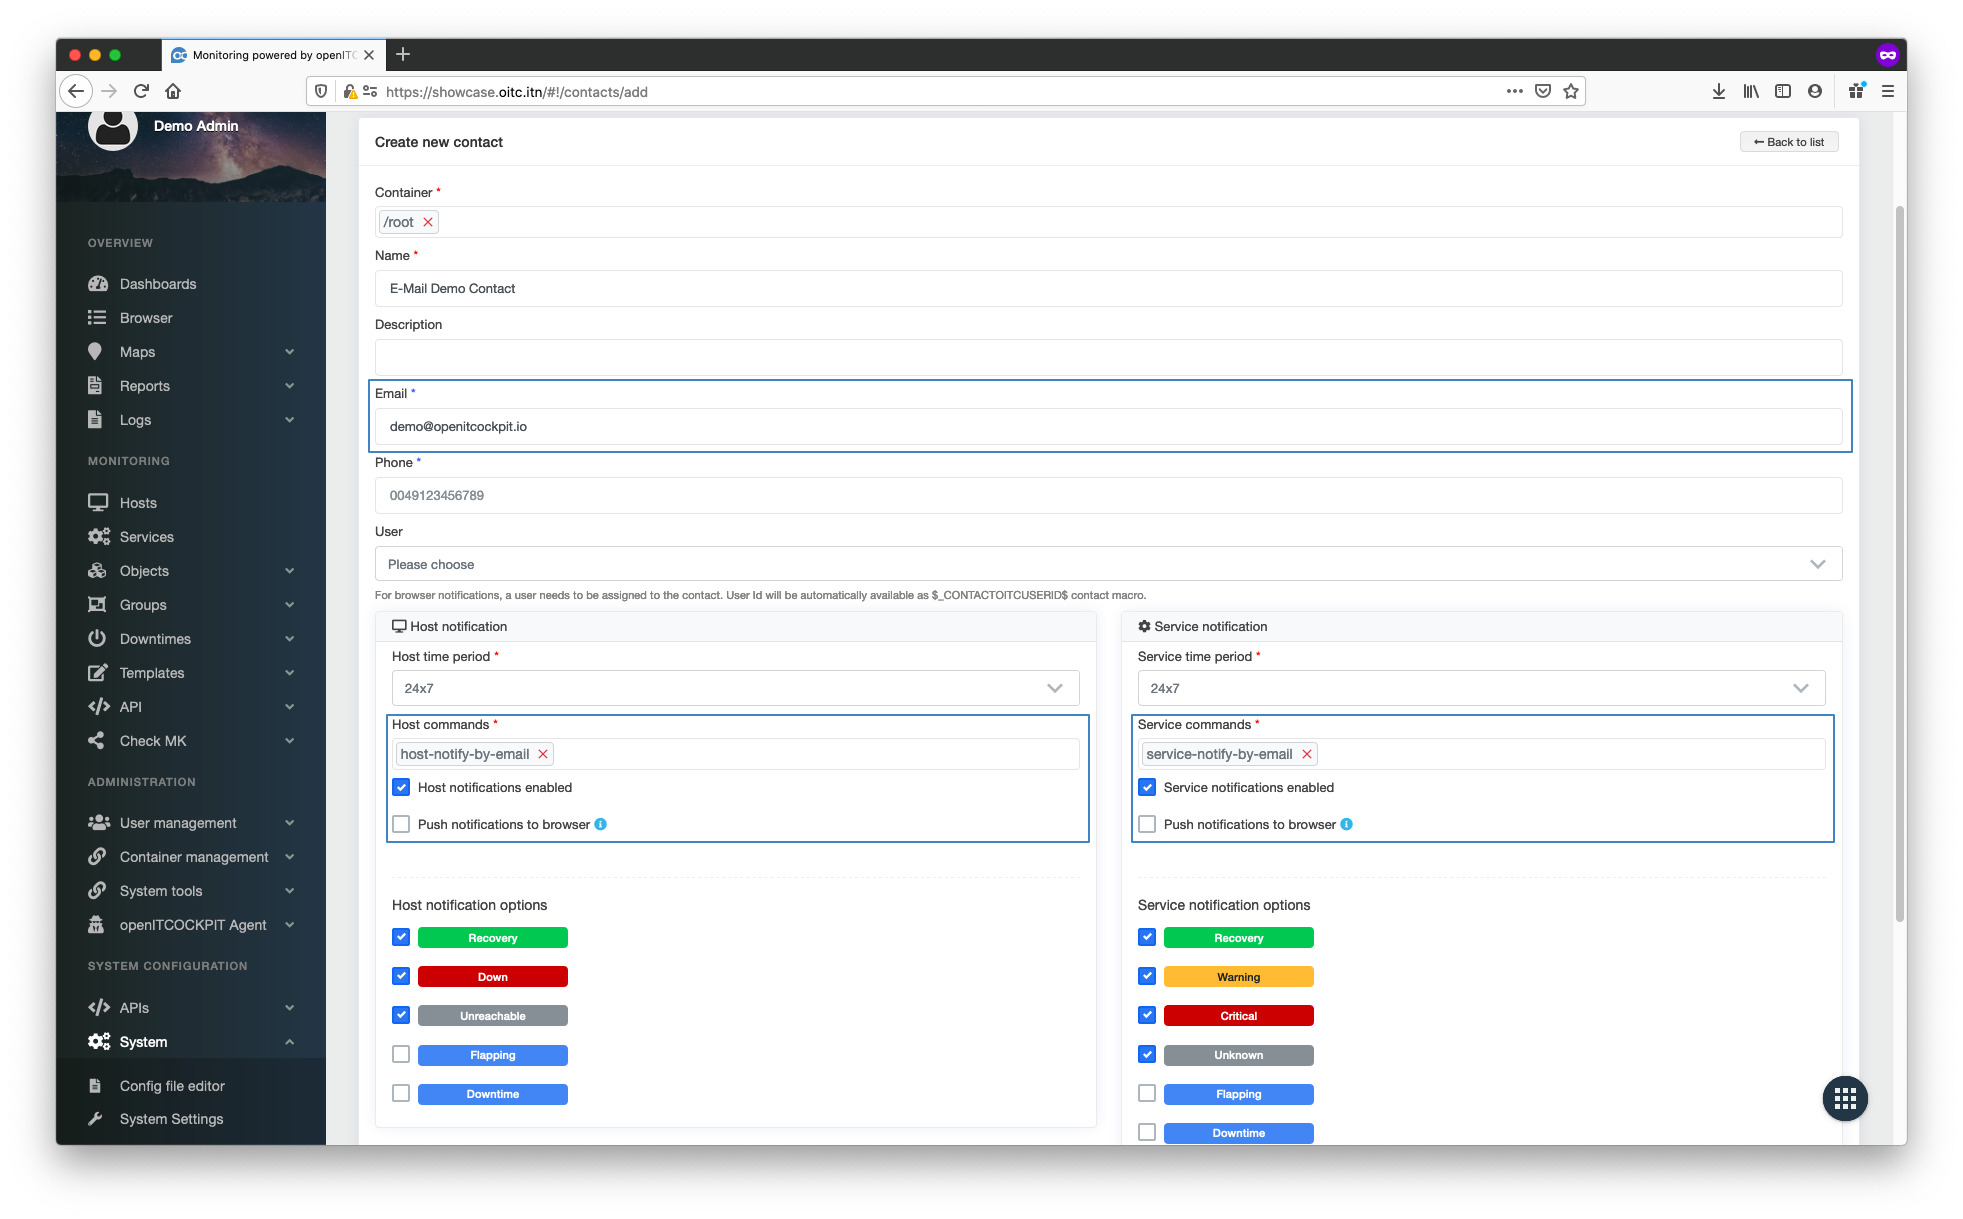
Creating a new contact
To check the setup of our new mail system, we will now create a new contact with your email address.
Now we assign the contact to a host or service.
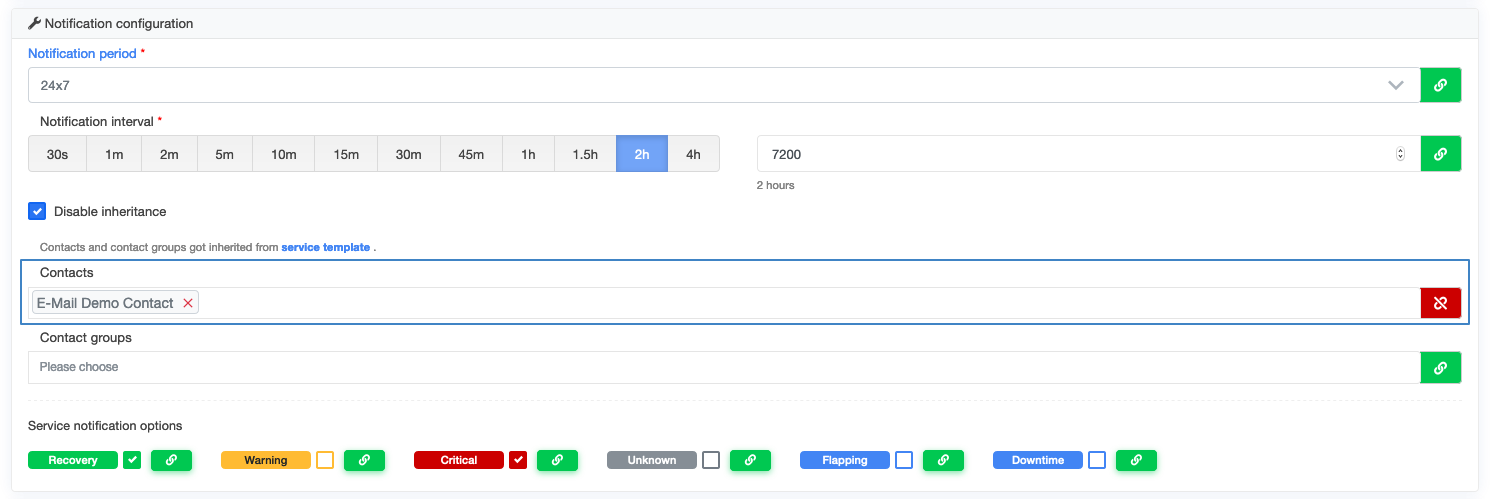
To enable the new configuration, you must update the monitoring configuration.
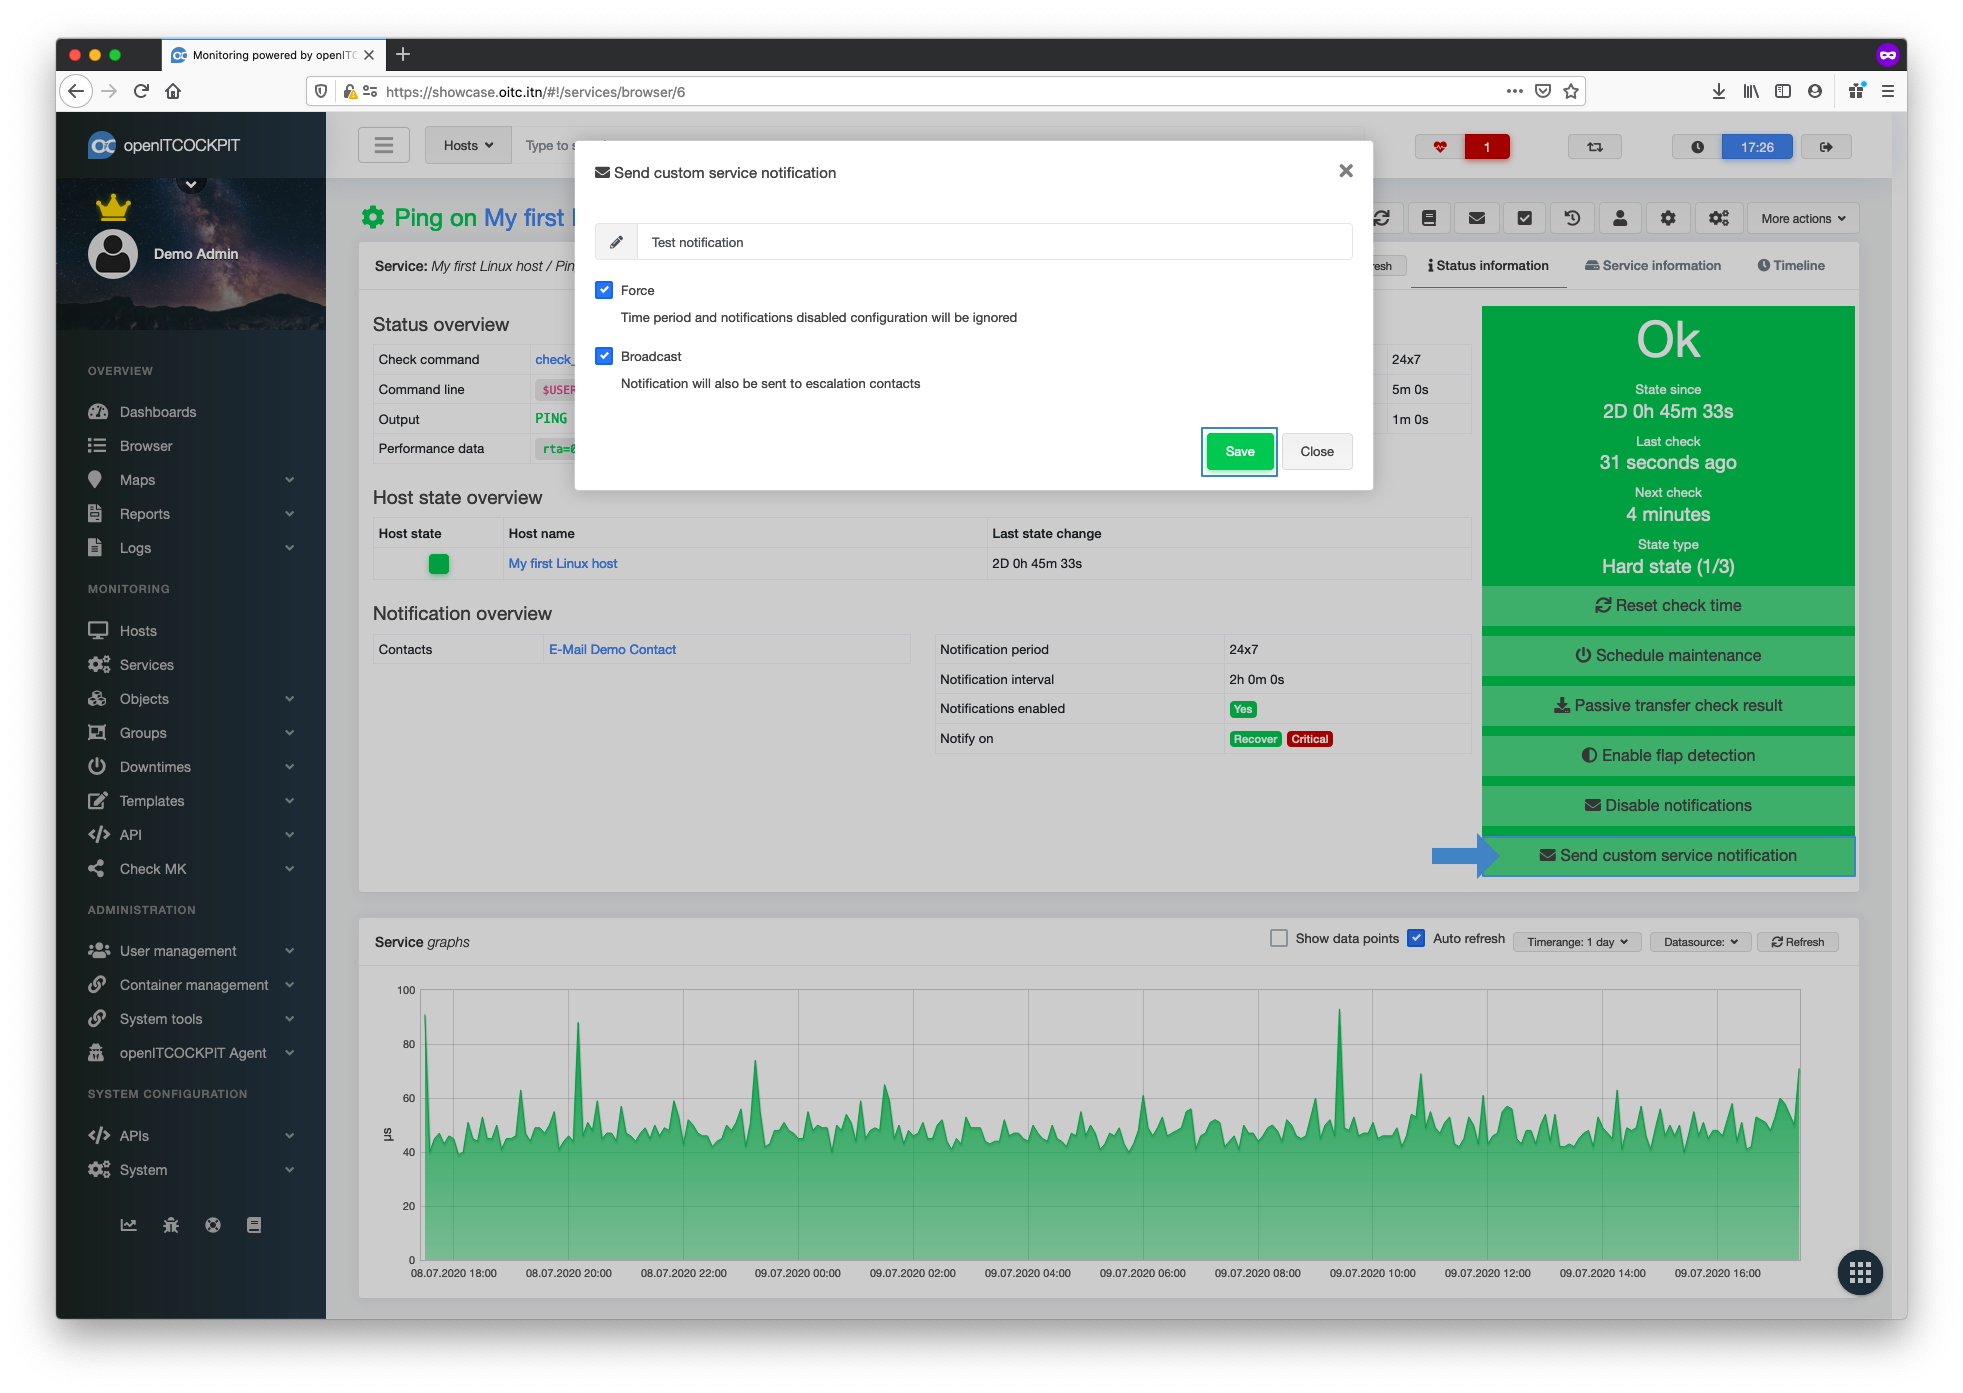
Test email notifications
Select the host or service you assigned the contact to. In this example we have assigned the contact to the ping service. Now click the Send custom service notification button. Leave the default settings as they are and click the Save button.
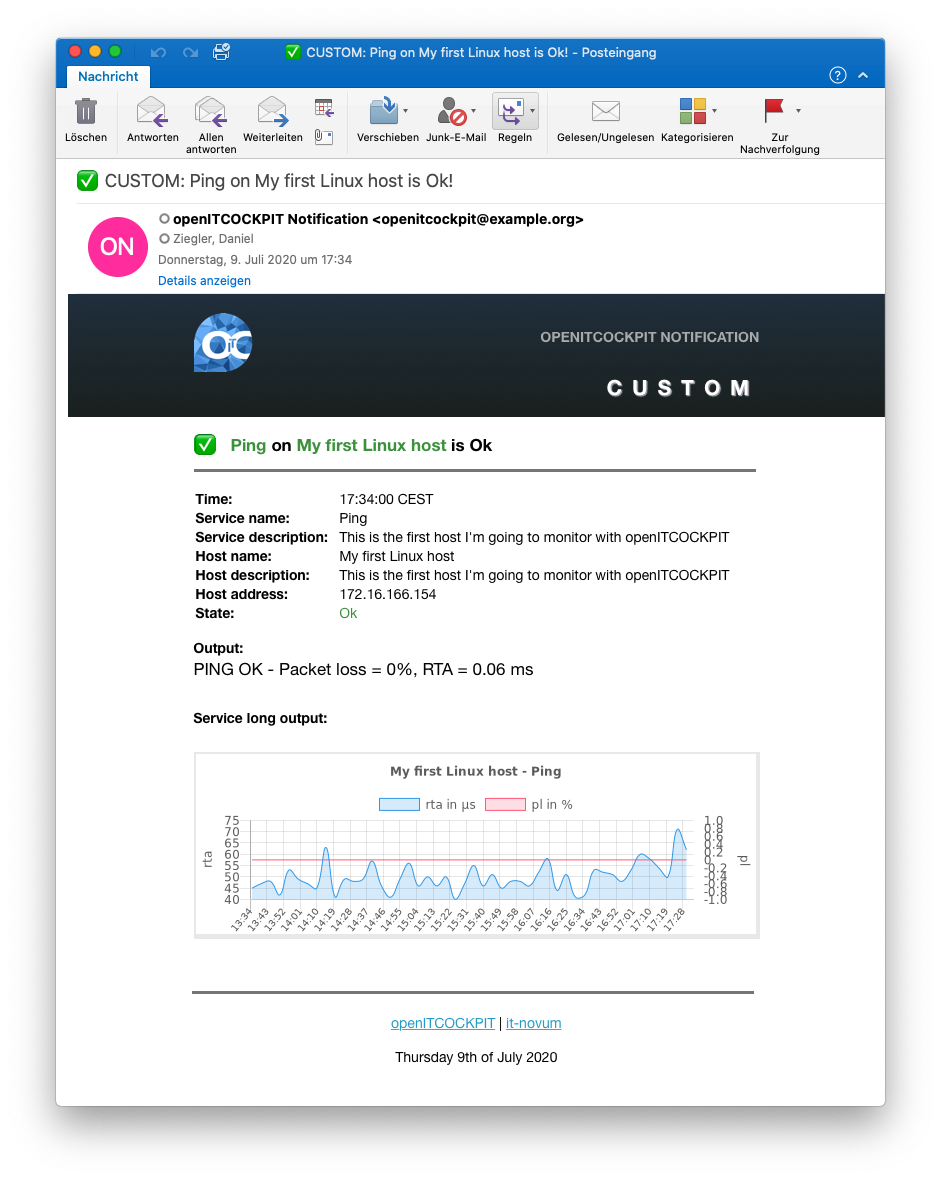
Now check your mailbox for new emails.
E-Mail nicht angekommen?
Run the command oitc debug --tailf to get more information from the logs.
[31.01.2018 - 12:22:51] SERVICE NOTIFICATION: Demo Contact[376a2dcf-ba7c-40be-b5ef-1b46c59a85cf];My first Linux host[c963e9f2-a1cb-43f6-8ad6-0babe02294c9];Ping[80ff370a-deff-4b8b-a37c-677a22d2e7a6];CUSTOM (OK);service-notify-by-cake[a517bbb6-f299-4b57-9865-a4e0b70597e4];PING OK - Packet loss = 0%, RTA = 0.28 ms;John Doe;test notification