Update from Agent 1.x to 3.x
This documentation describes the best practice method of how to update from openITCOCKPIT Monitoring Agent Version 1.x (Python Agent, EOL) to Version 3.x (Go Agent).
Due to massive technical changes and improvements the update from version 1.x to 3.x isn't that seamless as you are used to it form the openITCOCKPIT ecosystem. Most of the services from Agents that are running in Pull Mode should be fine. Some services like QEMU monitoring have been replaced. Others like support for Fans have been removed.
Agents that are running in Push Mode needs to be reassigned to the corresponding host manually.
We apologize for any inconvenience.
Requirements
- openITCOCKPIT >= 4.2
Required configuration changes
Comment out all blank values like certfile =, autossl-csr-file =, auth = and so on in config.cnf and customchecks.cnf
Also rename customchecks.cfg to customchecks.ini or comment out the line so the Agent will use the platform specific default path.
customchecks = /etc/openitcockpit-agent/customchecks.ini
Pull Mode
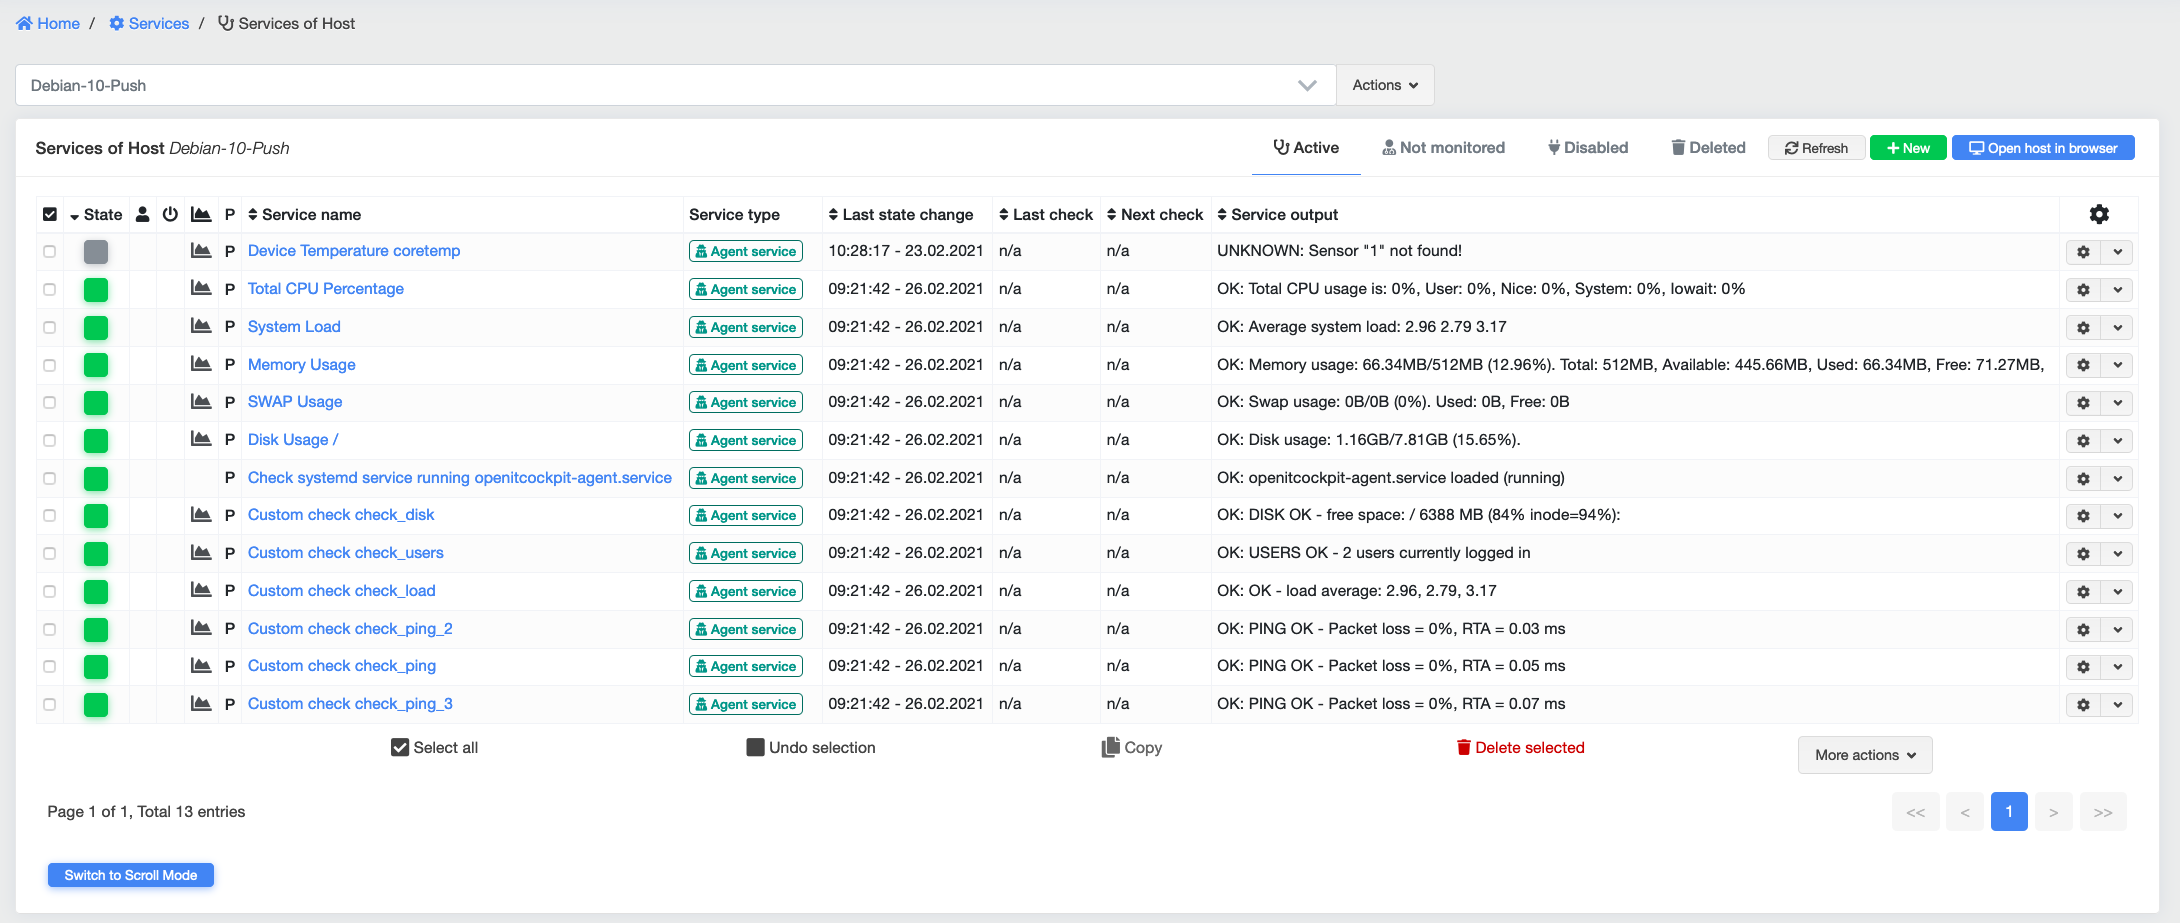
openITCOCKPIT will automatically update your existing configuration for the openITCOCKPIT Monitoring Agent 3.x. Due to the fact that some checks have changed or got removed you should check for any services in Unknown state.
- Make sure your openITCOCKPIT Monitoring Server is running openITCOCKPIT Version 4.2 or newer
- Update the openITCOCKPIT Monitoring Agent by following the Update instructions
- Refresh the monitoring configuration
Resolve services in unknown state
First of all take a look at the breaking changes. Some services just needs to be modified a bit. Others may have to be recreated: 1. Open the drop down menu of the host and click on "openITCOCKPIT Agent discovery" to start the wizard 2. Follow the steps and re add all your services.
Push Mode
A new authentication method got implemented to identify and authorize Agents running in Push mode. This change requires to reassign Agents to their corresponding hosts.
- Make sure your openITCOCKPIT Monitoring Server is running openITCOCKPIT Version 4.2 or newer
- Update the openITCOCKPIT Monitoring Agent by following the Update instructions
- Start the openITCOCKPIT Monitoring Agent on the target host.
The log file of the agent should now frequently repeat the following line:
time="2021-02-26T08:29:03Z" level=error msg="Push Client: could not send state to server: Invalid credentials or host not found"
This means that the Agent needs to be assigned to a host. (With Agent 1.x this process was called trusted)
- Assigned Agent to host
Open the openITCOCKPIT web interface and navigate to
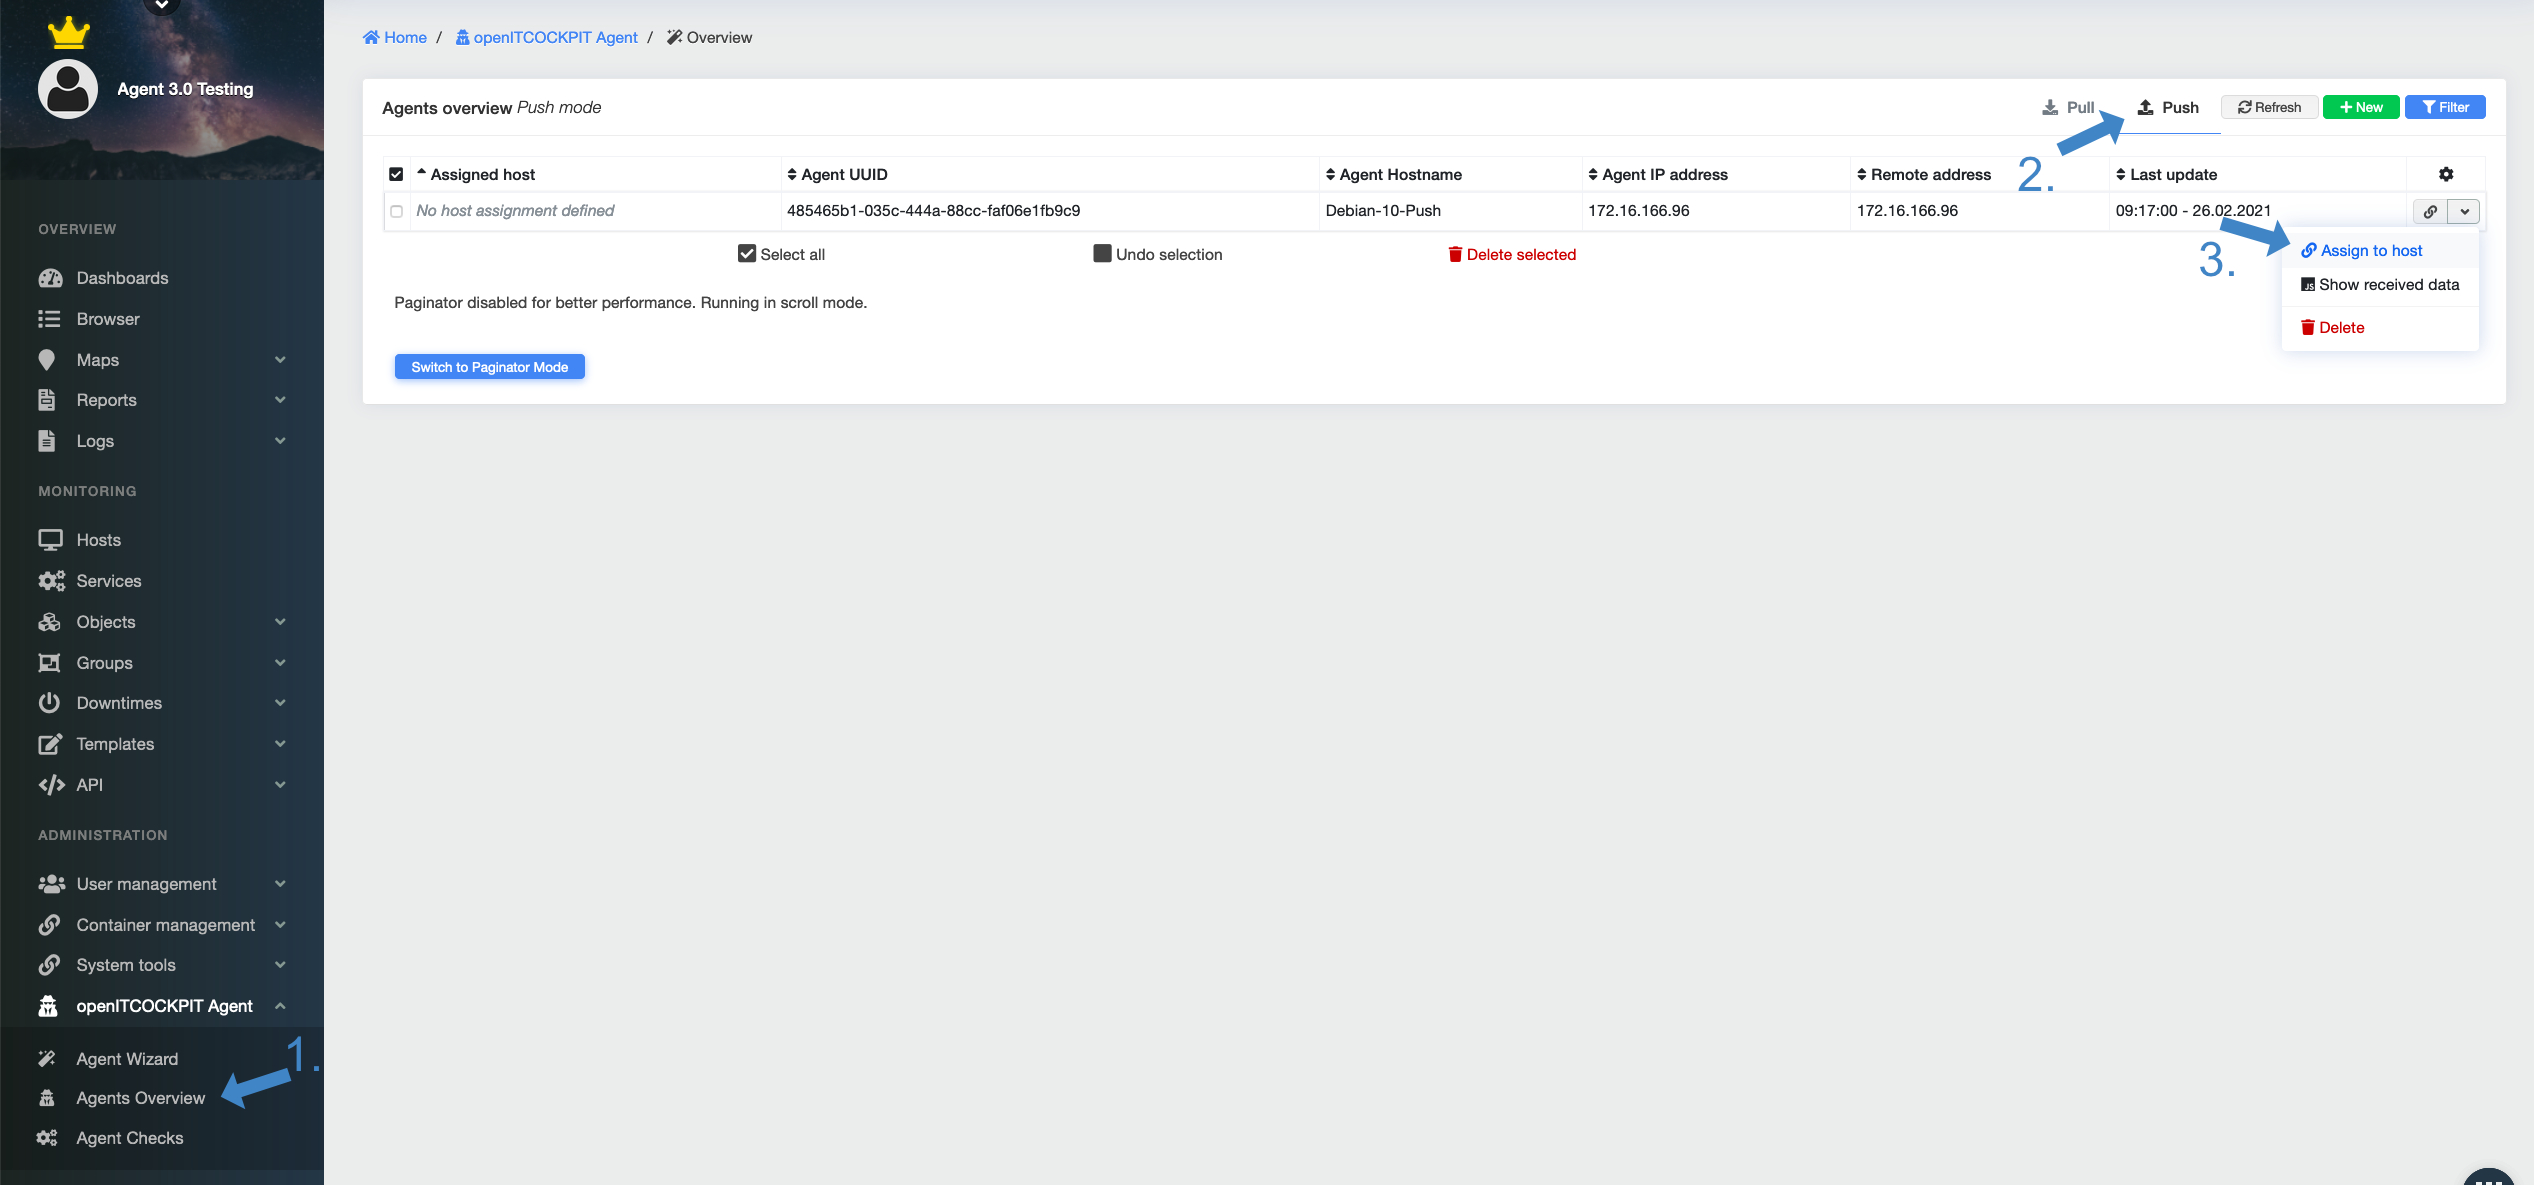
openITCOCKPIT Agent -> Agents Overview -> Push. You should get a list of all Agents running in Push mode, that contacted your openITCOCKPIT server.
Select the Agent and pick Assign to host from the drop down menu.

It is also recommended to refresh the Agent configuration while you are stepping through the wizard.
-
Check that you have selected the correct Agent. You can change it if required.

-
Refresh the monitoring configuration to apply the changes.
- Most of the services should now work again. Take a look at the breaking changes. Some services just needs to be modified a bit. Others may have to be recreated
Update instructions
The update process is different per operating system and frome linux distribution to linux distribution. Please follow the instructions carefully.
Debian and Ubuntu
Download the latest openitcockpit-agent_3.x.x_amd64.deb package from the releases page and install the package via apt.
apt-get install ./openitcockpit-agent_3.x.x_amd64.deb
apt will ask you if you want to keep your current configuration files /etc/openitcockpit-agent/config.ini and /etc/openitcockpit-agent/customchecks.ini. Confirm with N or O to keep your current configuration.
Please keep in mind to apply the required configuration changes. If done restart the Agent
systemctl restart openitcockpit-agent
Red Hat Linux / CentOS / openSUSE
Download the latest openitcockpit-agent-3.x.x-1.x86_64.rpm package from the releases page.
Uninstall old Agent
cp /etc/openitcockpit-agent/config.cnf /etc/openitcockpit-agent/config.cnf.save
cp /etc/openitcockpit-agent/customchecks.cnf /etc/openitcockpit-agent/customchecks.cnf.save

rpm -e openitcockpit-agent
Install new Agent
rpm -i openitcockpit-agent-3.x.x-x.x86_64.rpm

mv /etc/openitcockpit-agent/config.cnf.save /etc/openitcockpit-agent/config.ini
mv /etc/openitcockpit-agent/customchecks.cnf.save /etc/openitcockpit-agent/customchecks.ini

systemctl restart openitcockpit-agent
Please keep in mind to apply the required configuration changes.
Arch Linux
Download the latest openitcockpit-agent-3.x.x-1-x86_64.pkg.tar.zst package from the releases page.
Uninstall old Agent
cp /etc/openitcockpit-agent/config.cnf /etc/openitcockpit-agent/config.cnf.save
cp /etc/openitcockpit-agent/customchecks.cnf /etc/openitcockpit-agent/customchecks.cnf.save

pacman -R openitcockpit-agent
Install new Agent
pacman -U openitcockpit-agent-3.x.x-x-x86_64.pkg.tar.zst

mv /etc/openitcockpit-agent/config.cnf.save /etc/openitcockpit-agent/config.ini
mv /etc/openitcockpit-agent/customchecks.cnf.save /etc/openitcockpit-agent/customchecks.ini

systemctl restart openitcockpit-agent
Please keep in mind to apply the required configuration changes.
Windows
Download the latest openitcockpit-agent-3.x.x-amd64.msi package from the releases page.
Double click on the file to run the graphical installer. The MSI will automatically uninstall any old versions.
Copy old configuration
- Stop service
openITCOCKPITAgent - Open
C:\Program Files\it-novum\openitcockpit-agentwith Windows Explorer - Delete the default
config.iniandcustomchecks.ini - Rename the file
config.cnftoconfig.iniandcustomchecks.cnftocustomchecks.ini. - Please keep in mind to apply the required configuration changes.
- Start service
openITCOCKPITAgent
macOS
Uninstall old Agent
Download the latest openitcockpit-agent-uninstaller-3.x.x-darwin-amd64.pkg package from the releases page.
Double click on the file to run the graphical uninstaller.
If you prefer you can also use the CLI:
sudo installer -pkg openitcockpit-agent-uninstaller-3.x.x-darwin-amd64.pkg -target / -verbose
Install new Agent
Download the latest openitcockpit-agent-3.x.x-darwin-amd64.pkg package from the releases page.
Double click on the file to run the graphical installer.
If you prefer you can also use the CLI:
sudo installer -pkg openitcockpit-agent-3.x.x-darwin-amd64.pkg -target / -verbose
Please keep in mind to apply the required configuration changes and restart the Agent if done.
sudo su
/bin/launchctl stop com.it-novum.openitcockpit.agent

/bin/launchctl start com.it-novum.openitcockpit.agent
Breaking changes
- The default file extension for the configuration files got changed from
.cnfto.inito enable highlighting in most editors and to support double click to edit on Windows.
Breaking checks
The following list of checks have breaking changes and needs to be manually modified or re-created with the new Wizard.
Linux / macOS
- Sensor related checks got reimplemented.
- It's recommended to delete the old Sensor related services and recreated them via the Wizard
- Support for Fans got removed
- QEMU got replaced with libvirt. All QEMU related services needs to be deleted. Please see how to enable libvirt support and recreated the services via the Wizard
- The Docker checks are using the Docker API now and therefore need to be recreated via the Wizard. Also Docker is now available for Windows.
Windows
- System Load / CPU Load on Windows got removed
- Disk drive letters without trailing backslash #1062
- The resolve the issue edit the service and remove the trailing backslash from the
Mountpointcommand argument. E.g.:C:\toC: - Windows Event Log Checks
- Windows Event Log got reimplemented. It's recommended to delete the old Windows Event Log related services and recreated them via the Wizard
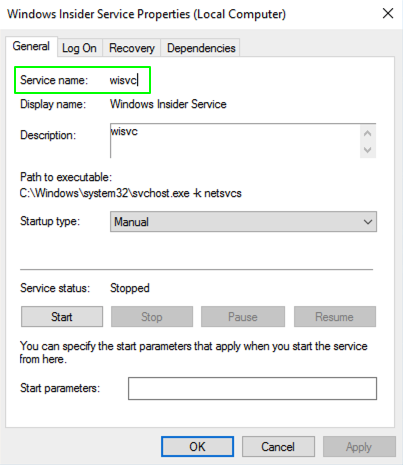
- Windows Services - The unique
Service nameis now used to determine if a service is running or not. Agent 1.x used thePath to executable. - The resolve the issue edit the service and set the Service name for the
Matchcommand argument.


